

SketchUp
Lumion
Photoshop
In Part ONE I will cover the process up to the very start with Lumion. Part TWO will dive into what is going on inside Lumion in more depth.
Enjoy!

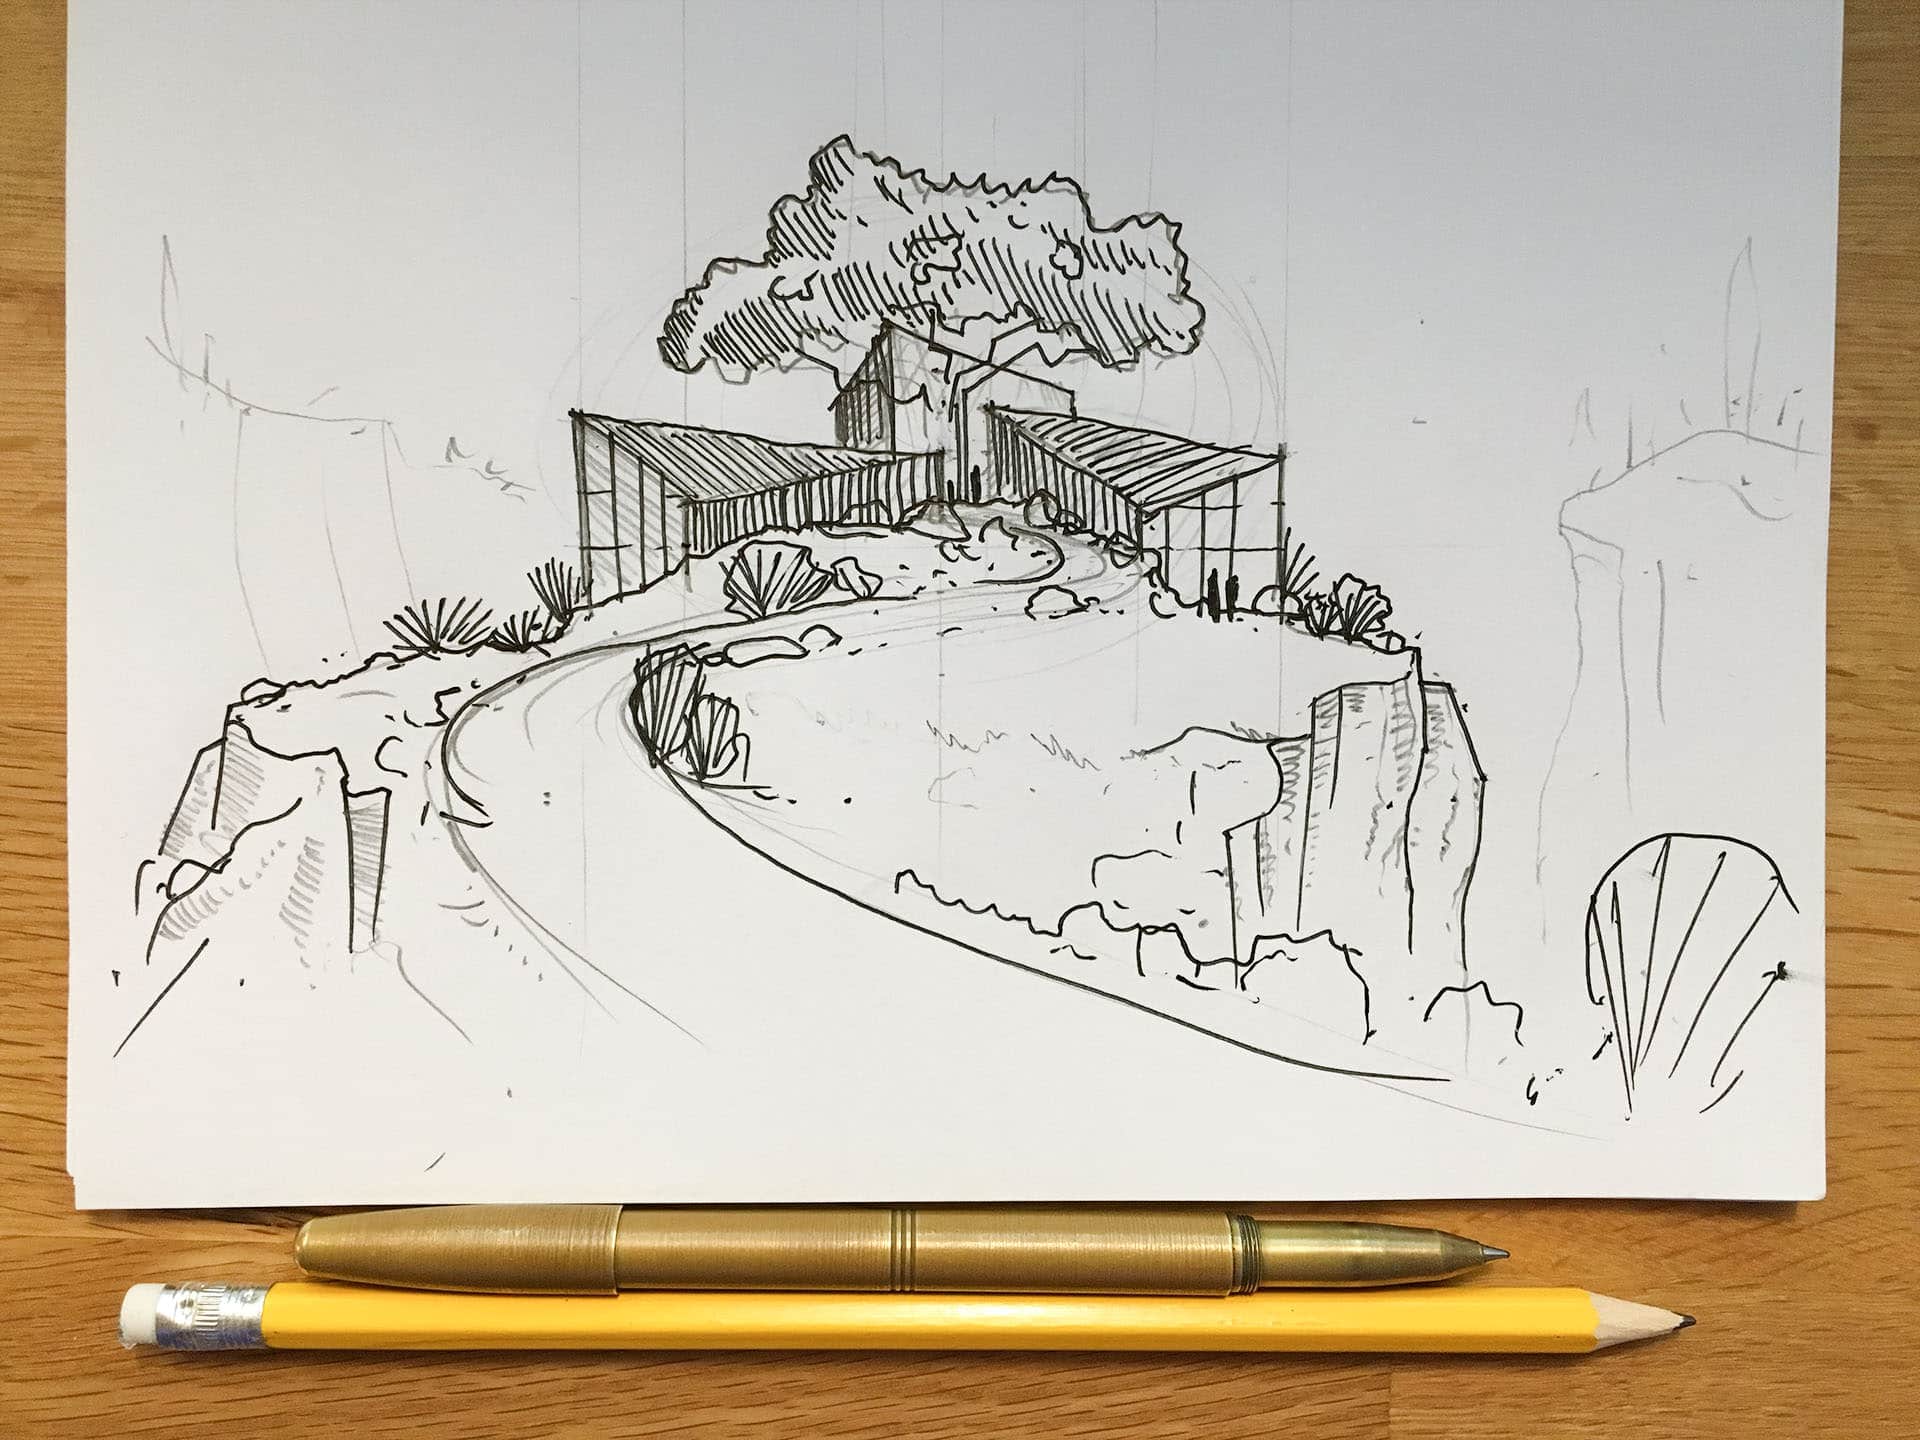
“We seem to underestimate good old pen & paper these days. Don’t! Coming up with the basic idea this way was fast and fun in more ways than one.”
It just is.
Or maybe it’s just me?
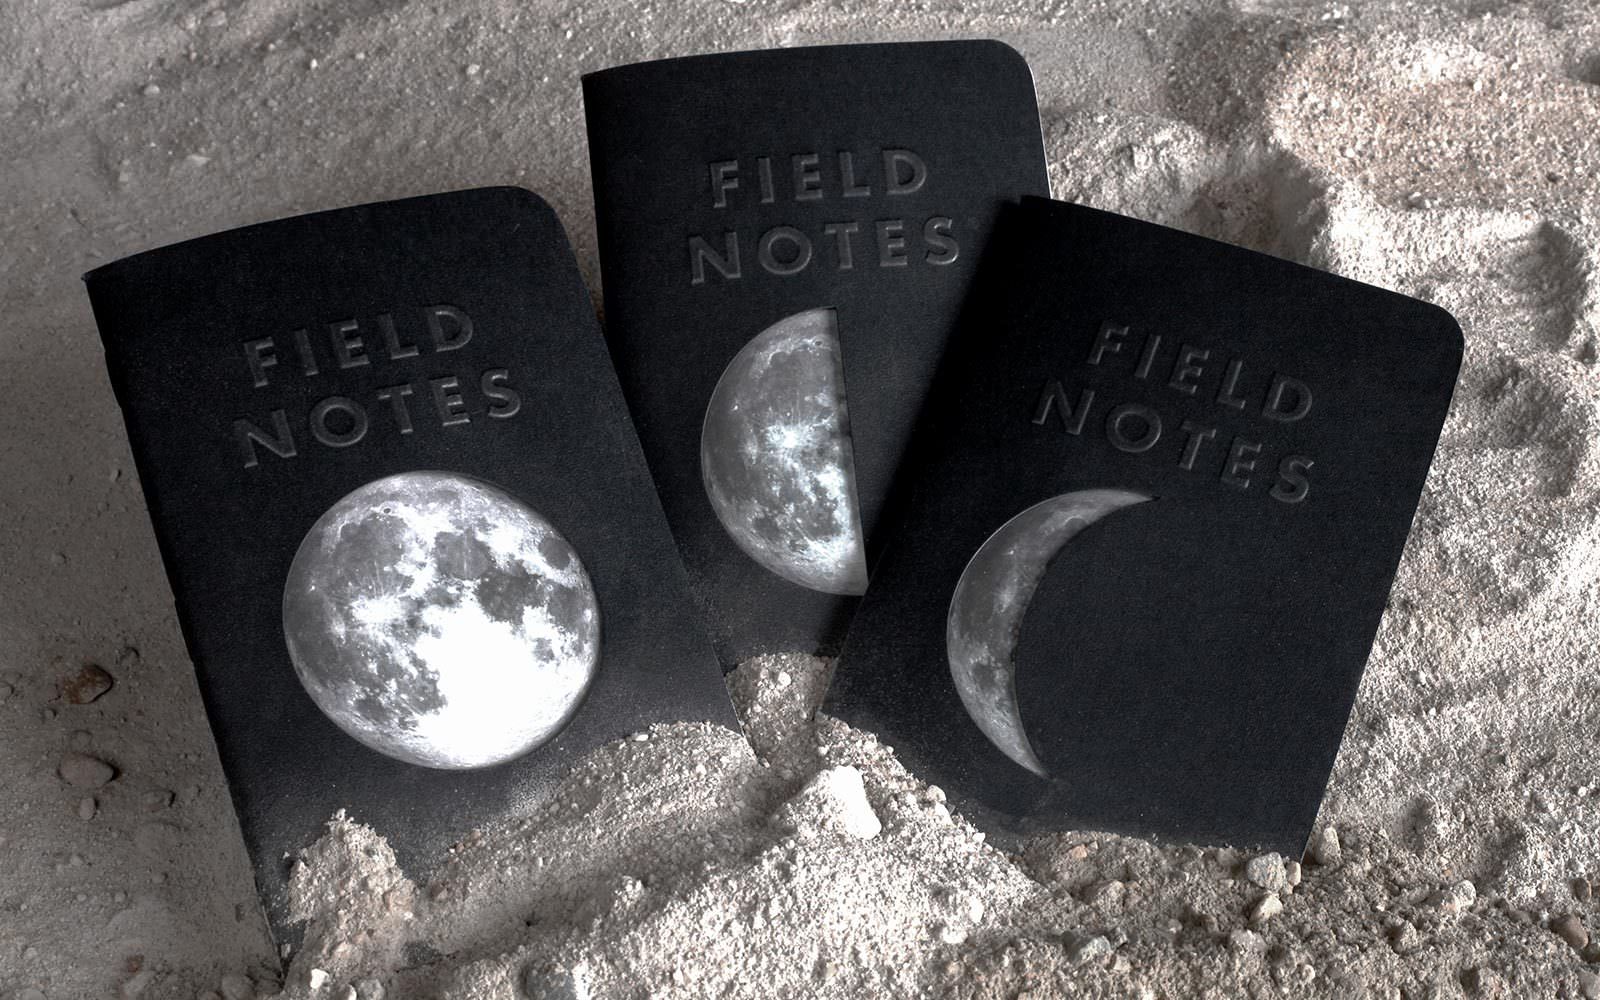
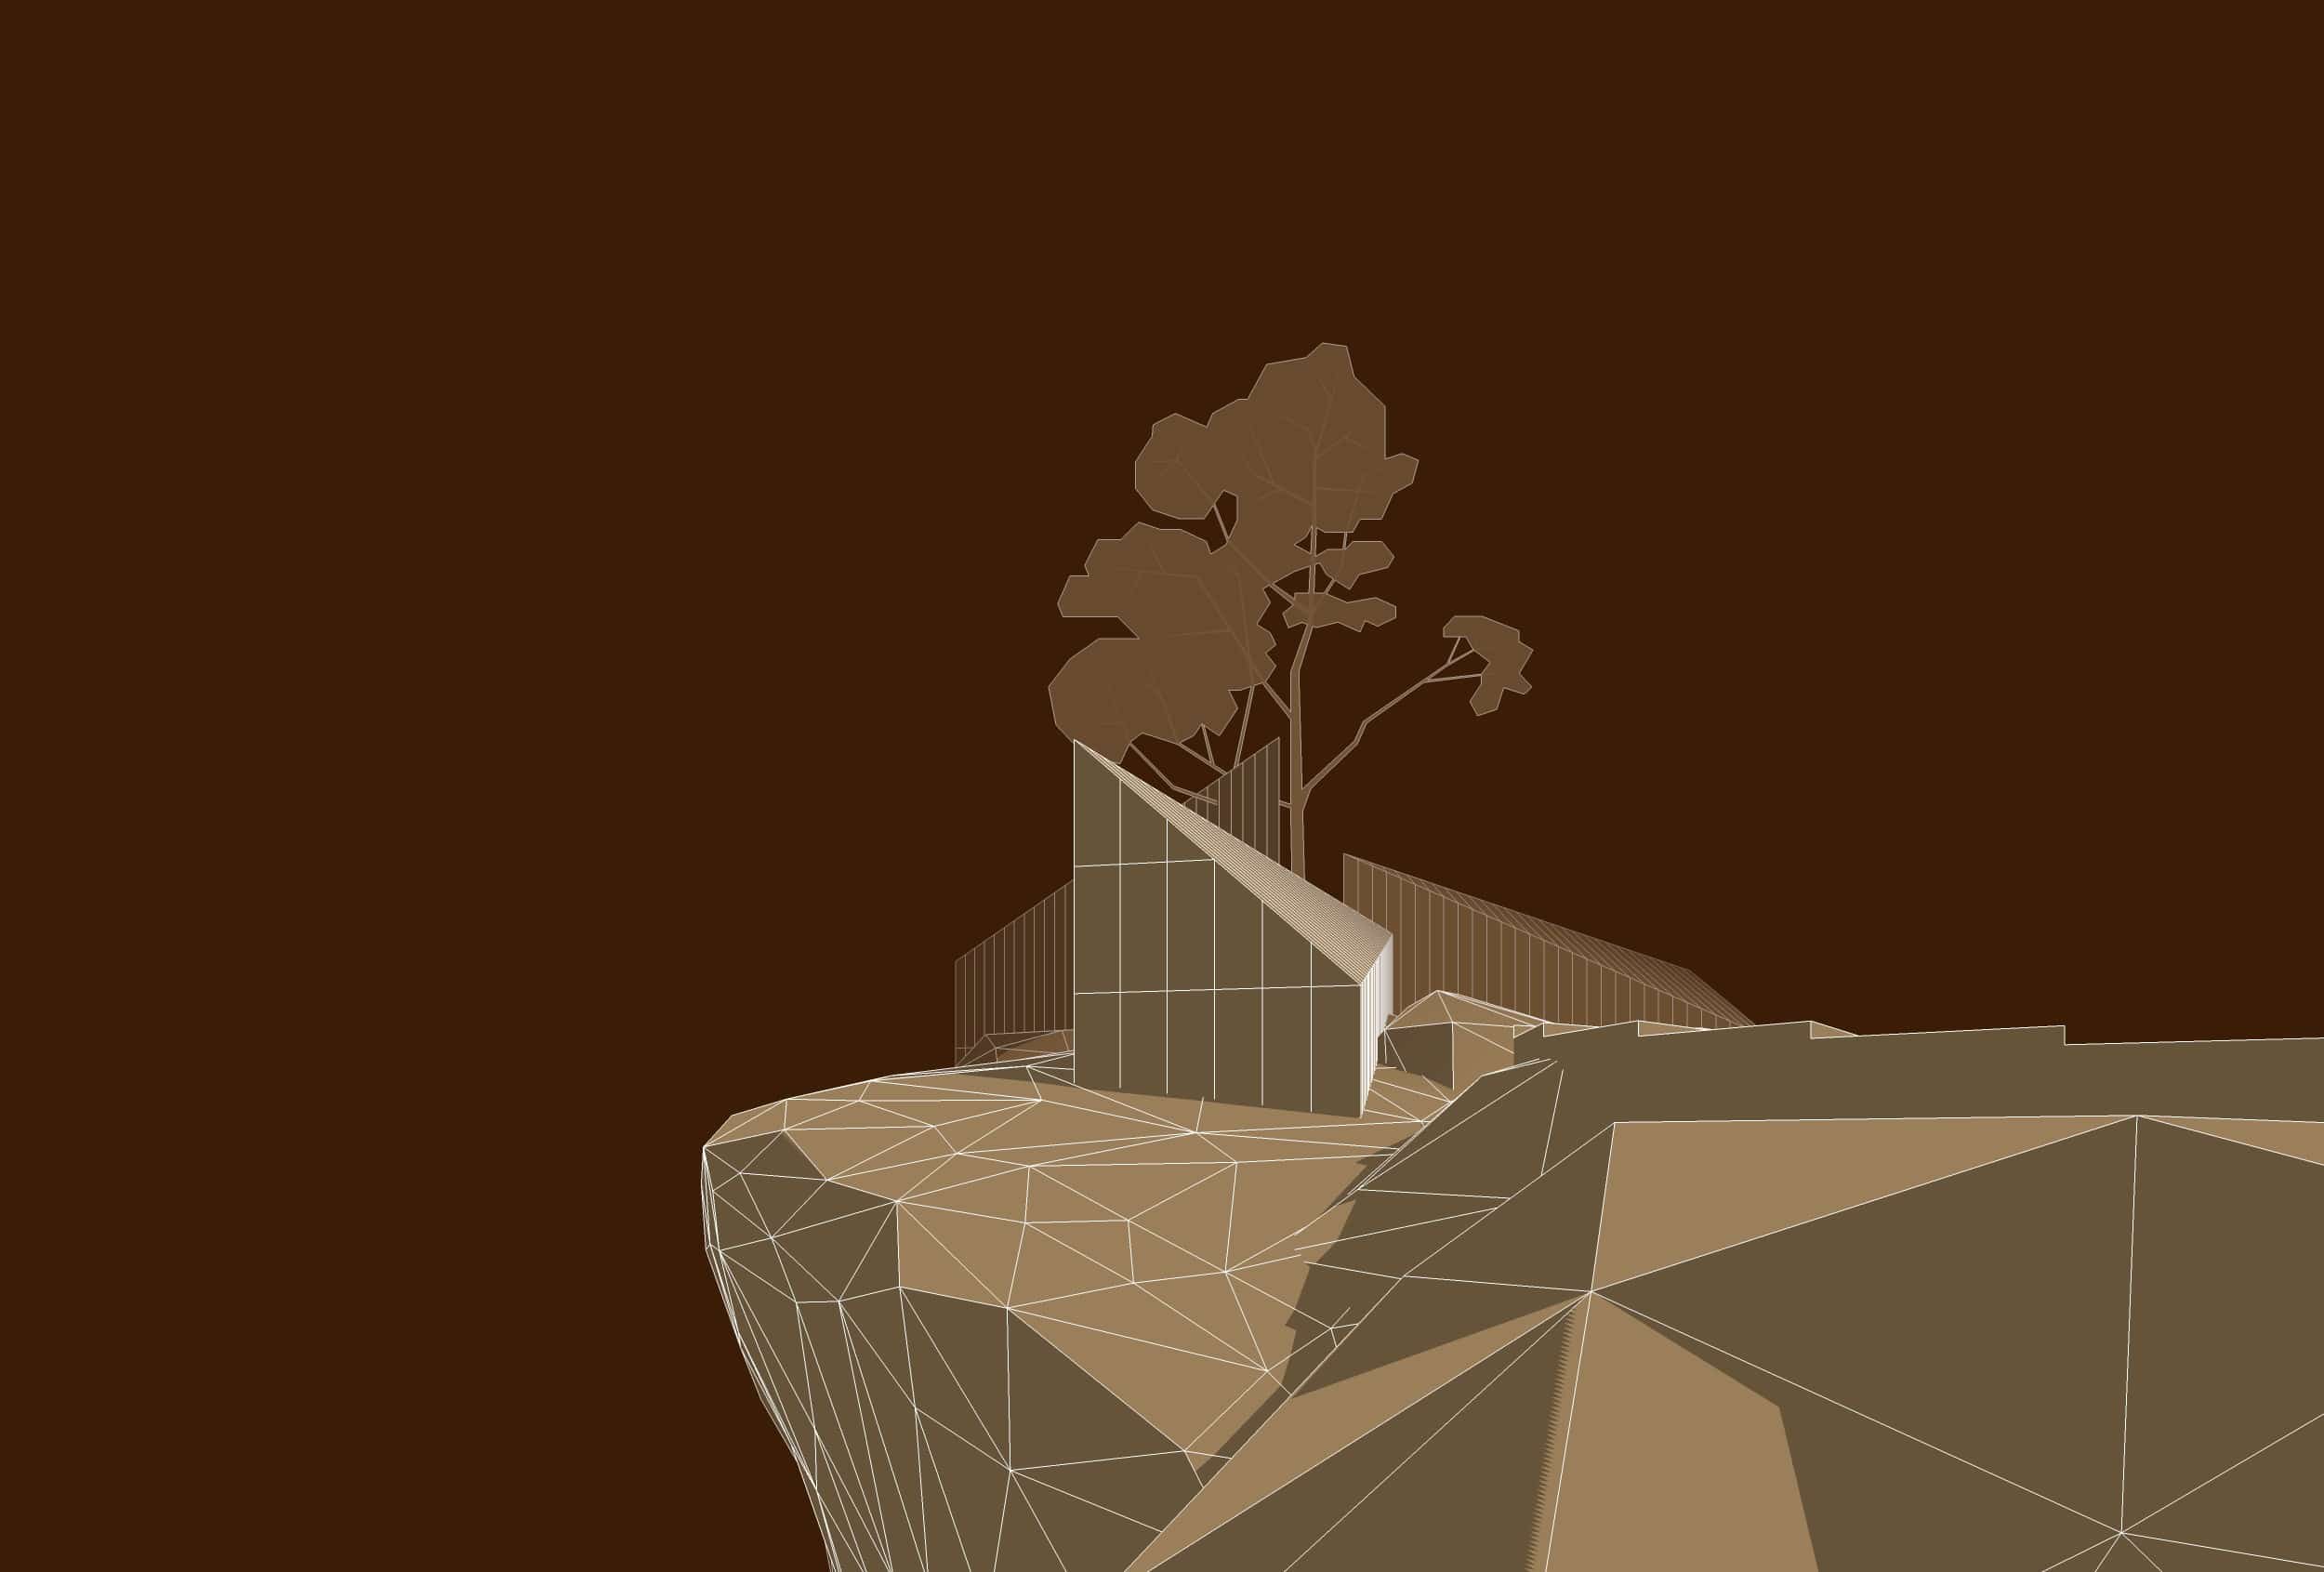
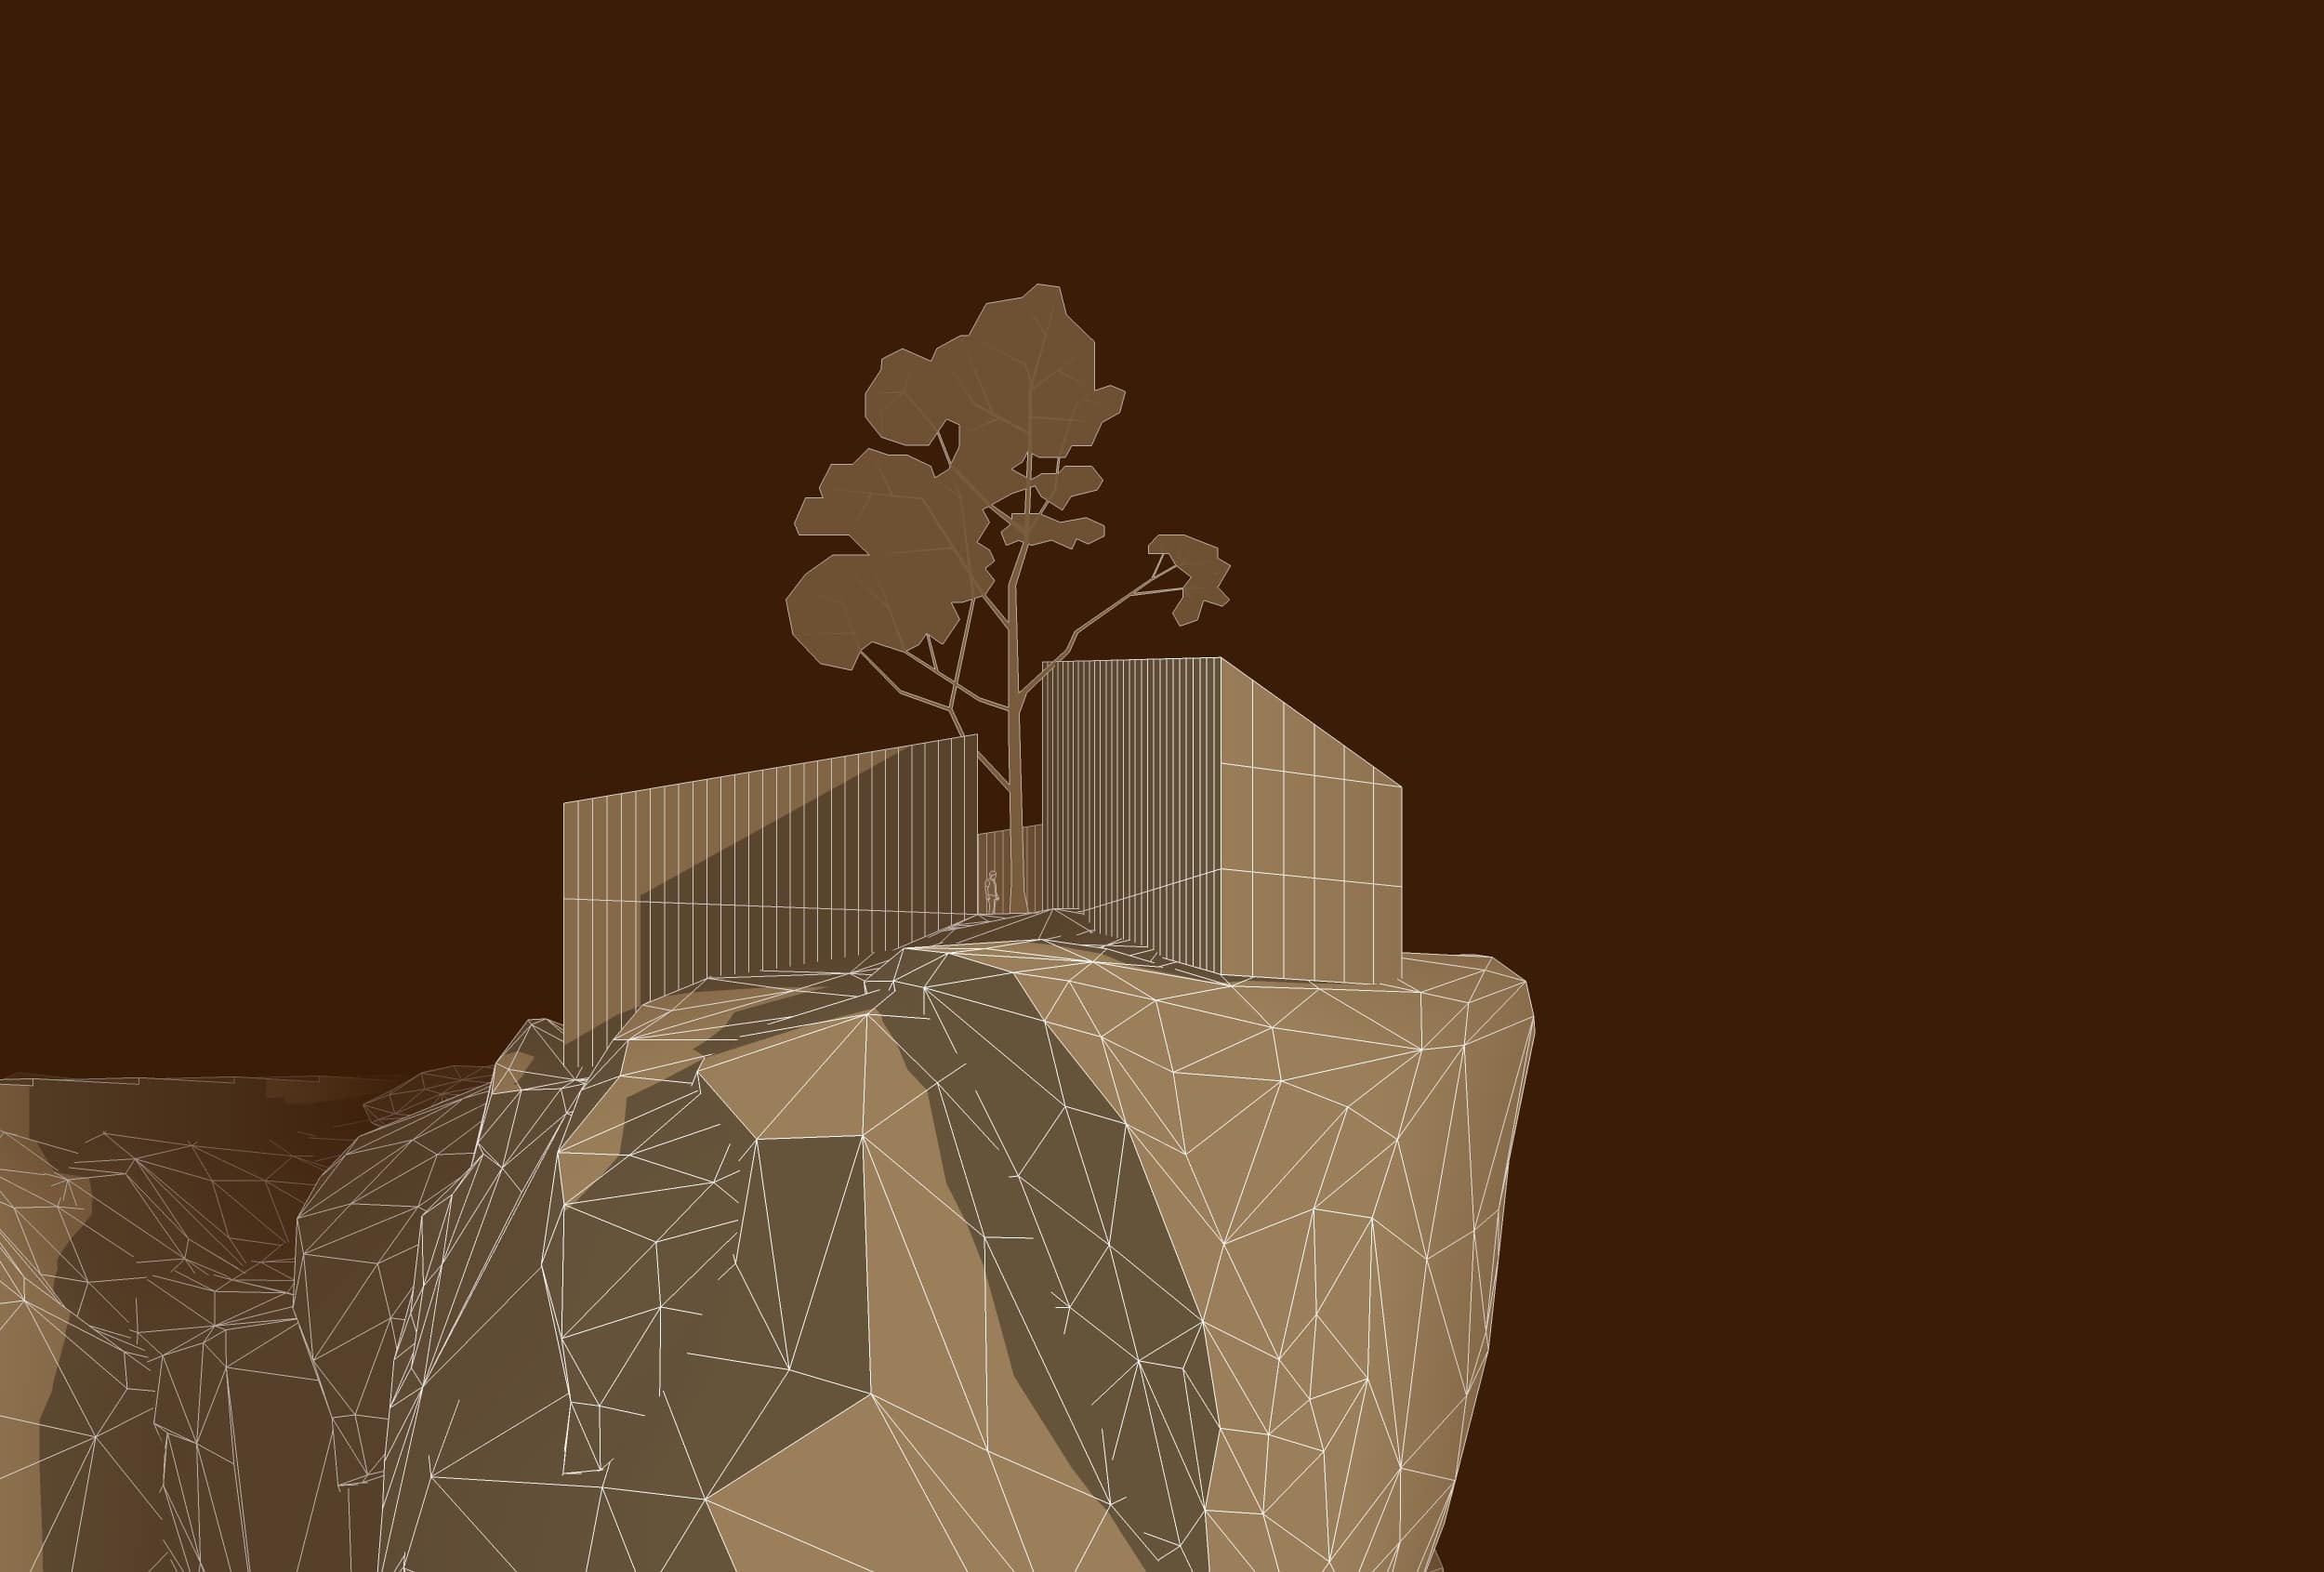
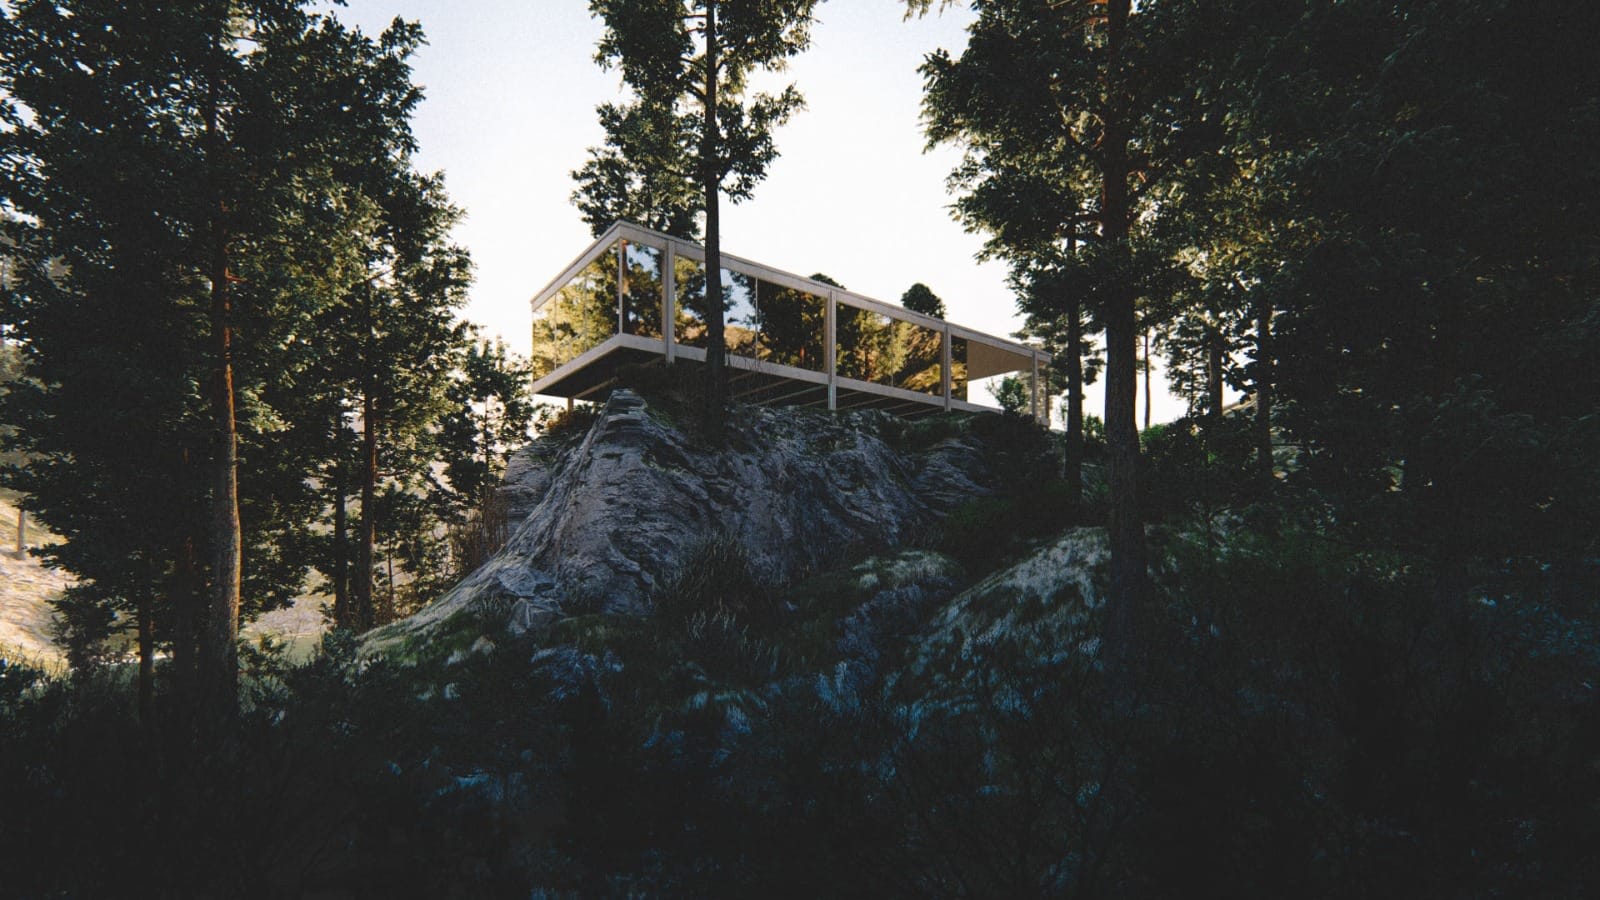
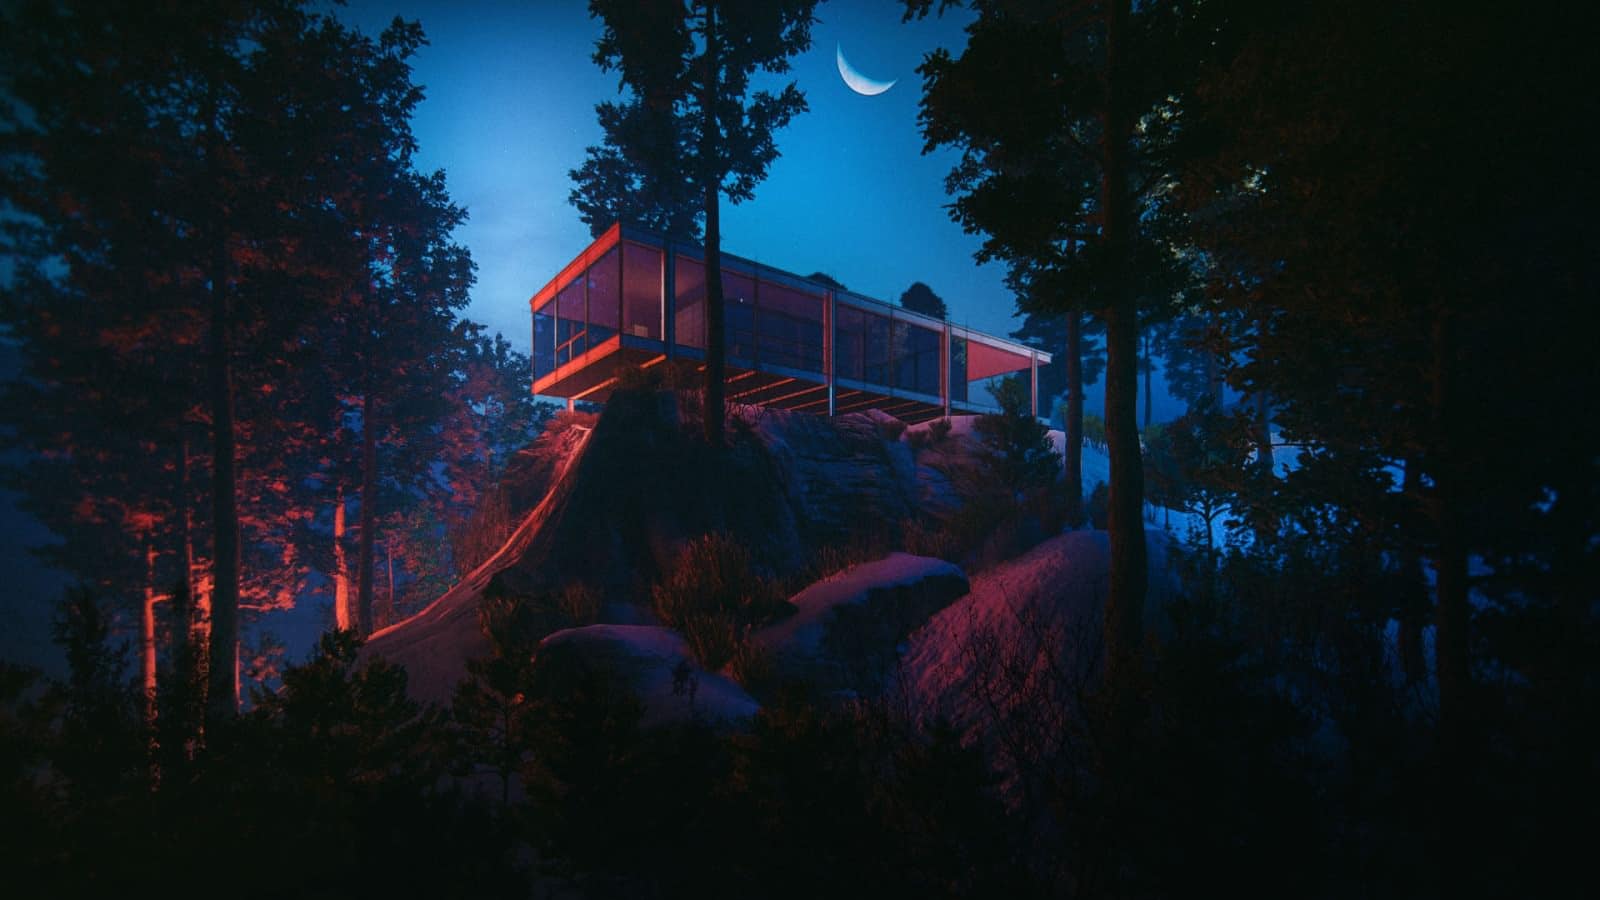
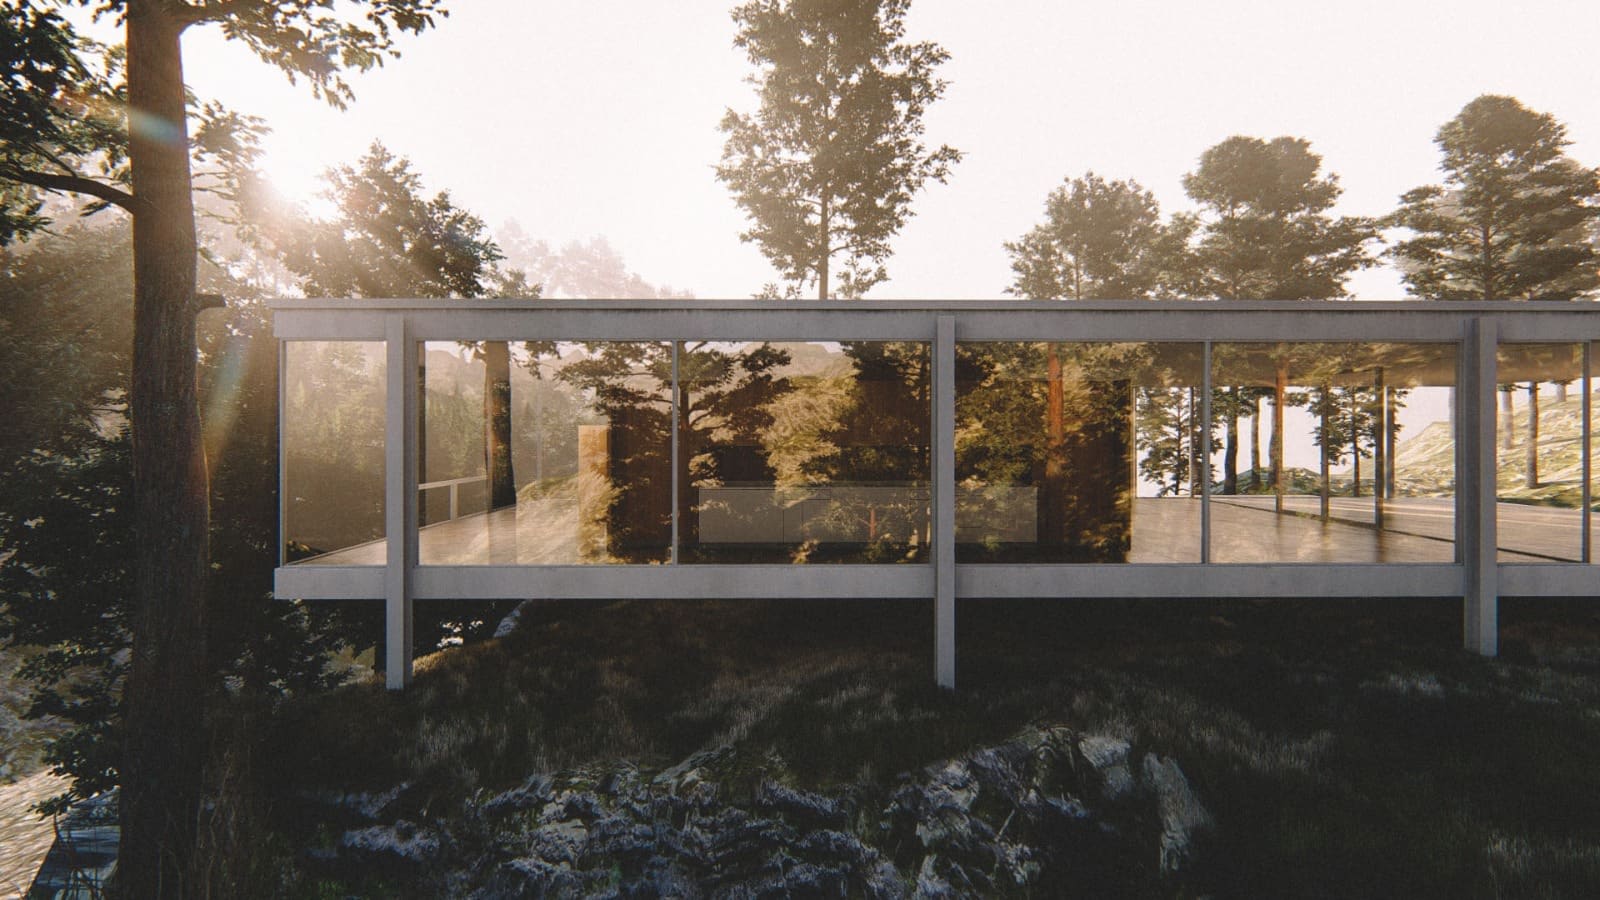
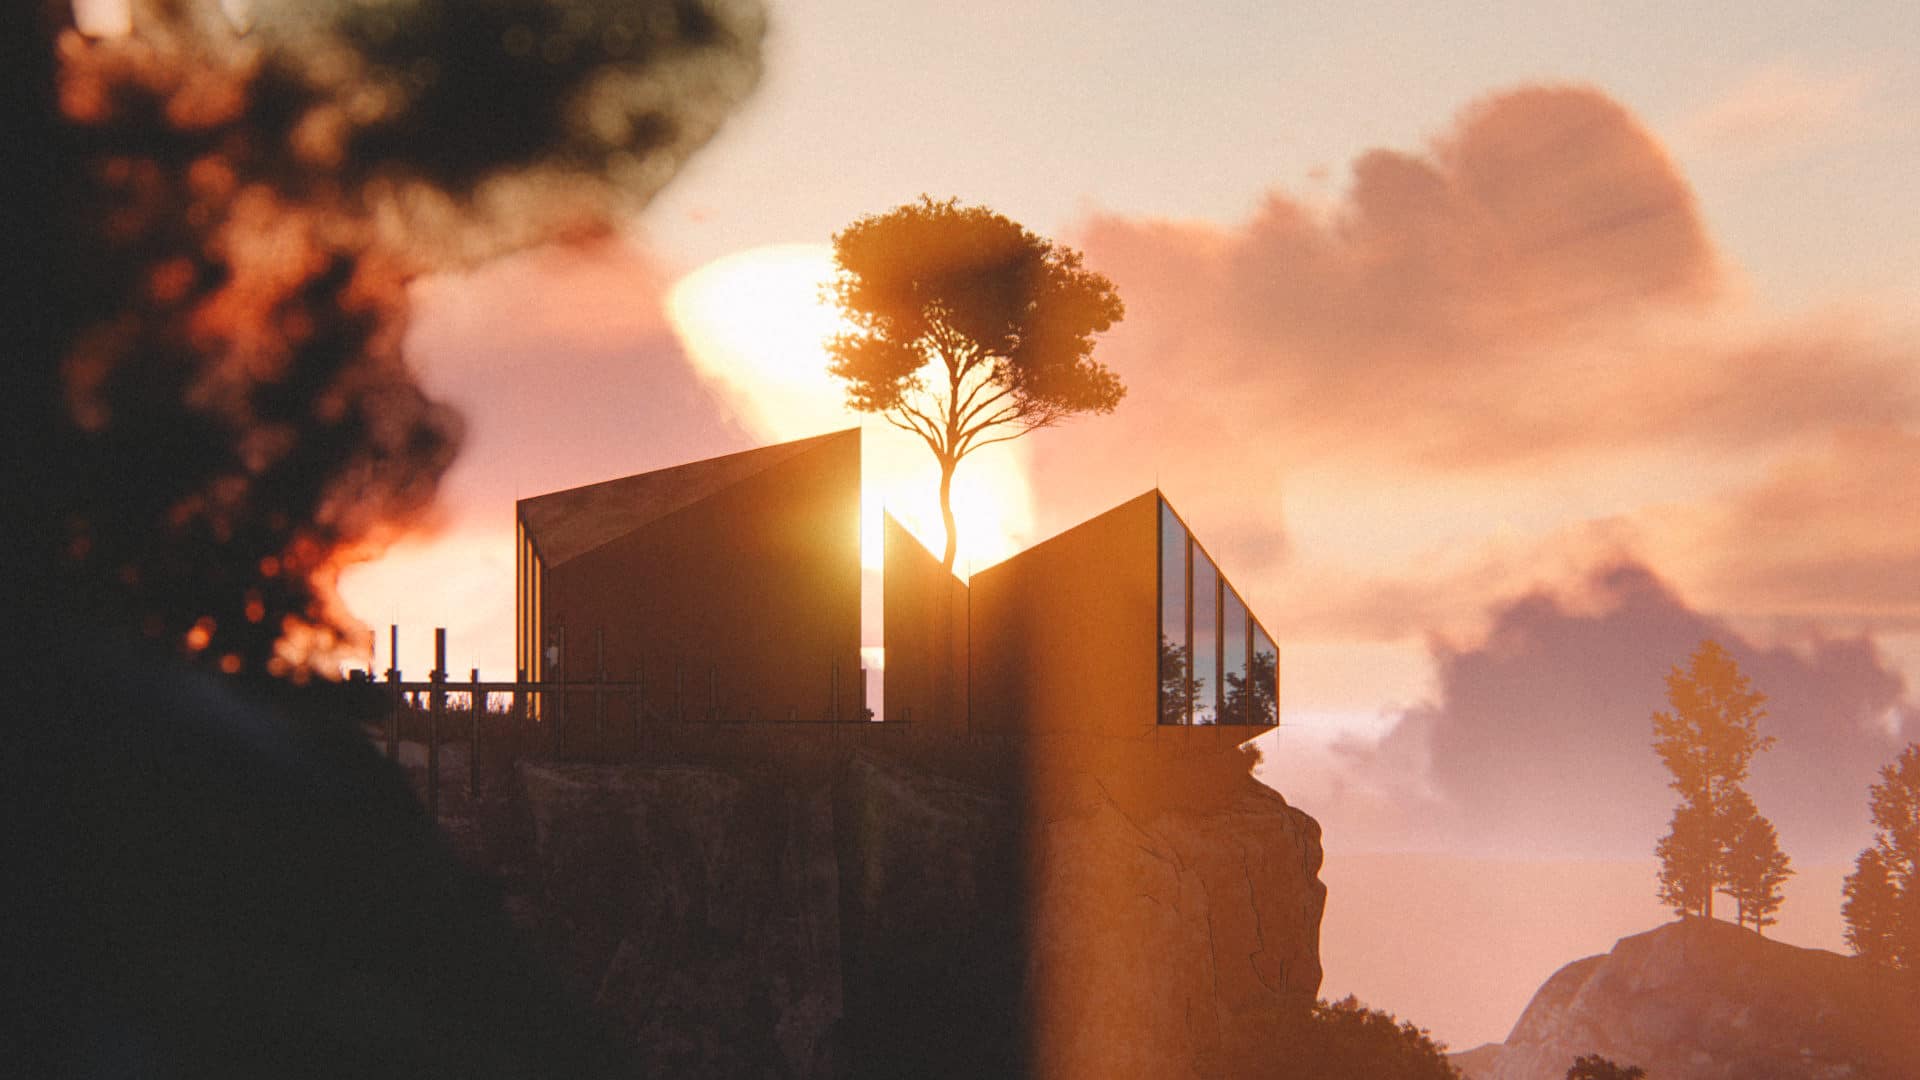
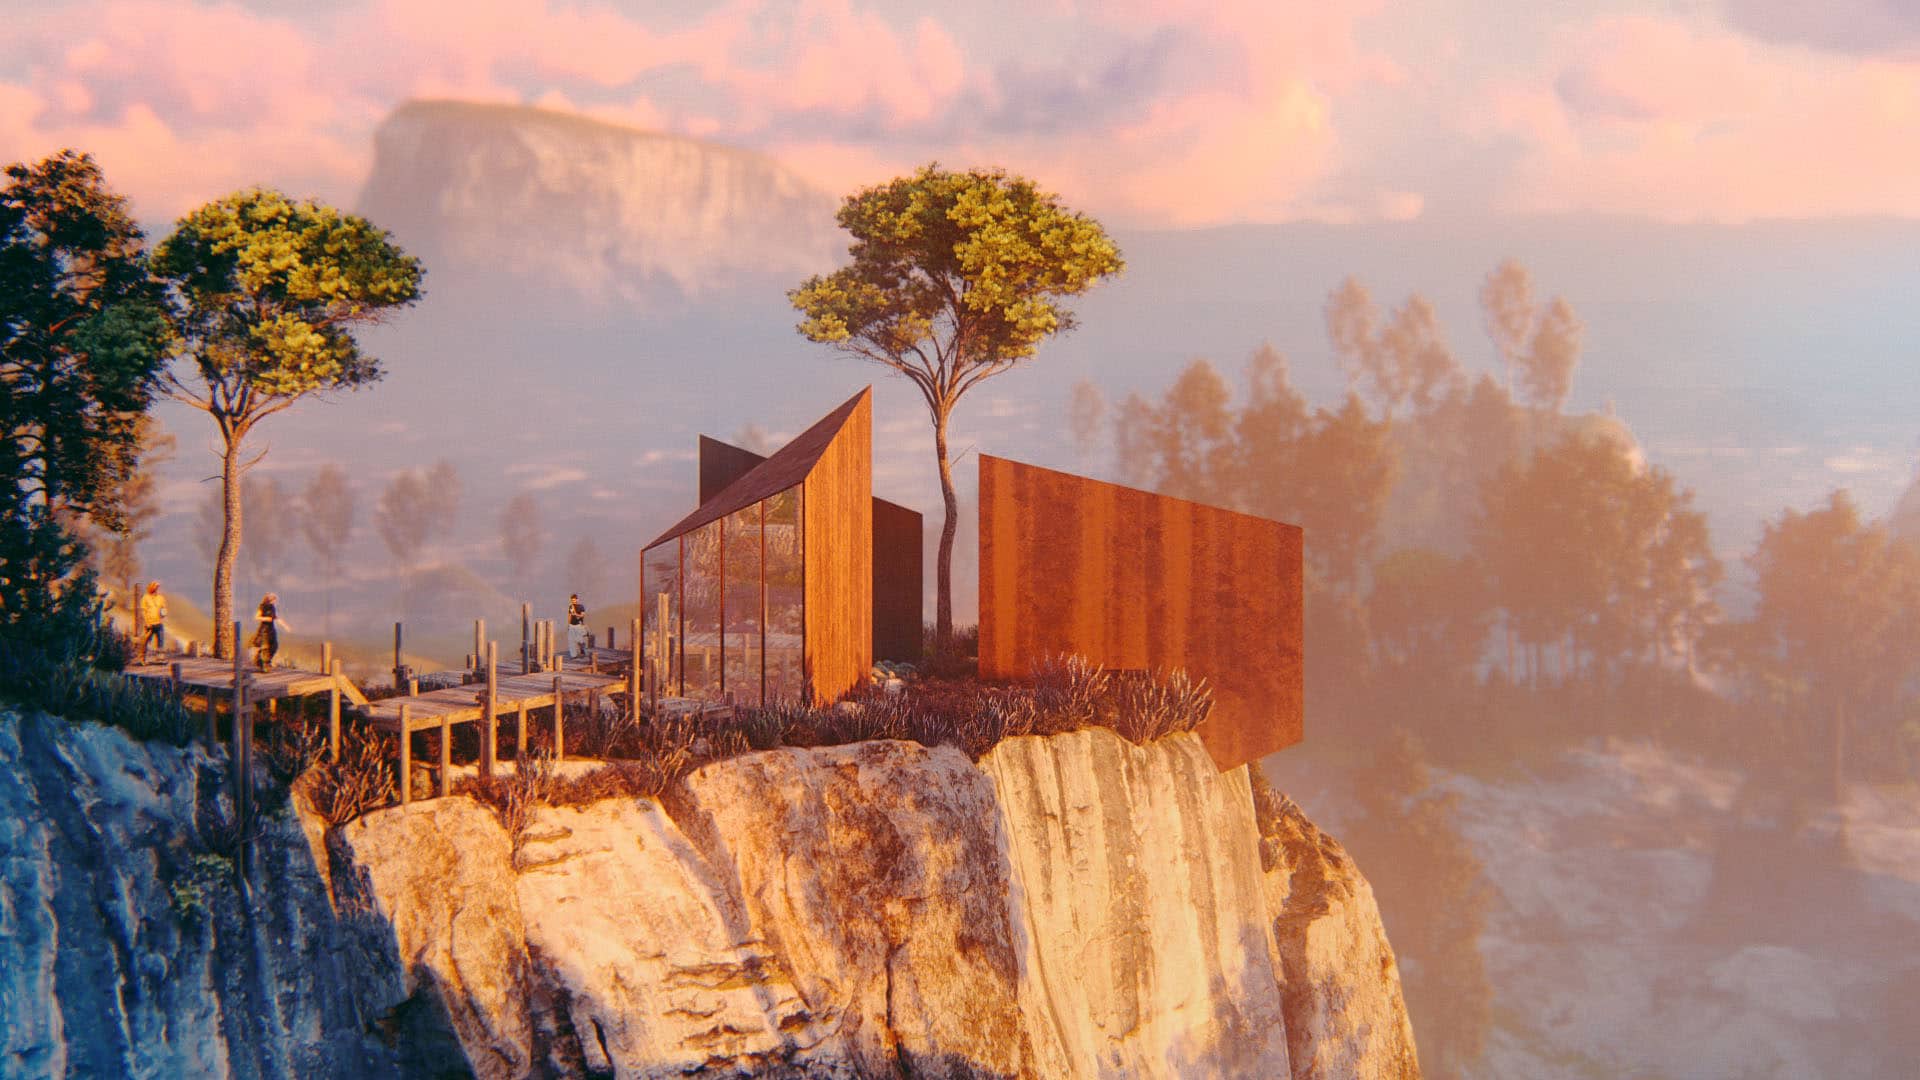
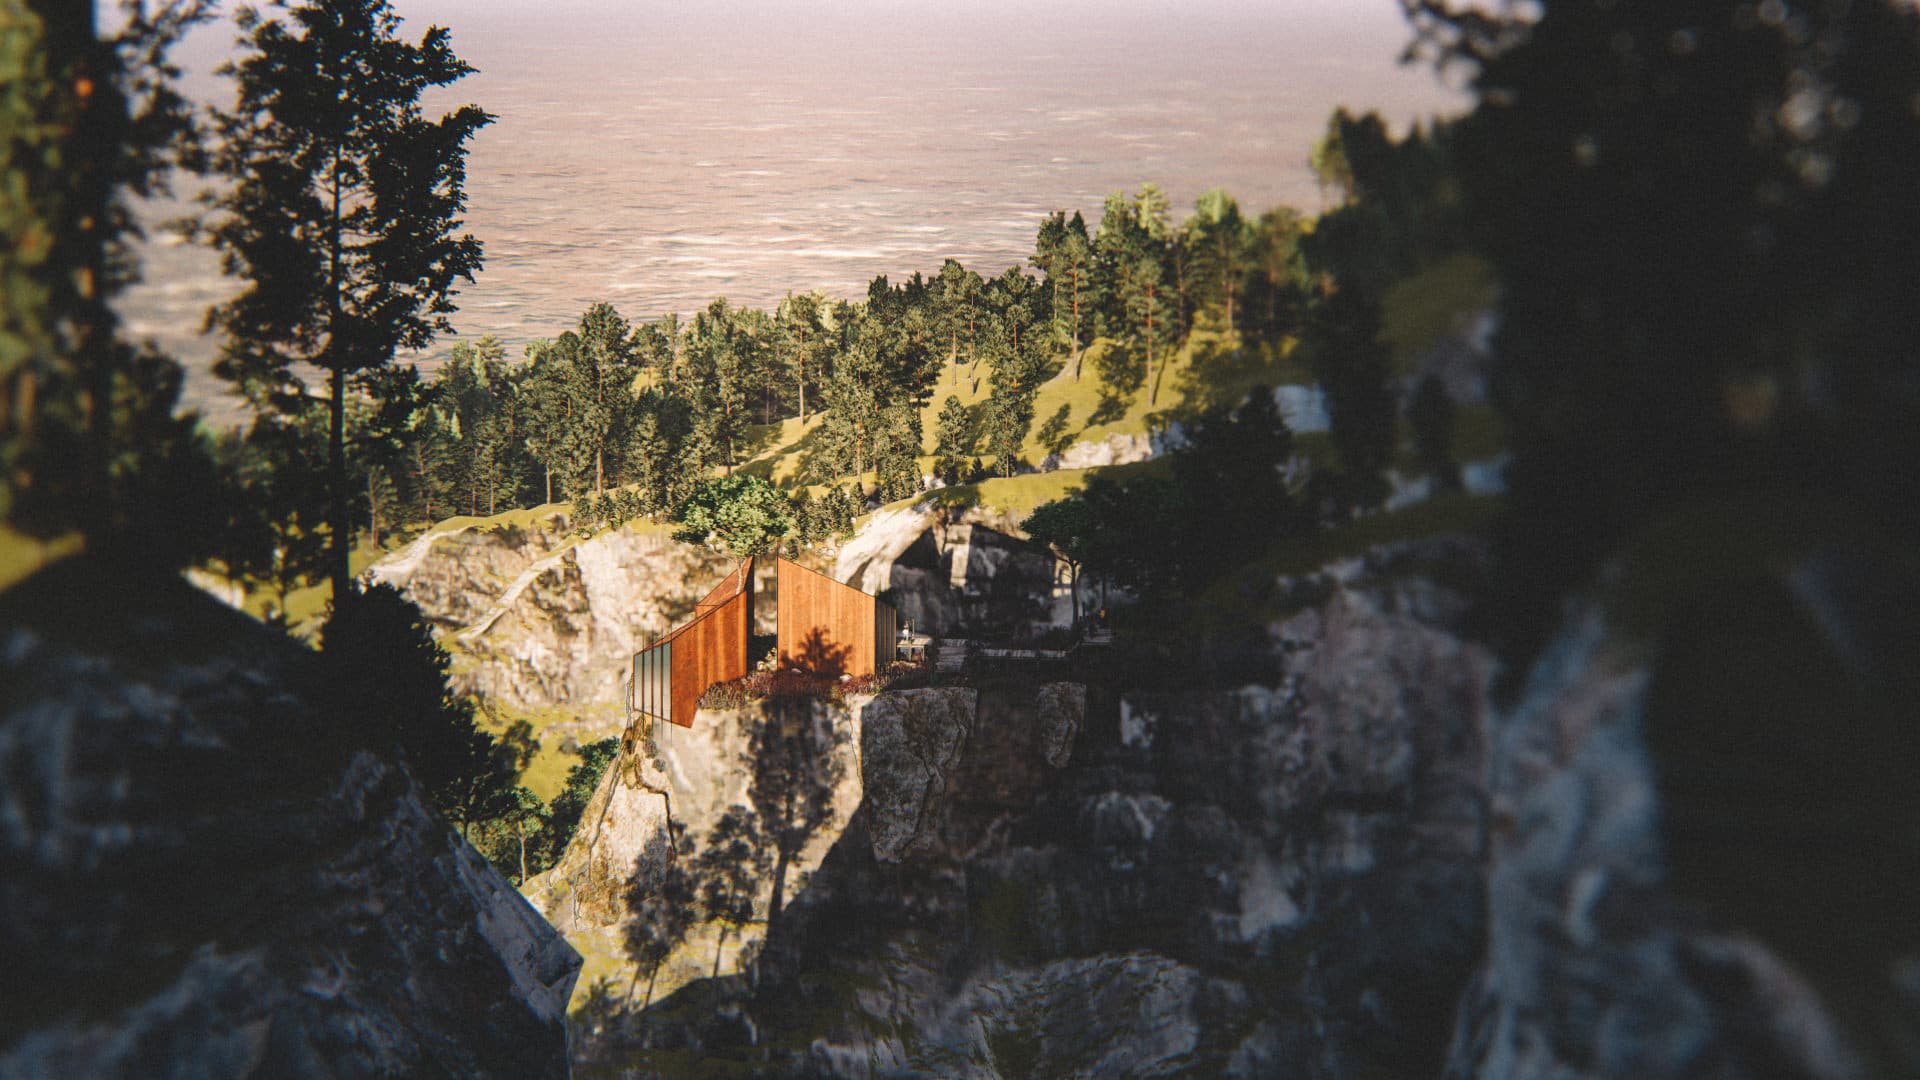
Anyway, my cabin is composed of three small triangle shaped cabins in a circular formation so that each cabin goes a little over the edge of a cliff, offering amazing views of the surroundings. A hero tree is placed in the center of it all with my Lunacy Memo Book Moon at the back of it all.
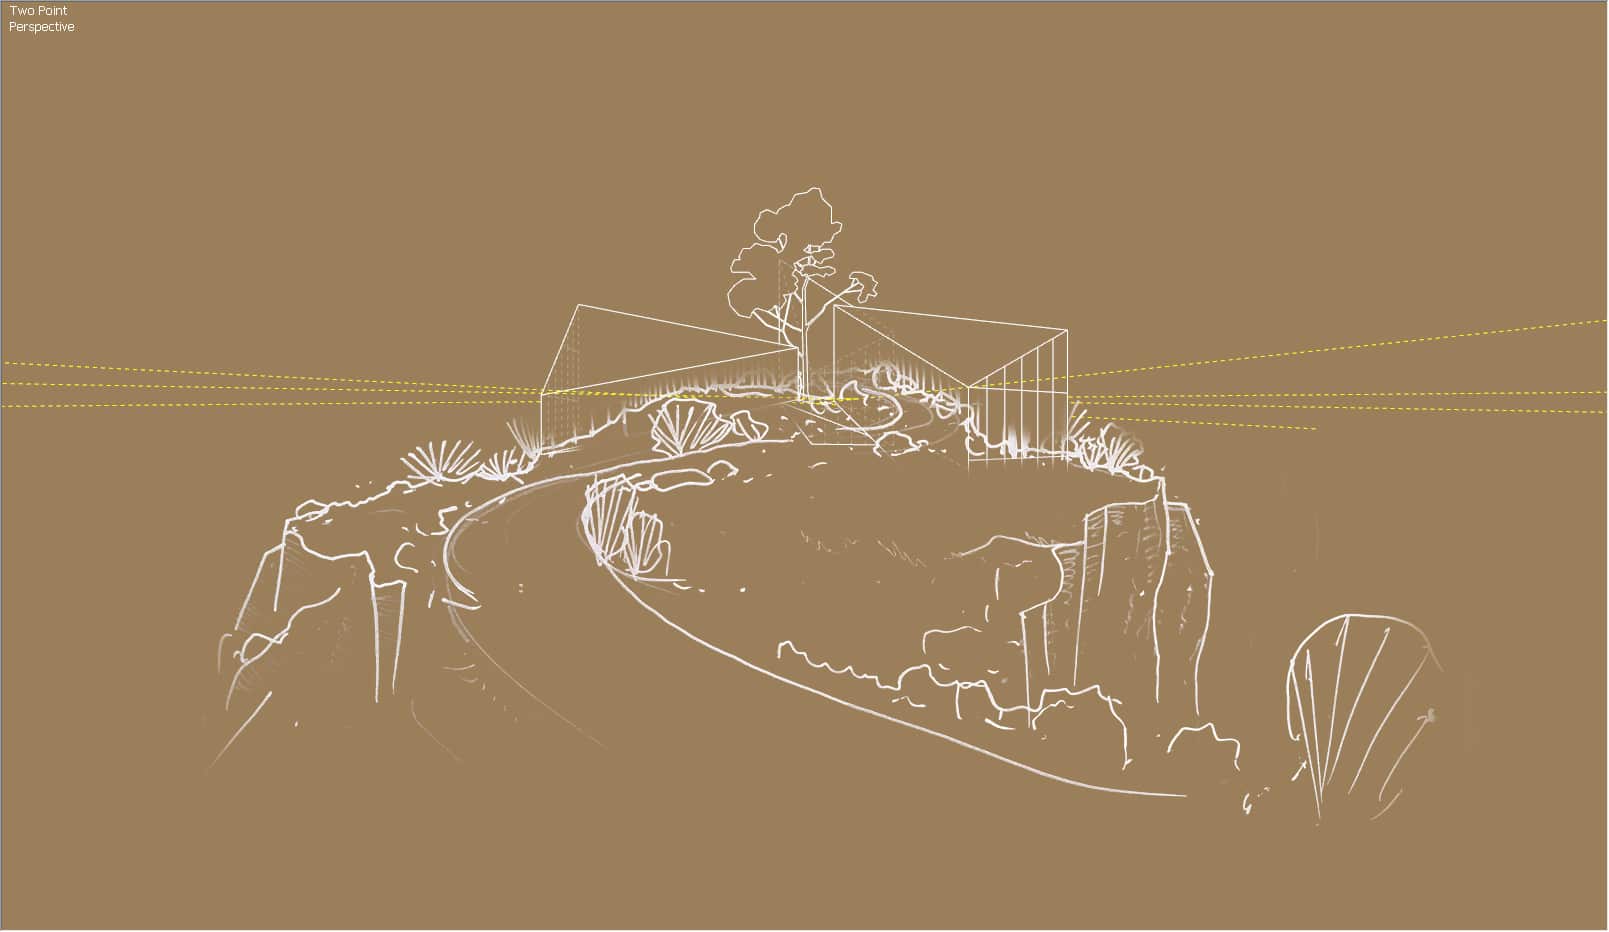
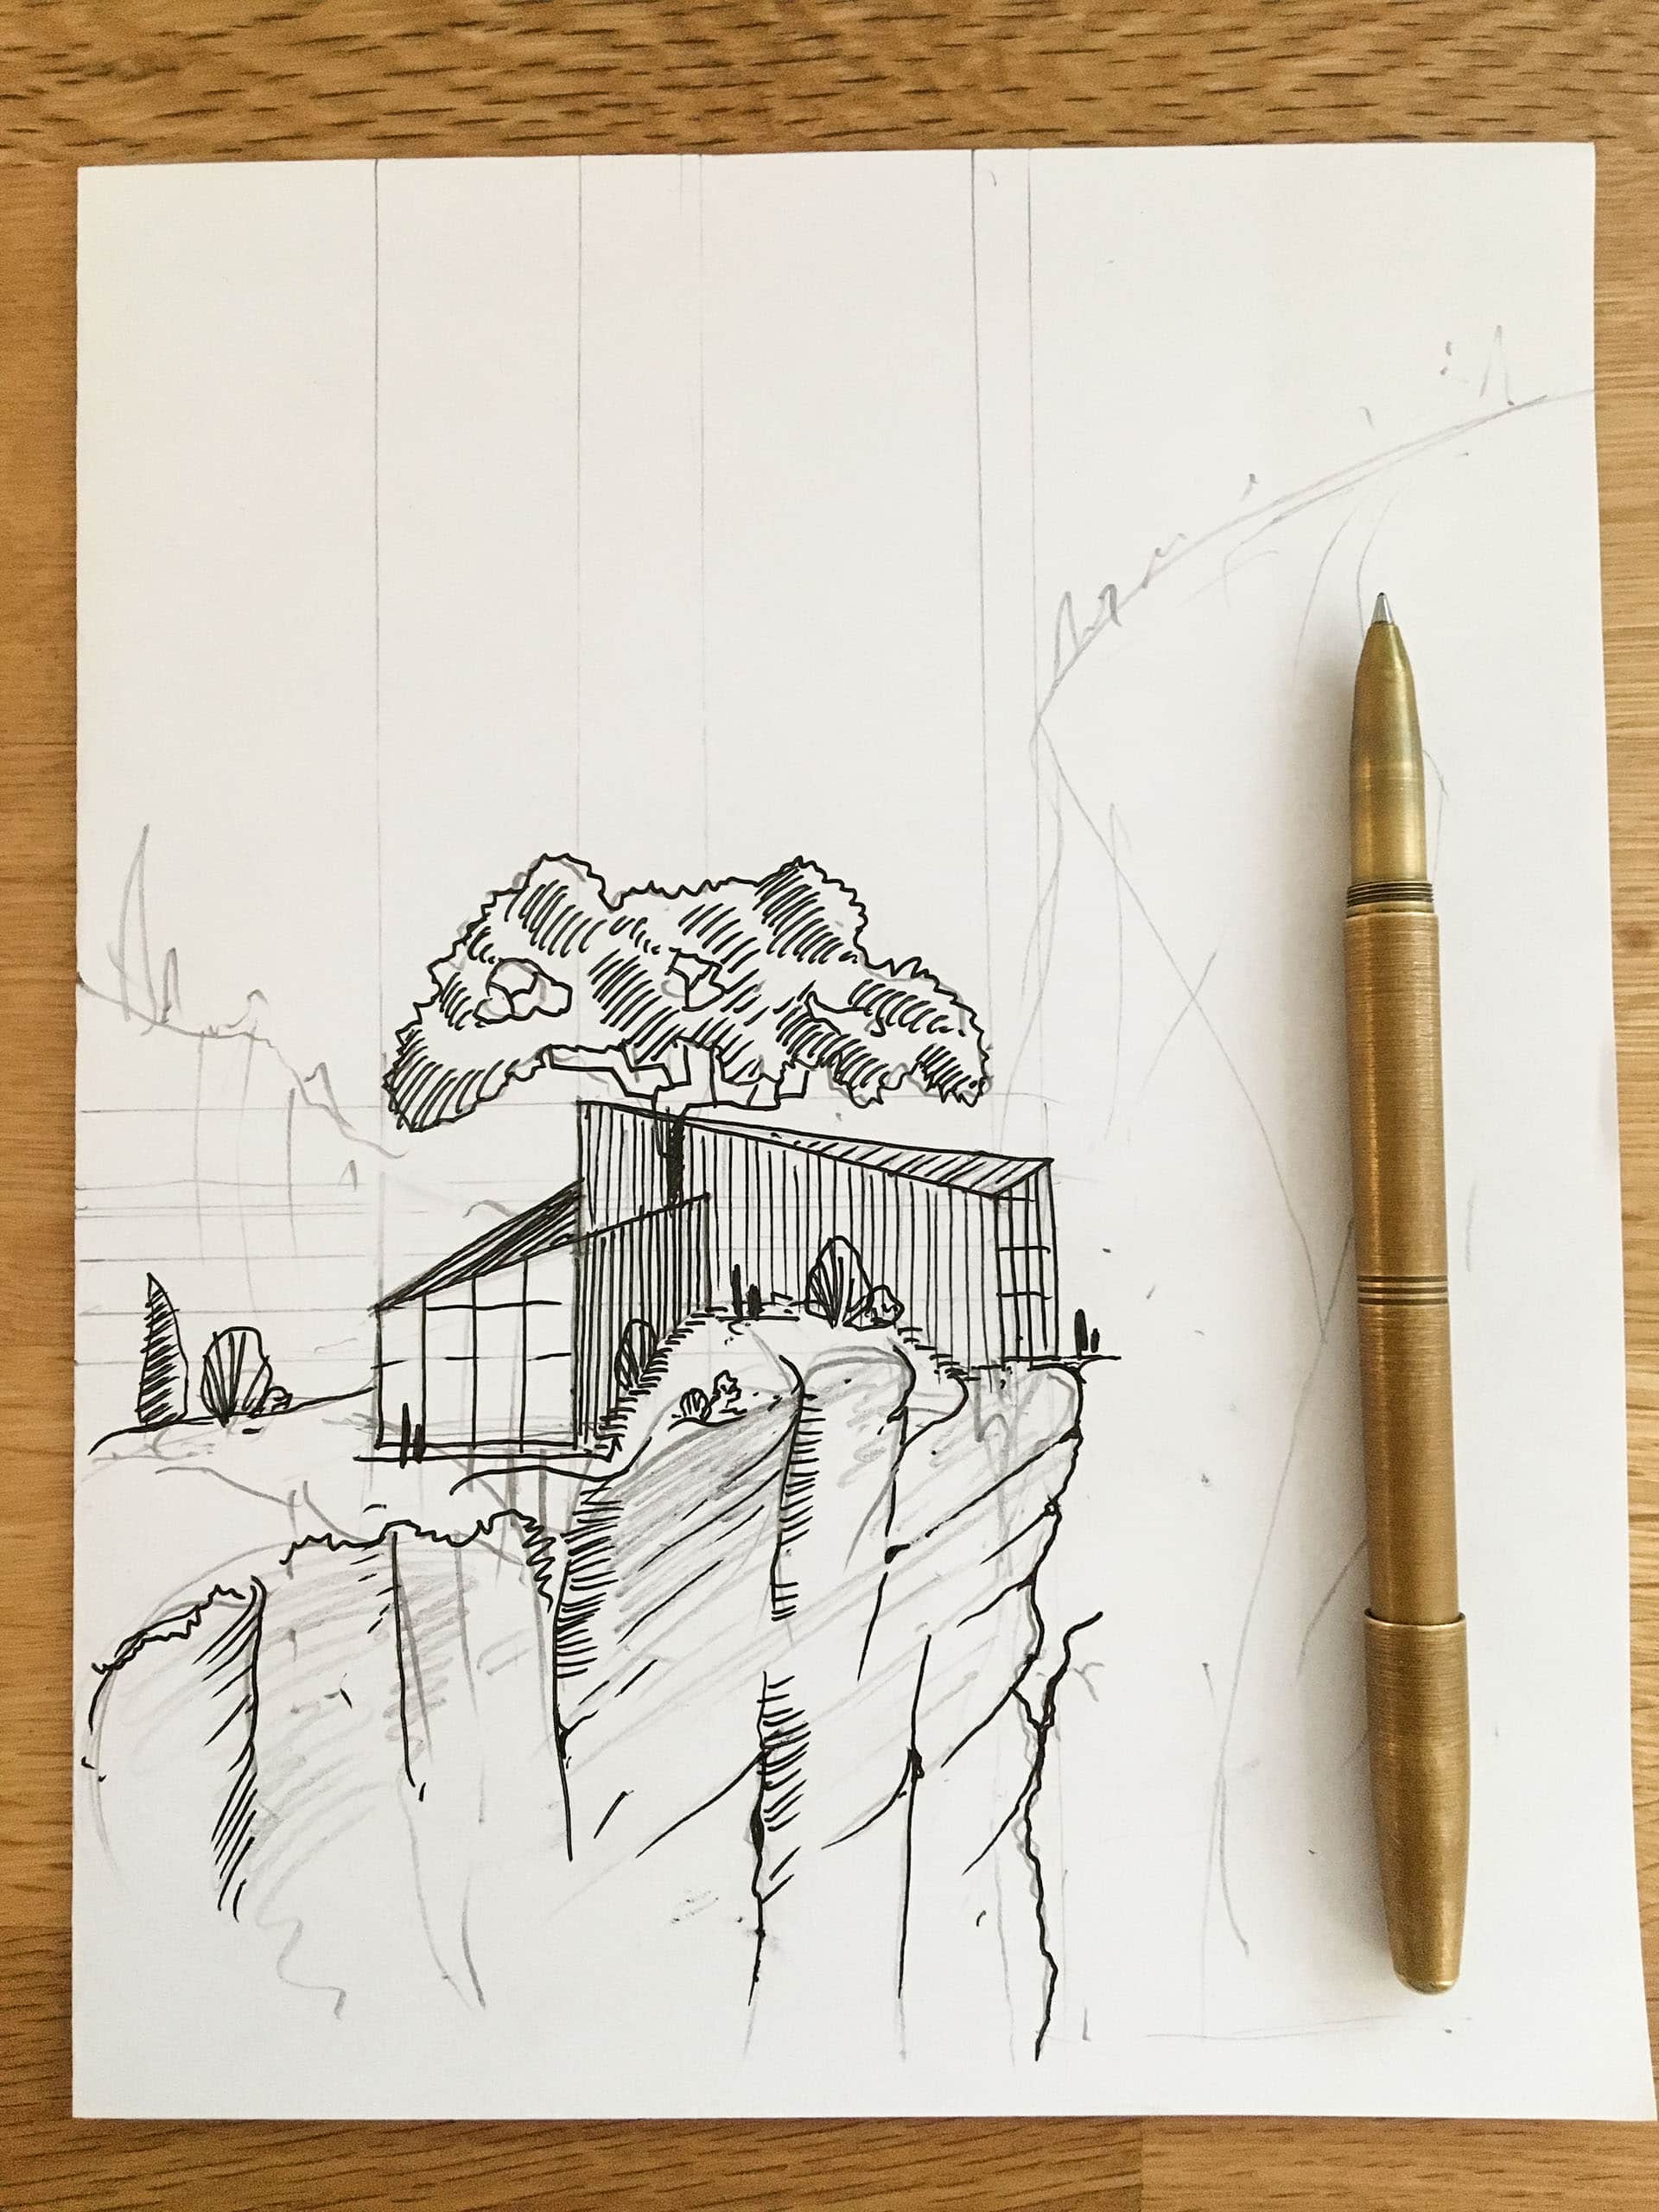
This helped me figure out the way the cliff should look like from the various angles.
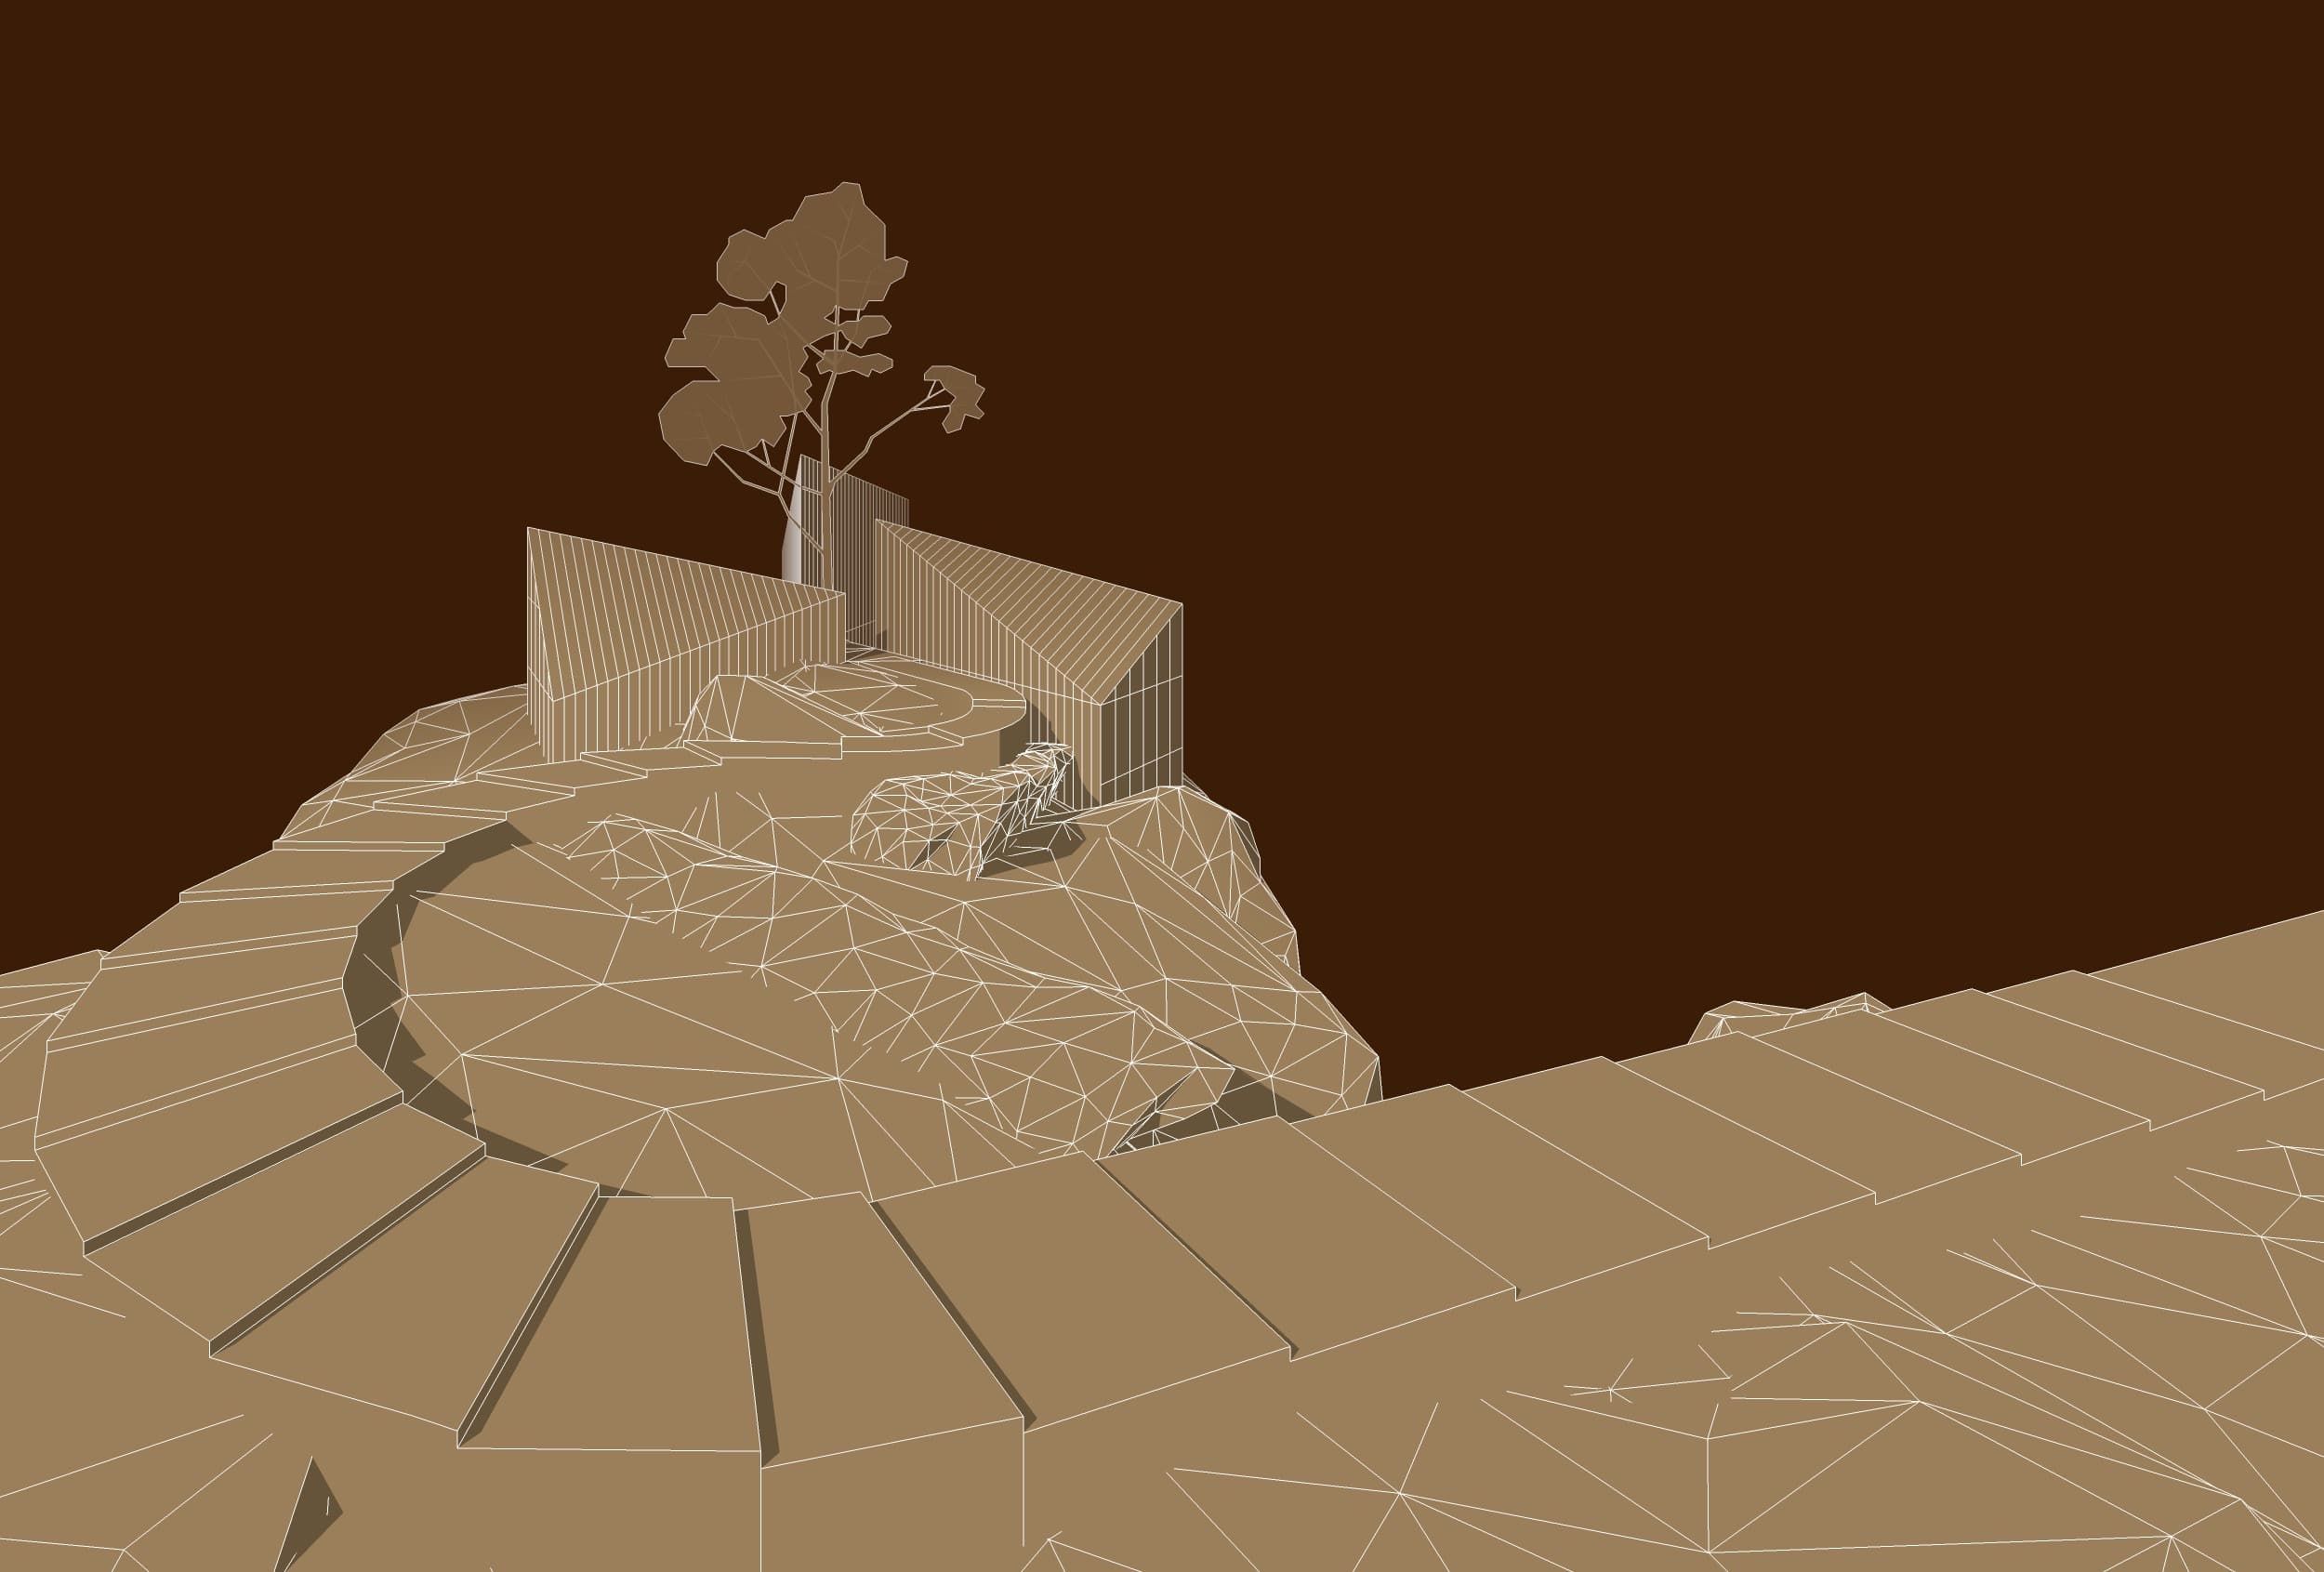
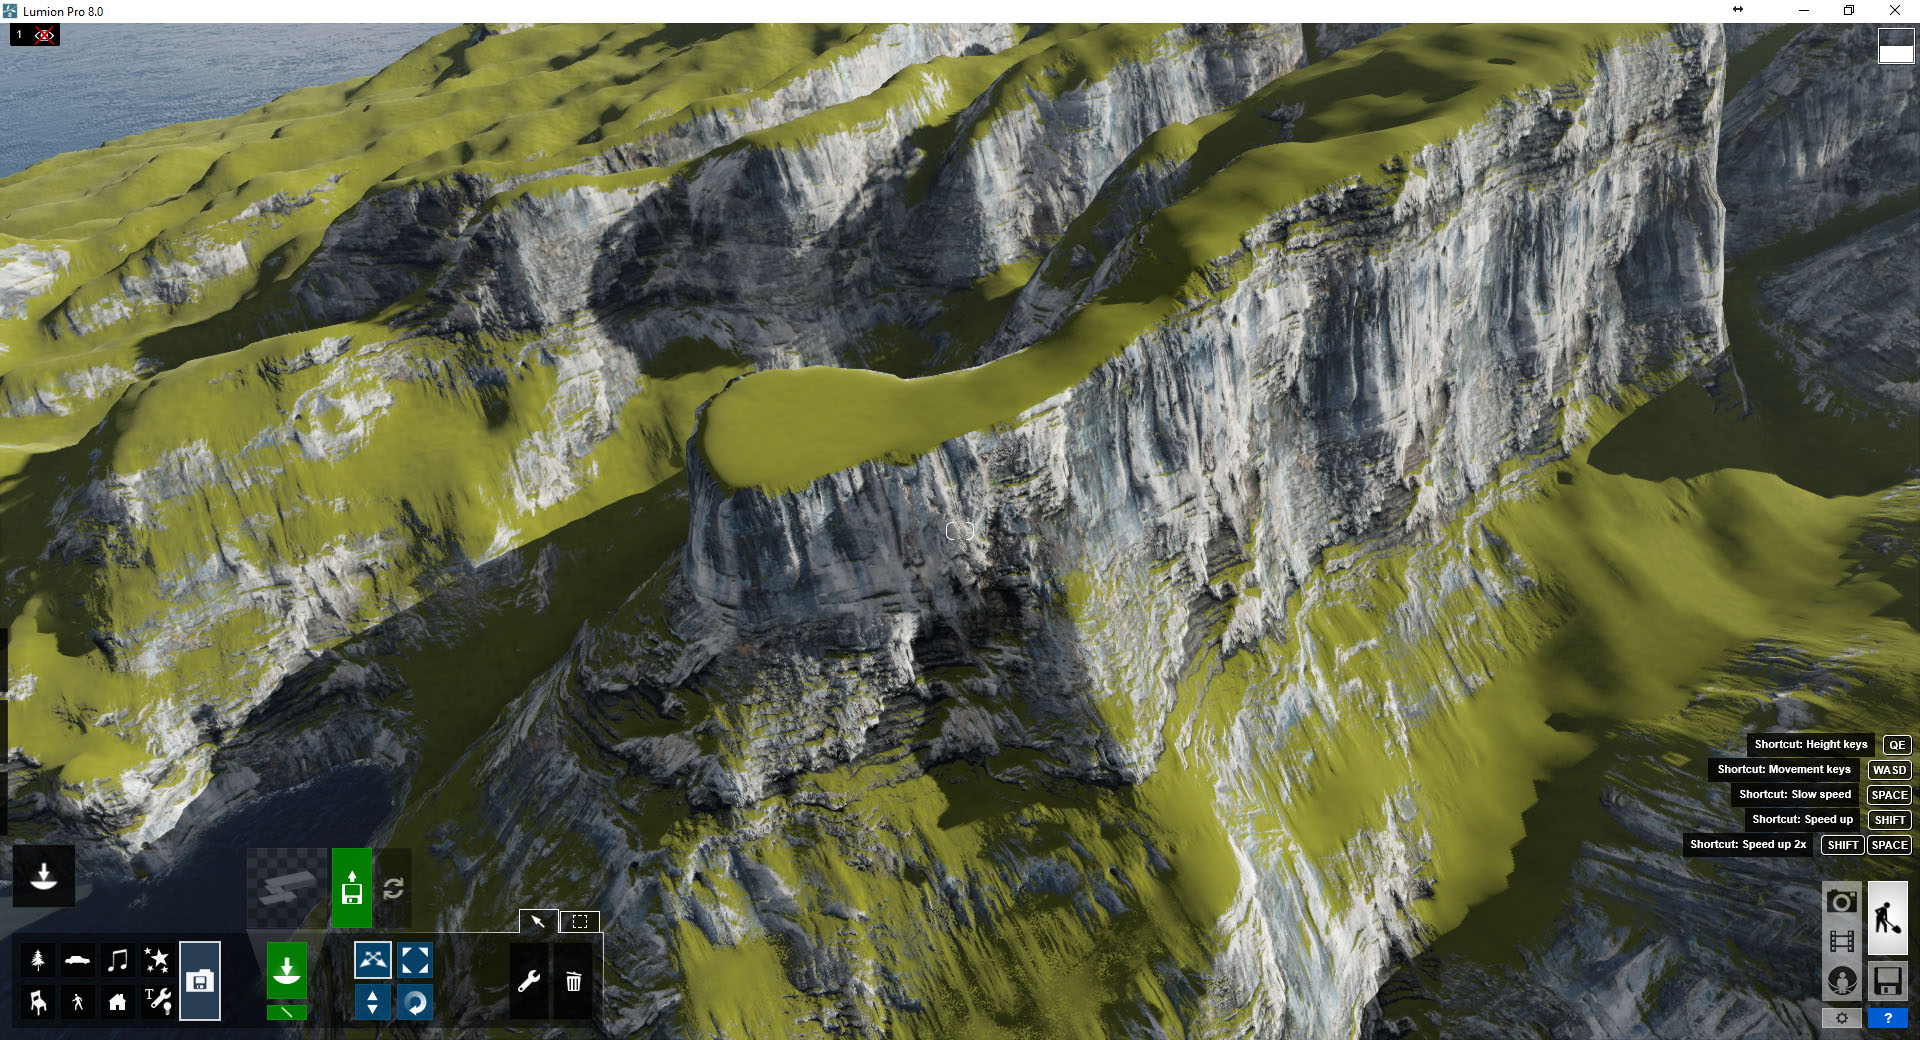
I’ve blocked the cliff using rock assets from the 3d Warehouse, scaling and rotating them as I duplicate and put them in place to form the overall cliff shape.

At this point, I am still thinking about doing the visuals with SketchUp and the newly released V-Ray for SketchUp so all was supposed to be done inside SketchUp with the help of Skatter and Laubwerk Plants Kit to populate the entire area with trees before I begin the views exploration stage.
Thing is… I took a short break from this initial concept stage before I came back to it for obvious reasons.
Work!
I did manage to output some mood / lighting tests with V-Ray while exploring the new version.

You’ve seen my first tests with it in the “Hello! MMF House Meets Lumion” article I posted on the blog back on November 23rd. I took a gradual approach to this process, as should you if you like to explore it. You can’t just dive into Lumion running around aimless thinking you’ll get the hang of it. It is not like any other software you’ve used.
Lumion comes packed with a few pre-made scenes, the Farnsworth House being one of them.

I could not skip the photoshop part, though I did manage to minimize it to color grading mostly. With that part explored as well as remaking the MMF House, I was ready to continue with the cabins concept.
Before that, I took Farnsworth House for one last spin as I practice making an environemt similar to what the cabins concept needs.

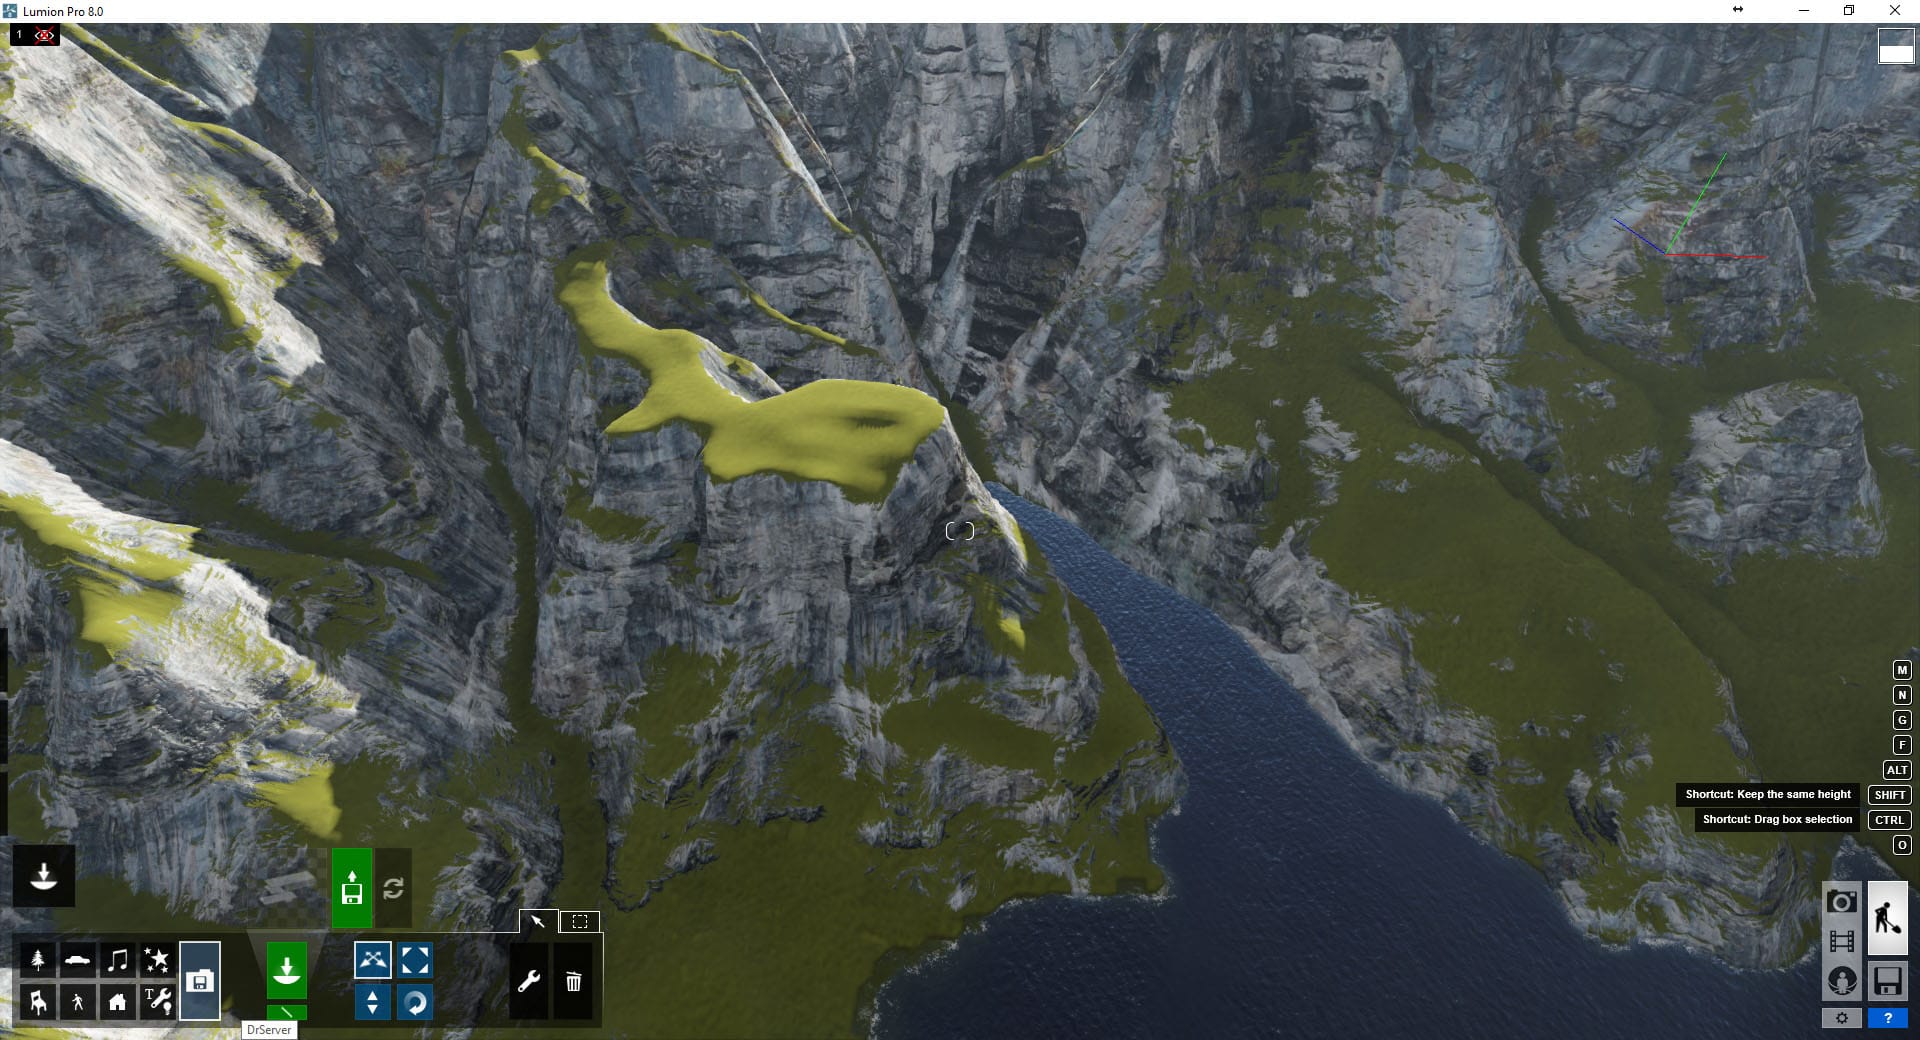
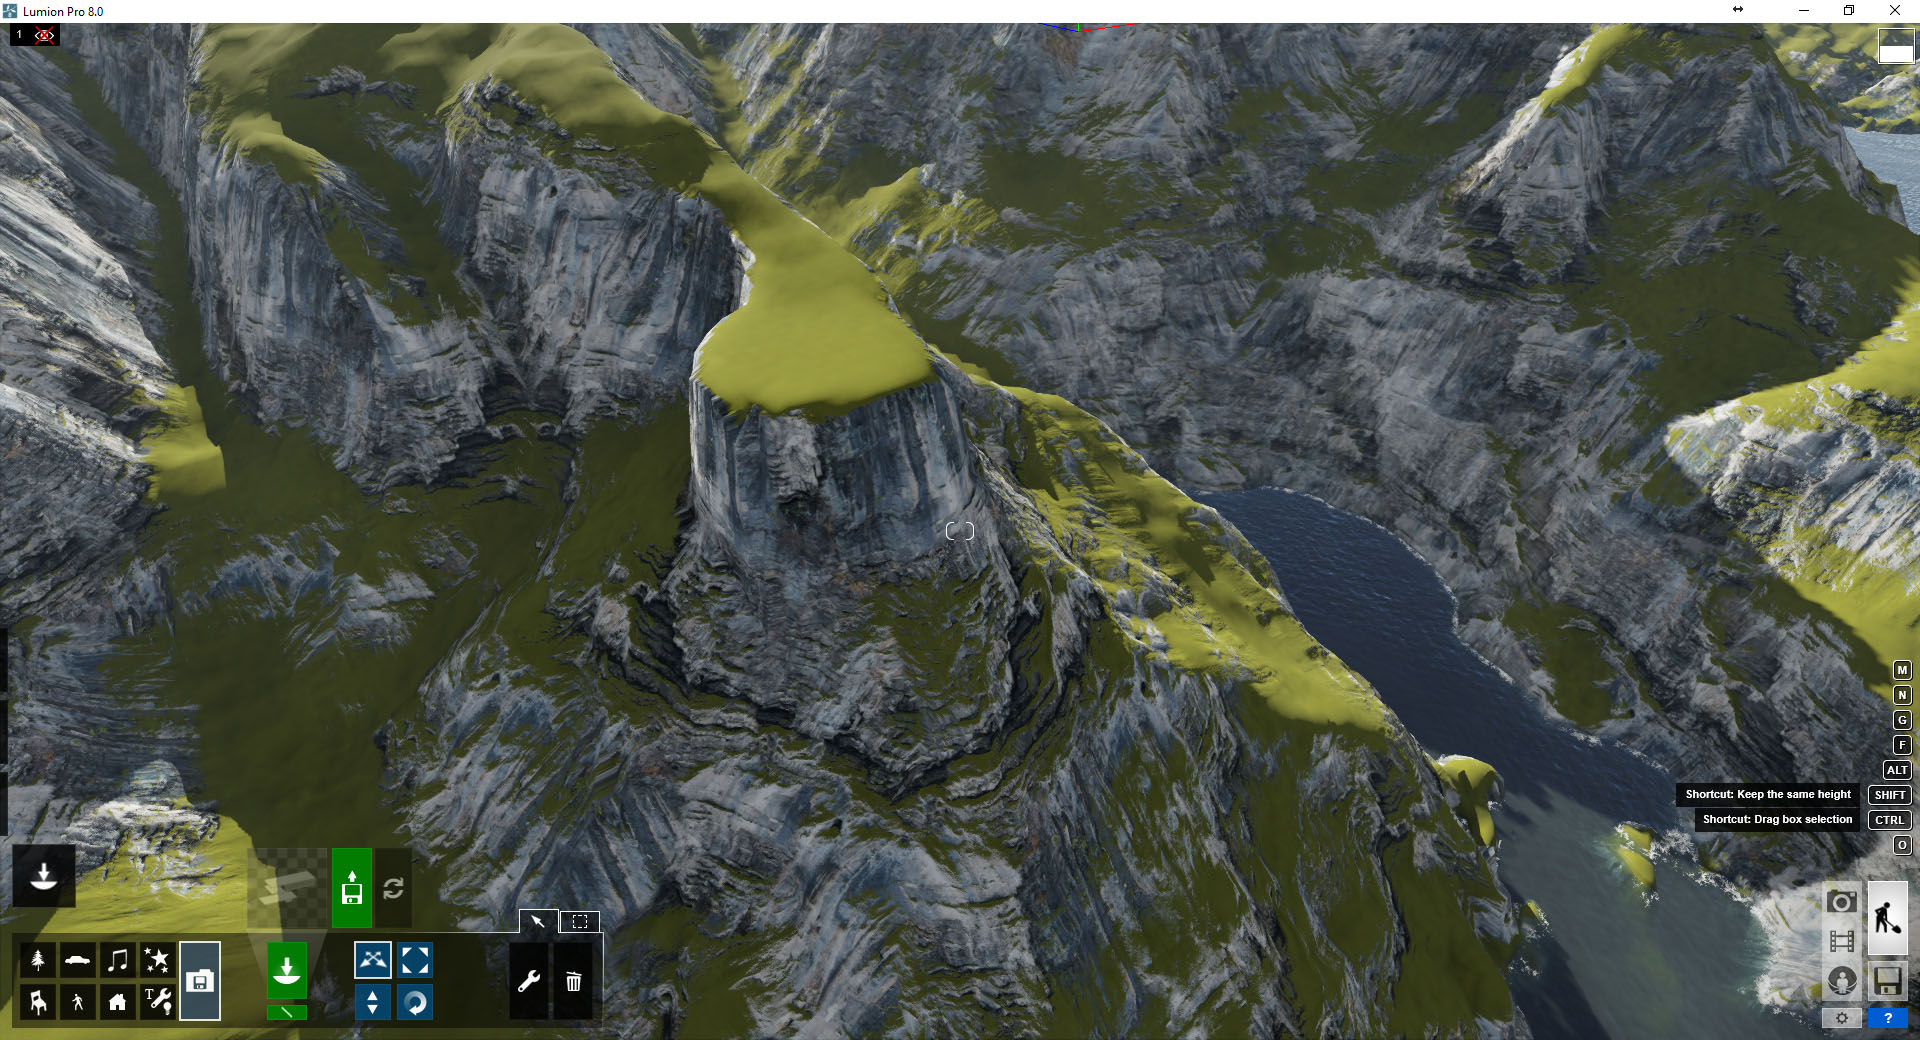
For CABINS, I search for a place with specific terrain features and Salt Lake City, Utah, USA was the perfect fit for what I needed. Creating a terrain to match specific project needs can be time-consuming. There is no need to create it from scratch and many benefits if you rely on real-world data.


I have identified two areas with a good looking cliff and enough space for water to wrap around it at a lower level. I’ve marked these spots in the diagram below, which represents the terrain data before I tweaked it to accomedate the cabins and added more rockformations to it.

“Importing a Heightmap is a good start, but do try Lumion’s terrain sculpting & painting tools.”
Below you can see both locations after the tweaks that allow me to land a cabin on the cliffs edge.

Till then, enjoy the CABINS set of visuals below.

Ronen,
I am very excited to see you experiment more with Lumion, and thus posting more tutorials. We’ve been using this program for over a year and I’ve grown to love the simplicity and speed of this software. For someone like yourself who is used to higher quality rendering engines, it would be great to see what you can come up with to bring the best out of Lumion. Keep rockin’ in the 3D world.
Cheers
Thanks RJ. Lumion sure made big steps with v8 and we started to use it at The Craft for various deliverables.
Hello and congratulations for your website and challenge you are making for us.
I wanna ask something which is not very clear (for me), about the softwares we need to use it. Its only possible to do this challengue in SketchUp and Lumion? Or I can do it in 3D Max and Vray? I wanna participate in this challenge and try to do a very good job but I never used Sketchup or Lumion before…
Thanks
Jorge Mb.
Hi Jorge,
You can use any software you like! This challenge is open to all as far as I can see.
There will be a few requirements, like using Megascans assets. But Quixel will be providing this for you in various file formats, so no worries there too.
Wow
Wowza!!! Very nice work!
awsome
This is great! Is there a way to export out the mesh data so you could up-res it in say Zbrush?
Yes, you can. I did not try it, though I think that once you import back – that is where Lumion limits you. But again, I’m not sure about this… yet.
Wow, Lumion looks it has some great tools!
wow, that is an amazing work you have there and thanks for taking your time to go through your work step by step.
great work Ron .. !
Ronen!
This is looking very exciting thus far. Very excited for this one hopefully I can get some time to actually submit. Like you said, WORK! gets in the way sometimes.
Cheers!
Rich.
I hope you do, Rich!
Maravilhosa a oportunidade que você está oferecendo de conhecer um projeto impar como esse, parabéns ! abraços. Ary C
hello, Ronen and thanx for this great tutorial, how to participate in this challenge?
It starts on Monday, January 15th with all the instructions you’ll need to know. By then, join on the main page and share with others too.
Excited about this! We use SketchUp + Lumion in our workflow and to see this challenge and learn from everyone will be wonderful.
Question: How did you make that axon terrain map (with the contour elevations, clouds, water) that you identified the main and backup location? Is that a Lumion + Photoshop output?
The workflow for that would be illuminating!
Wow, that’s really nice work. I’m a total beginner in the visualization scene and still learning the hacks. Your work inspires me and I hope to do a decent job for this challenge.
cheers
Very happy to inspire you, Emeka. Looking forward seeing your work during the Challenge.
I really enjoyed reading through your creative process. Looking forward for part 2. 🙂
Thank you! Documenting the process is not easy but does help learn things better I found. Part TWO coming up soon.
Nice Work!!
Thanks a lot 😉
Buddy, you had outdone yourself this time and I am proud of you. Almost thought you did the terrain in world machine. Awesome output!!
Wow! That’s a hell of a story, Ronen! And you are a perfect storyteller. Another cliff to climb, well done!
Thank you Val!
Nice description of the process!
I don’t get one thing about the challenge – is it started yet or it will start soon? Did I miss something?
Thanks!
Challenge starts on Monday, January 15th 😉
See you at the start and good luck!
it’s really nice idea
Thanks! It’s been on my mind far too long 😉
Hi Ronen,
Thank you for promoting such contest. I have my first question: will it be mandatory to use the same terrain or we will be free to use another one?
You can do what you like. Any kind of terrain.
Firstly, your work is really inspiring, congratulations!
I have a question about your process. How did you make that axon terrain map (with the contour elevations, clouds, water) that you identified the main and backup location?
Thanks in advance for your reply
This was done in Photoshop based on the Heightmap. I will share this process too… It is pretty cool!
this is very very wonderful
thanks you ronen
Thank you!
Cool stuff! I was wondering about the axon image also. Can´t wait for that process!
Coming soon!
What a beautiful pen you have. May I ask what it is?
It is a Machine Era Pen, Solid Brass. The design they have now is a bit different.
Is the challenge starting today?
Yep… final updates and the frontpage will update!
Ronen –
Thank you for your amazing site! Been a fan for years.
I am sure you will be covering it however, when saving a JPG of the height map, I get a low quality map. How do I save a larger version?
Can’t wait for the rest of this making of!
Larissa
The one I use is 1900px wide and works ok. What is the pixel size of your JPG?
Great article Ronen, thanks for doing it.
Thank you! I enjoyed it a lot 😉
So much explained and surely we can do it. Thank Ronen to provide us a beautiful opportunities.
Thank you! I hope I can help more 😉
Hello Ronen, congratulations on a very useful and beautiful article.
I want to ask you something about the challenge. Can I do a VR project with Yulio without VR glasses?
Sure! Yulio can deliver a none VR Headset experience as well.
It’s not possible to post/upload anything yet? I’m trying to figure out this new system, I remember using forums on old vineyard challenge and it’s kind of confusing to me. Cheers!
Yes you can and I see you did by now 😉 Good Luck!
I have registered and downloaded a couple of height maps from USGS and none have anywhere like the detail you have illustrated on your example. I used the same export settings but the image downloaded was only 450×450 pixels and not usable. Is there a section on increasing the map size/detail?
What I showed is all there is to do and the maps I got are around 1800px – 1900px wide. I’ll explore this more…
It happend exactly the same to me. Very sharp picks. Not very much detailed image map I guess.
Right when I saw the theme of the challenge I already had the vision for my project, now I’m looking to take out those ideas and make them real. I hope to have enough time to make everything.
I already told my architecture friends about this so they can join and make something too.
I hope you managed to enter and make progress! Please link me to your updates to follow your work 😉
Ronen,
**Amazing**….I am very excited to see your experiments more with Lumion.:)
Hi all! Please join the Drove page I’ve opened for the CABINS challenge. It’s new, I know… some of you might be skeptical about one more platform, but if you don’t try – you never know! Go here and join : https://www.drove.com/cabins?via=5a928aa1bccd46148d1ca253
I plan to do some action related to CABINS on Drove and see how it goes 😉
Hi Ronen! Just one question: we can made a matte painting for environment or we need to model everything, all 3D?