
Making of Inside Out
by Jamie Holmes
- Nature – Above
- Cliffs
- Trees and Plants
- Beach
- Nature – Below (Underwater)
- Water
- Sealife
- Corals
- Shipwreck
- Cabin
- Design
- Modeling
- Texturing
And after all that I’ll cover the overall :
- Lighting
- Rendering
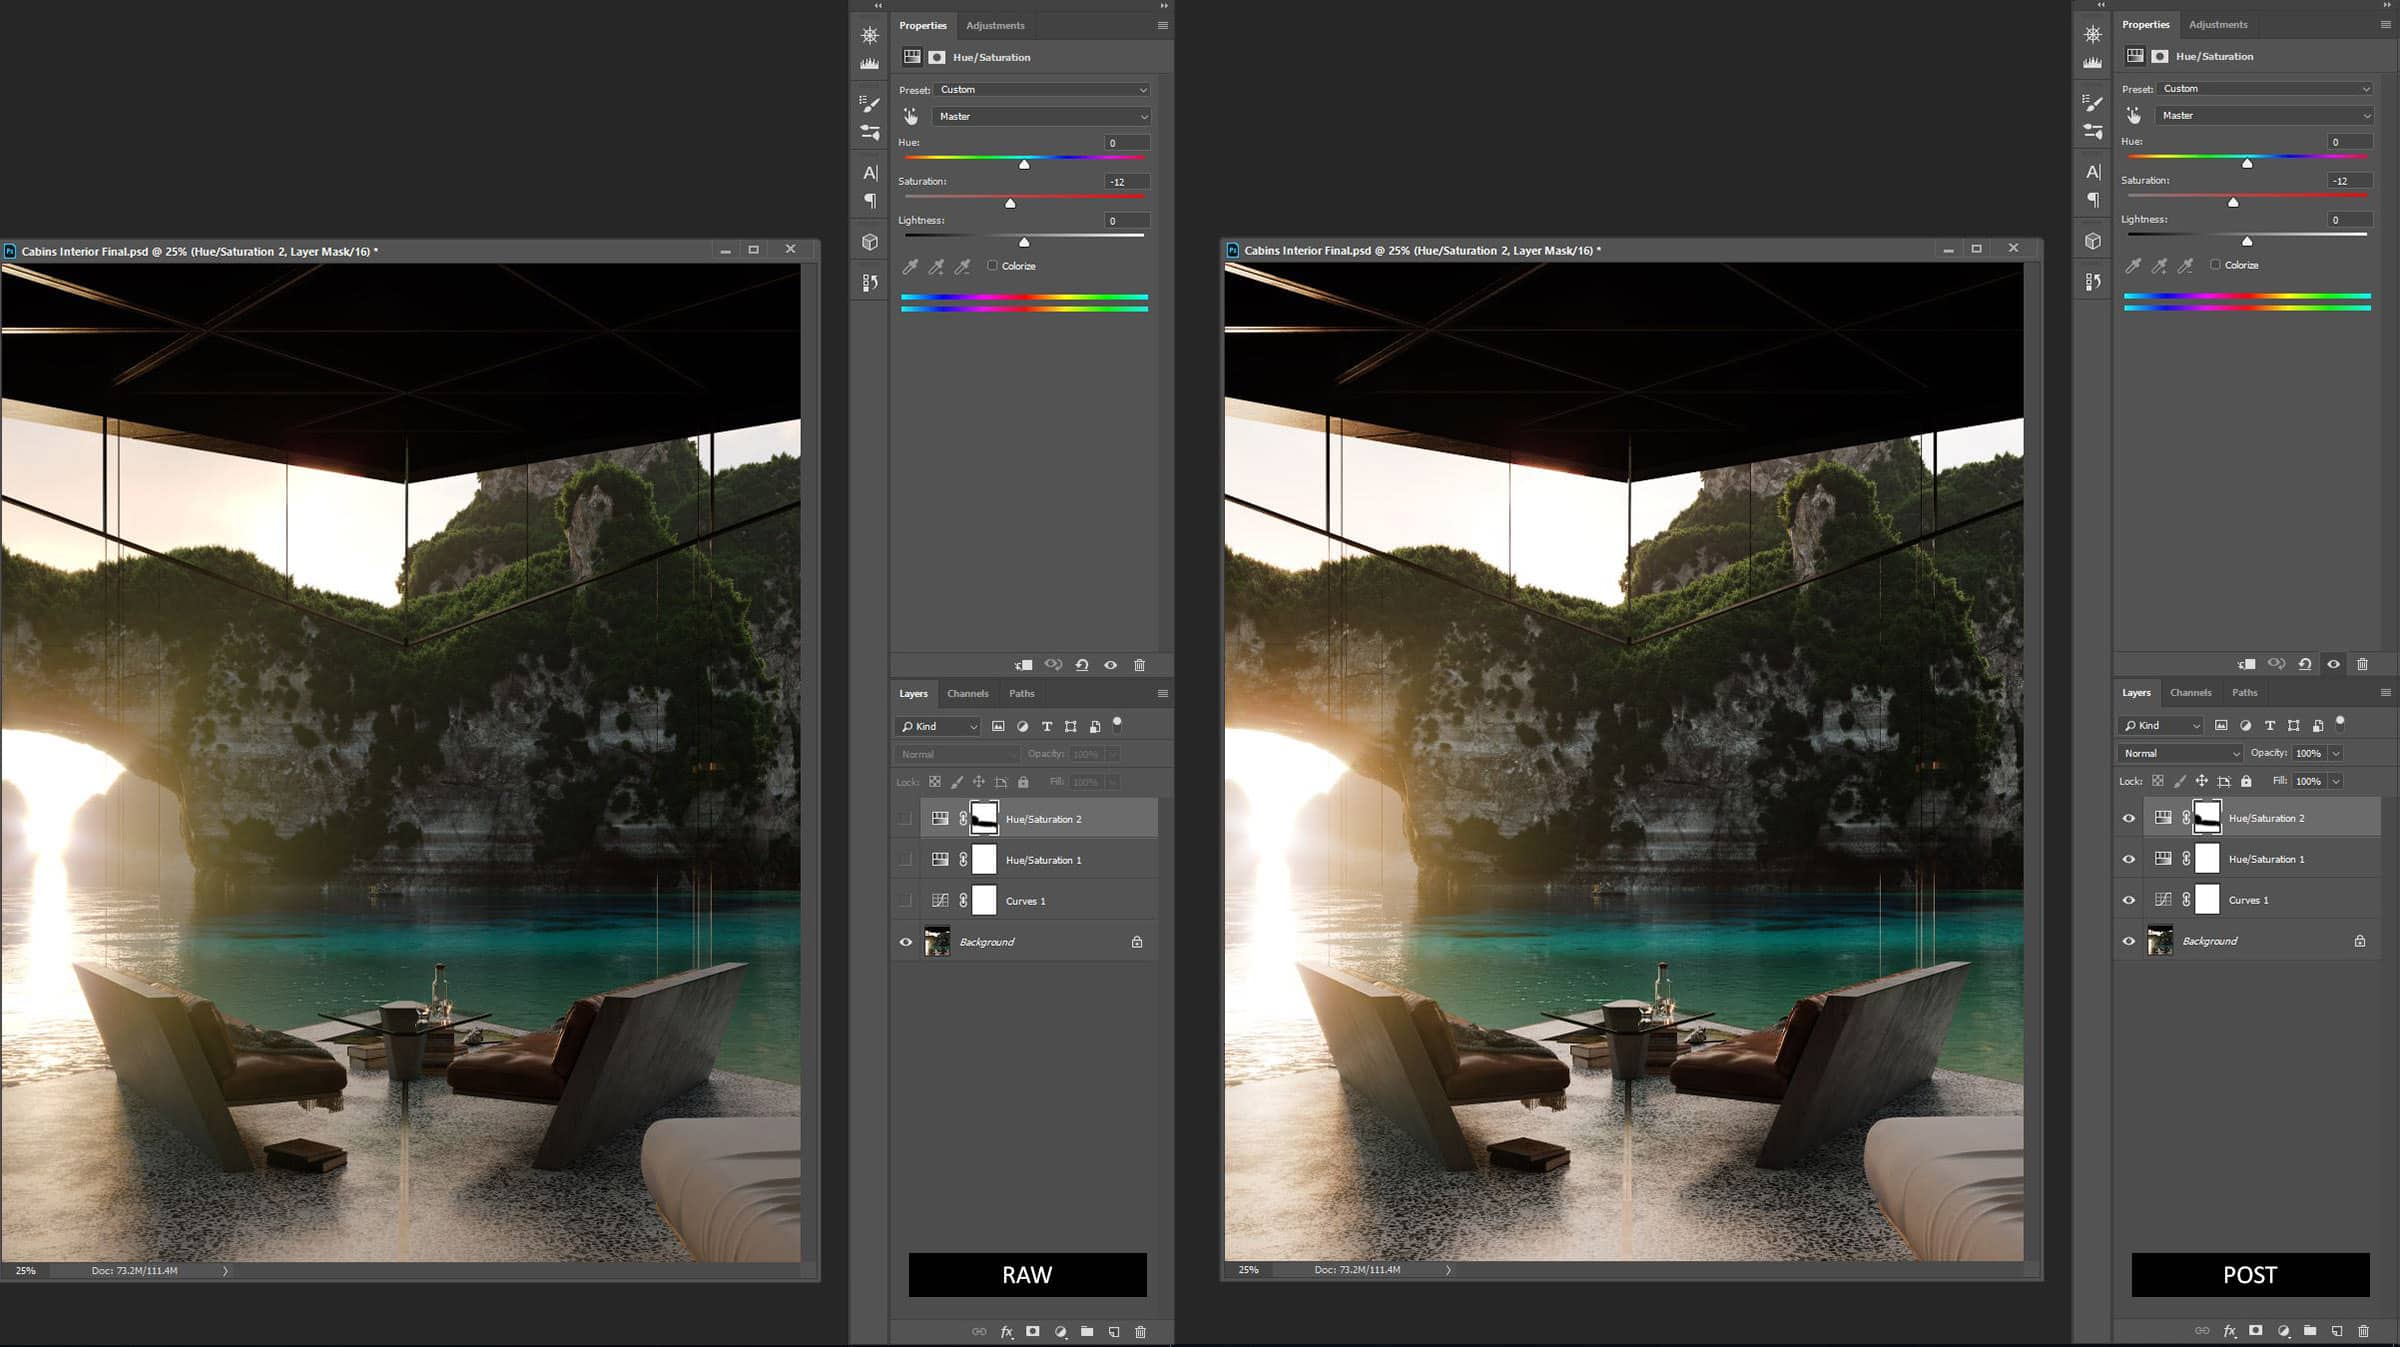
- Post Production
“My goal for this entry was to create a secluded tropical paradise with a similar feeling to the amazing islands located around the equator.”
Let’s start then!
3d Modeling
To be honest, my idea grew as I progressed with the scene. I work organically, always trying different things quickly. I like to focus on the bigger picture first and add details as I go. Having said that I still follow a basic formula where I model all the significant elements and build upon those.
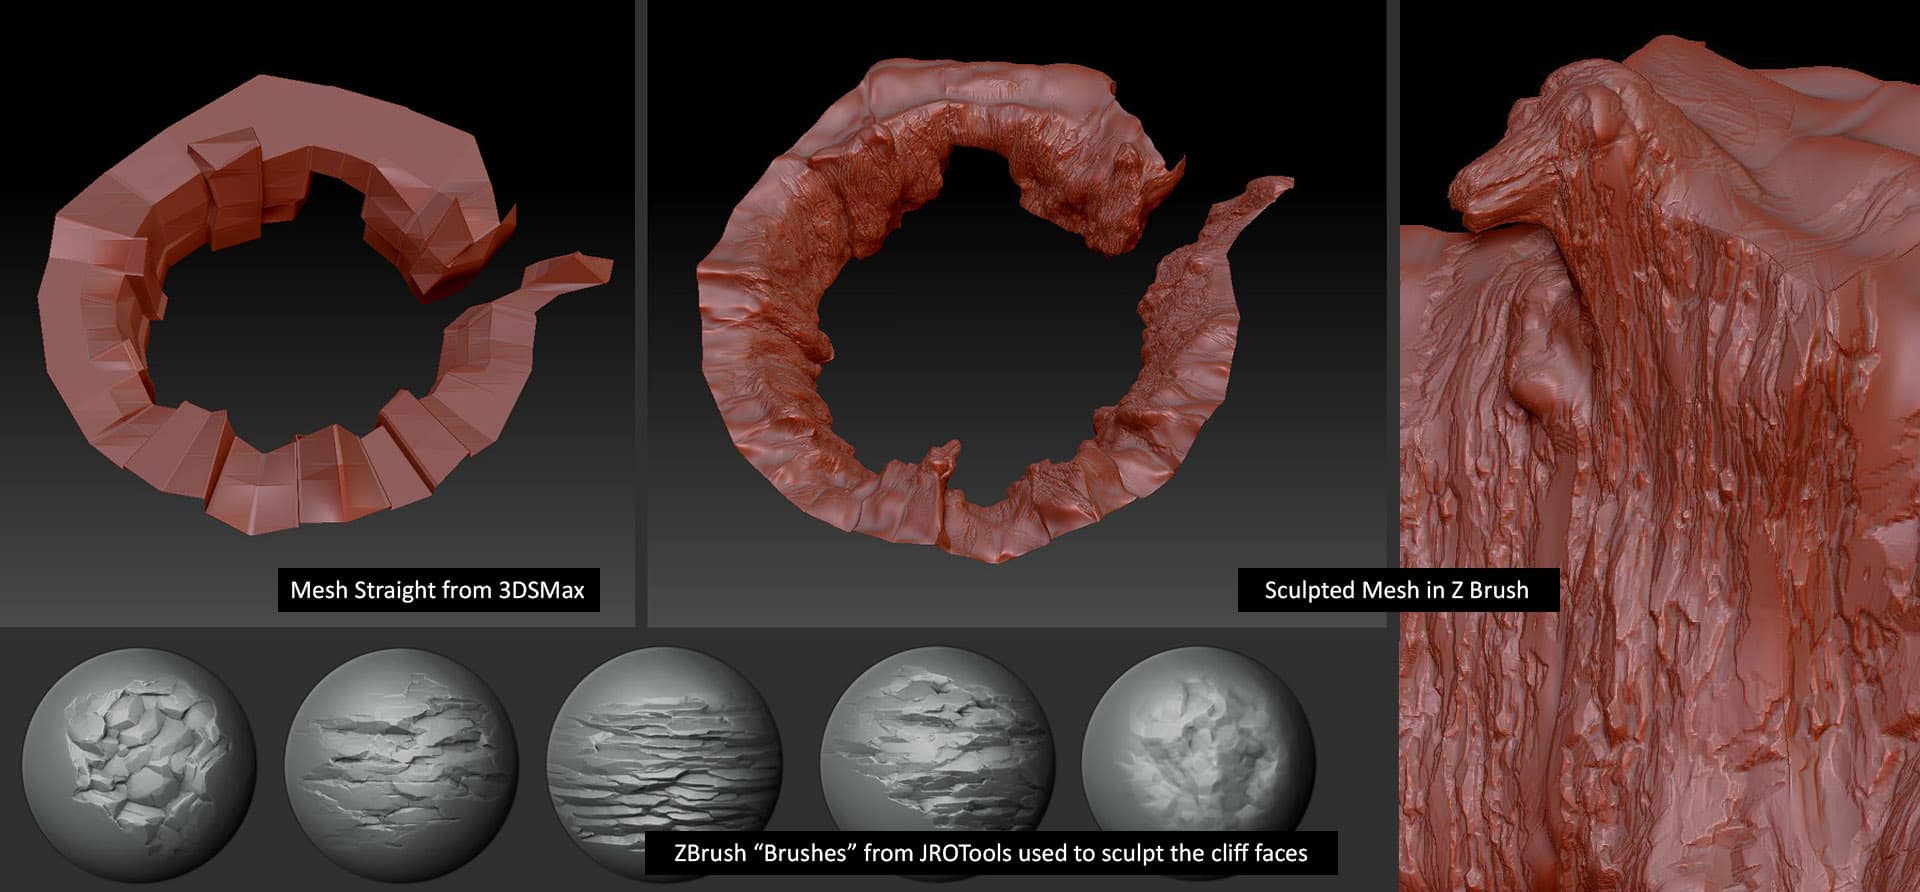
The first item I modeled adequately was the surrounding cliff faces. I sketched the basic shape in 3dsMax and then took it into ZBrush to sculpt the details. I tried a few techniques before I settle on using some rock alpha brushes created by JROTools.
These brushes helped to create a more realistic rock look a lot quicker than manually sculpting the mesh.
The seabed and water are just basic poly modeling with a turbosmooth modifier applied.
Textures
The three main textures in the scene are the cliffs, the sand, and the water.
Cliff Texture
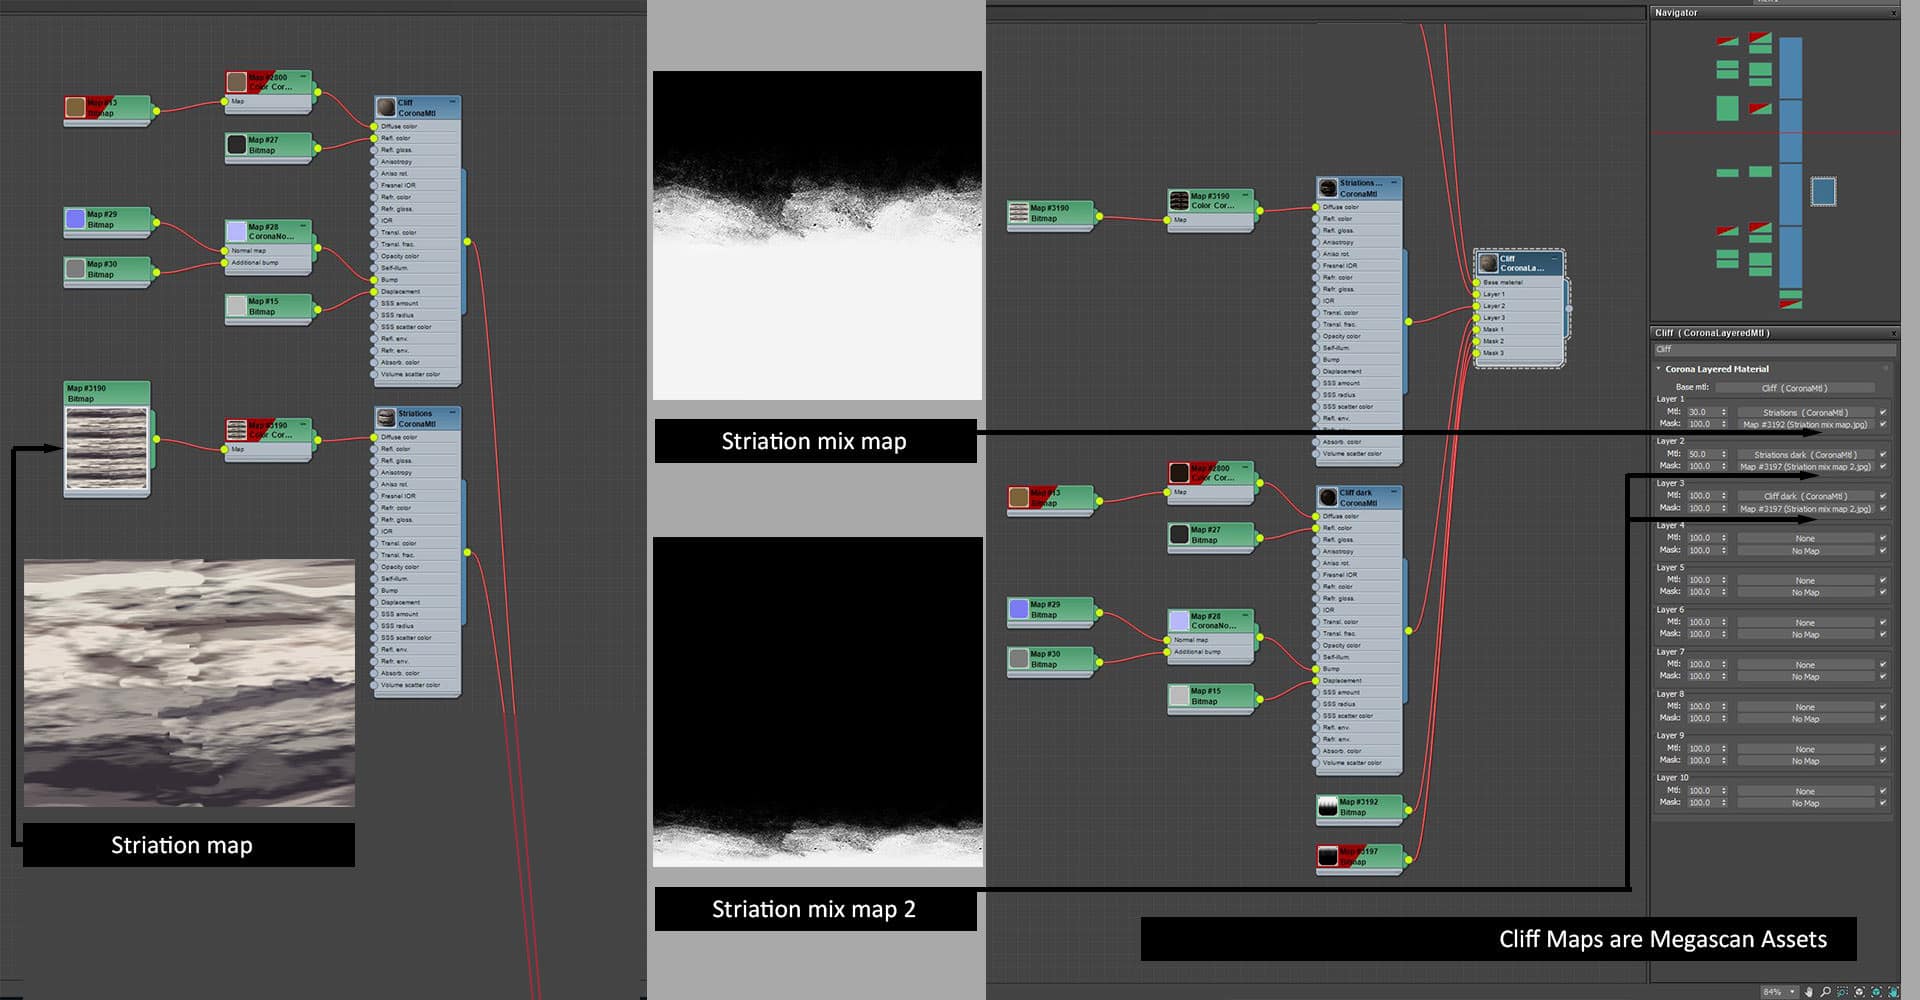
The texture I created for the cliff is a mixture of a standard Megascans texture (Rock Jagged) with a procedural gradient ramp map I created to make the cliff walls look like they have an eroded look with a definite edge where they meet the water.
Sand Texture
The sand texture is pretty simple too. It is made up of a few noise maps and then has various mask bitmaps I painted in Photoshop to differentiate between wet sand and dry sand. I have a displacement modifier for where the sand is softest.
Water Texture
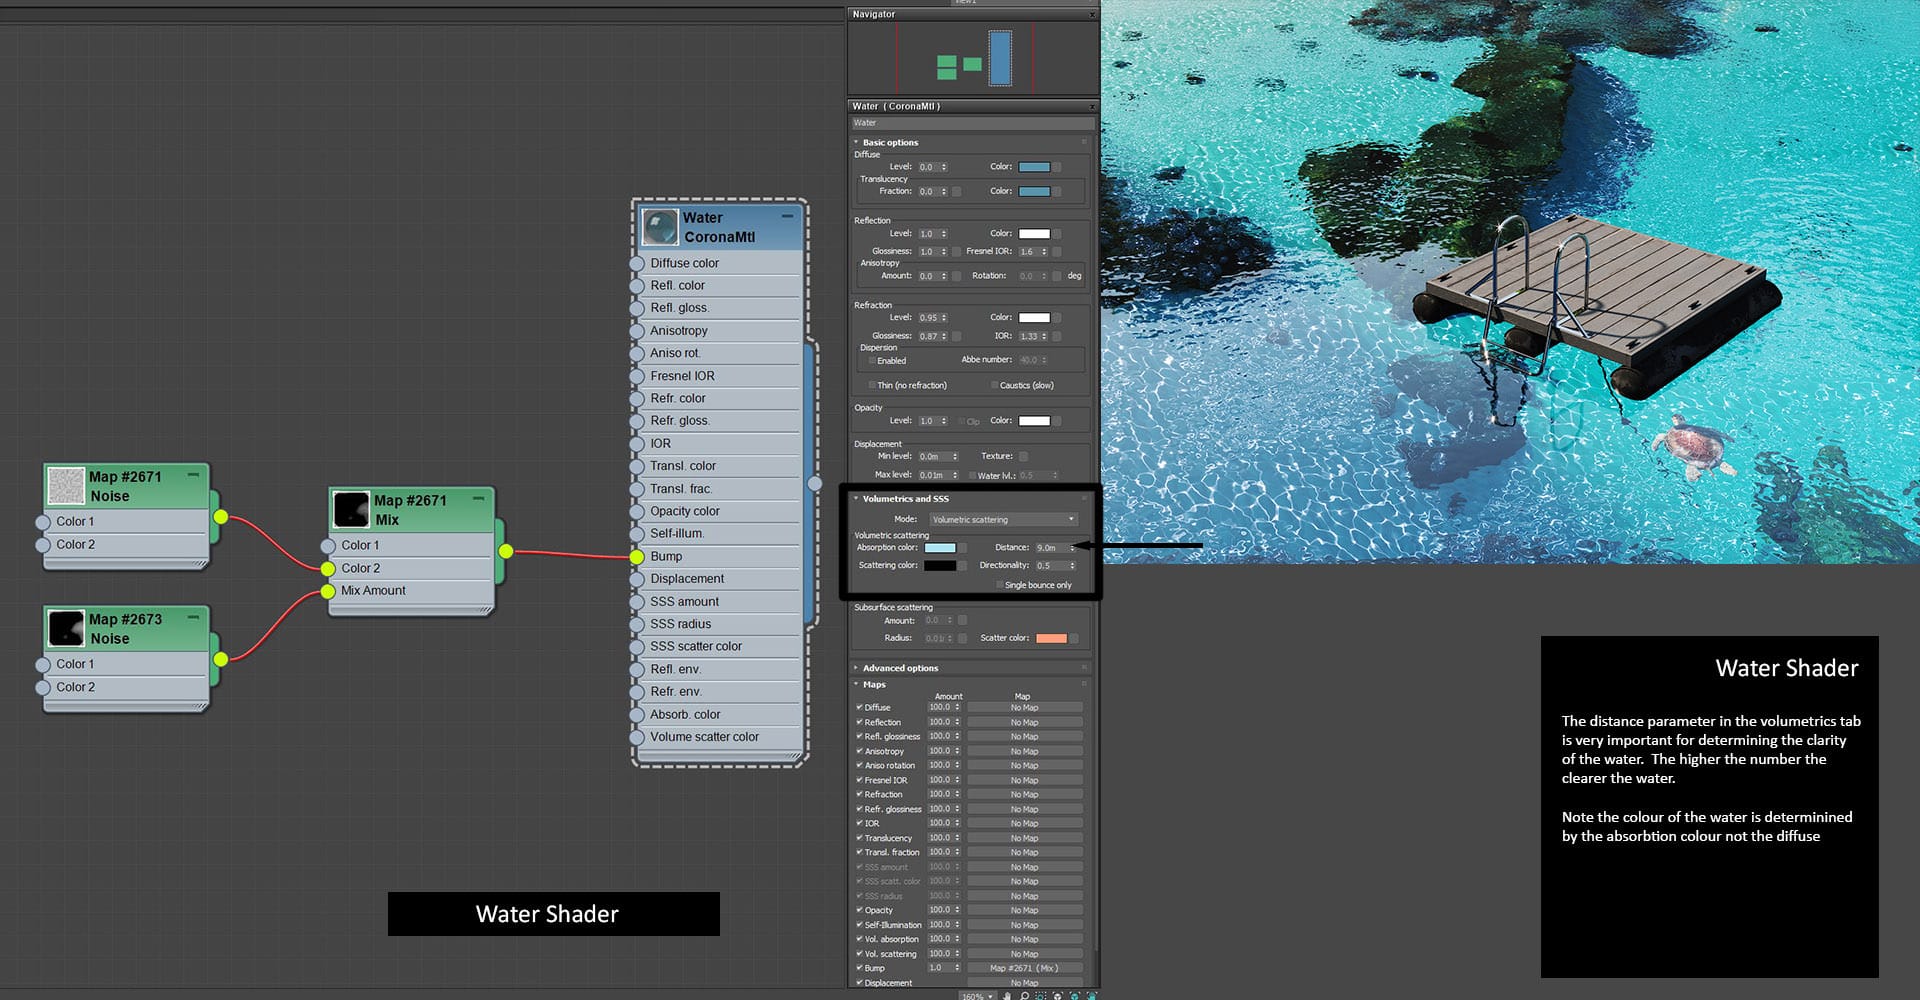
I spent an obscene amount of time on the water during this project, mostly playing with the shader in Corona, but also playing with the seabed model to make sure I was getting an exact depth change with color and visibility both above and below the surface. The shader, after all, is so simple. It just needed a lot more adjusting per shot compared to the other shaders in the scene.
Trees & other Plantings
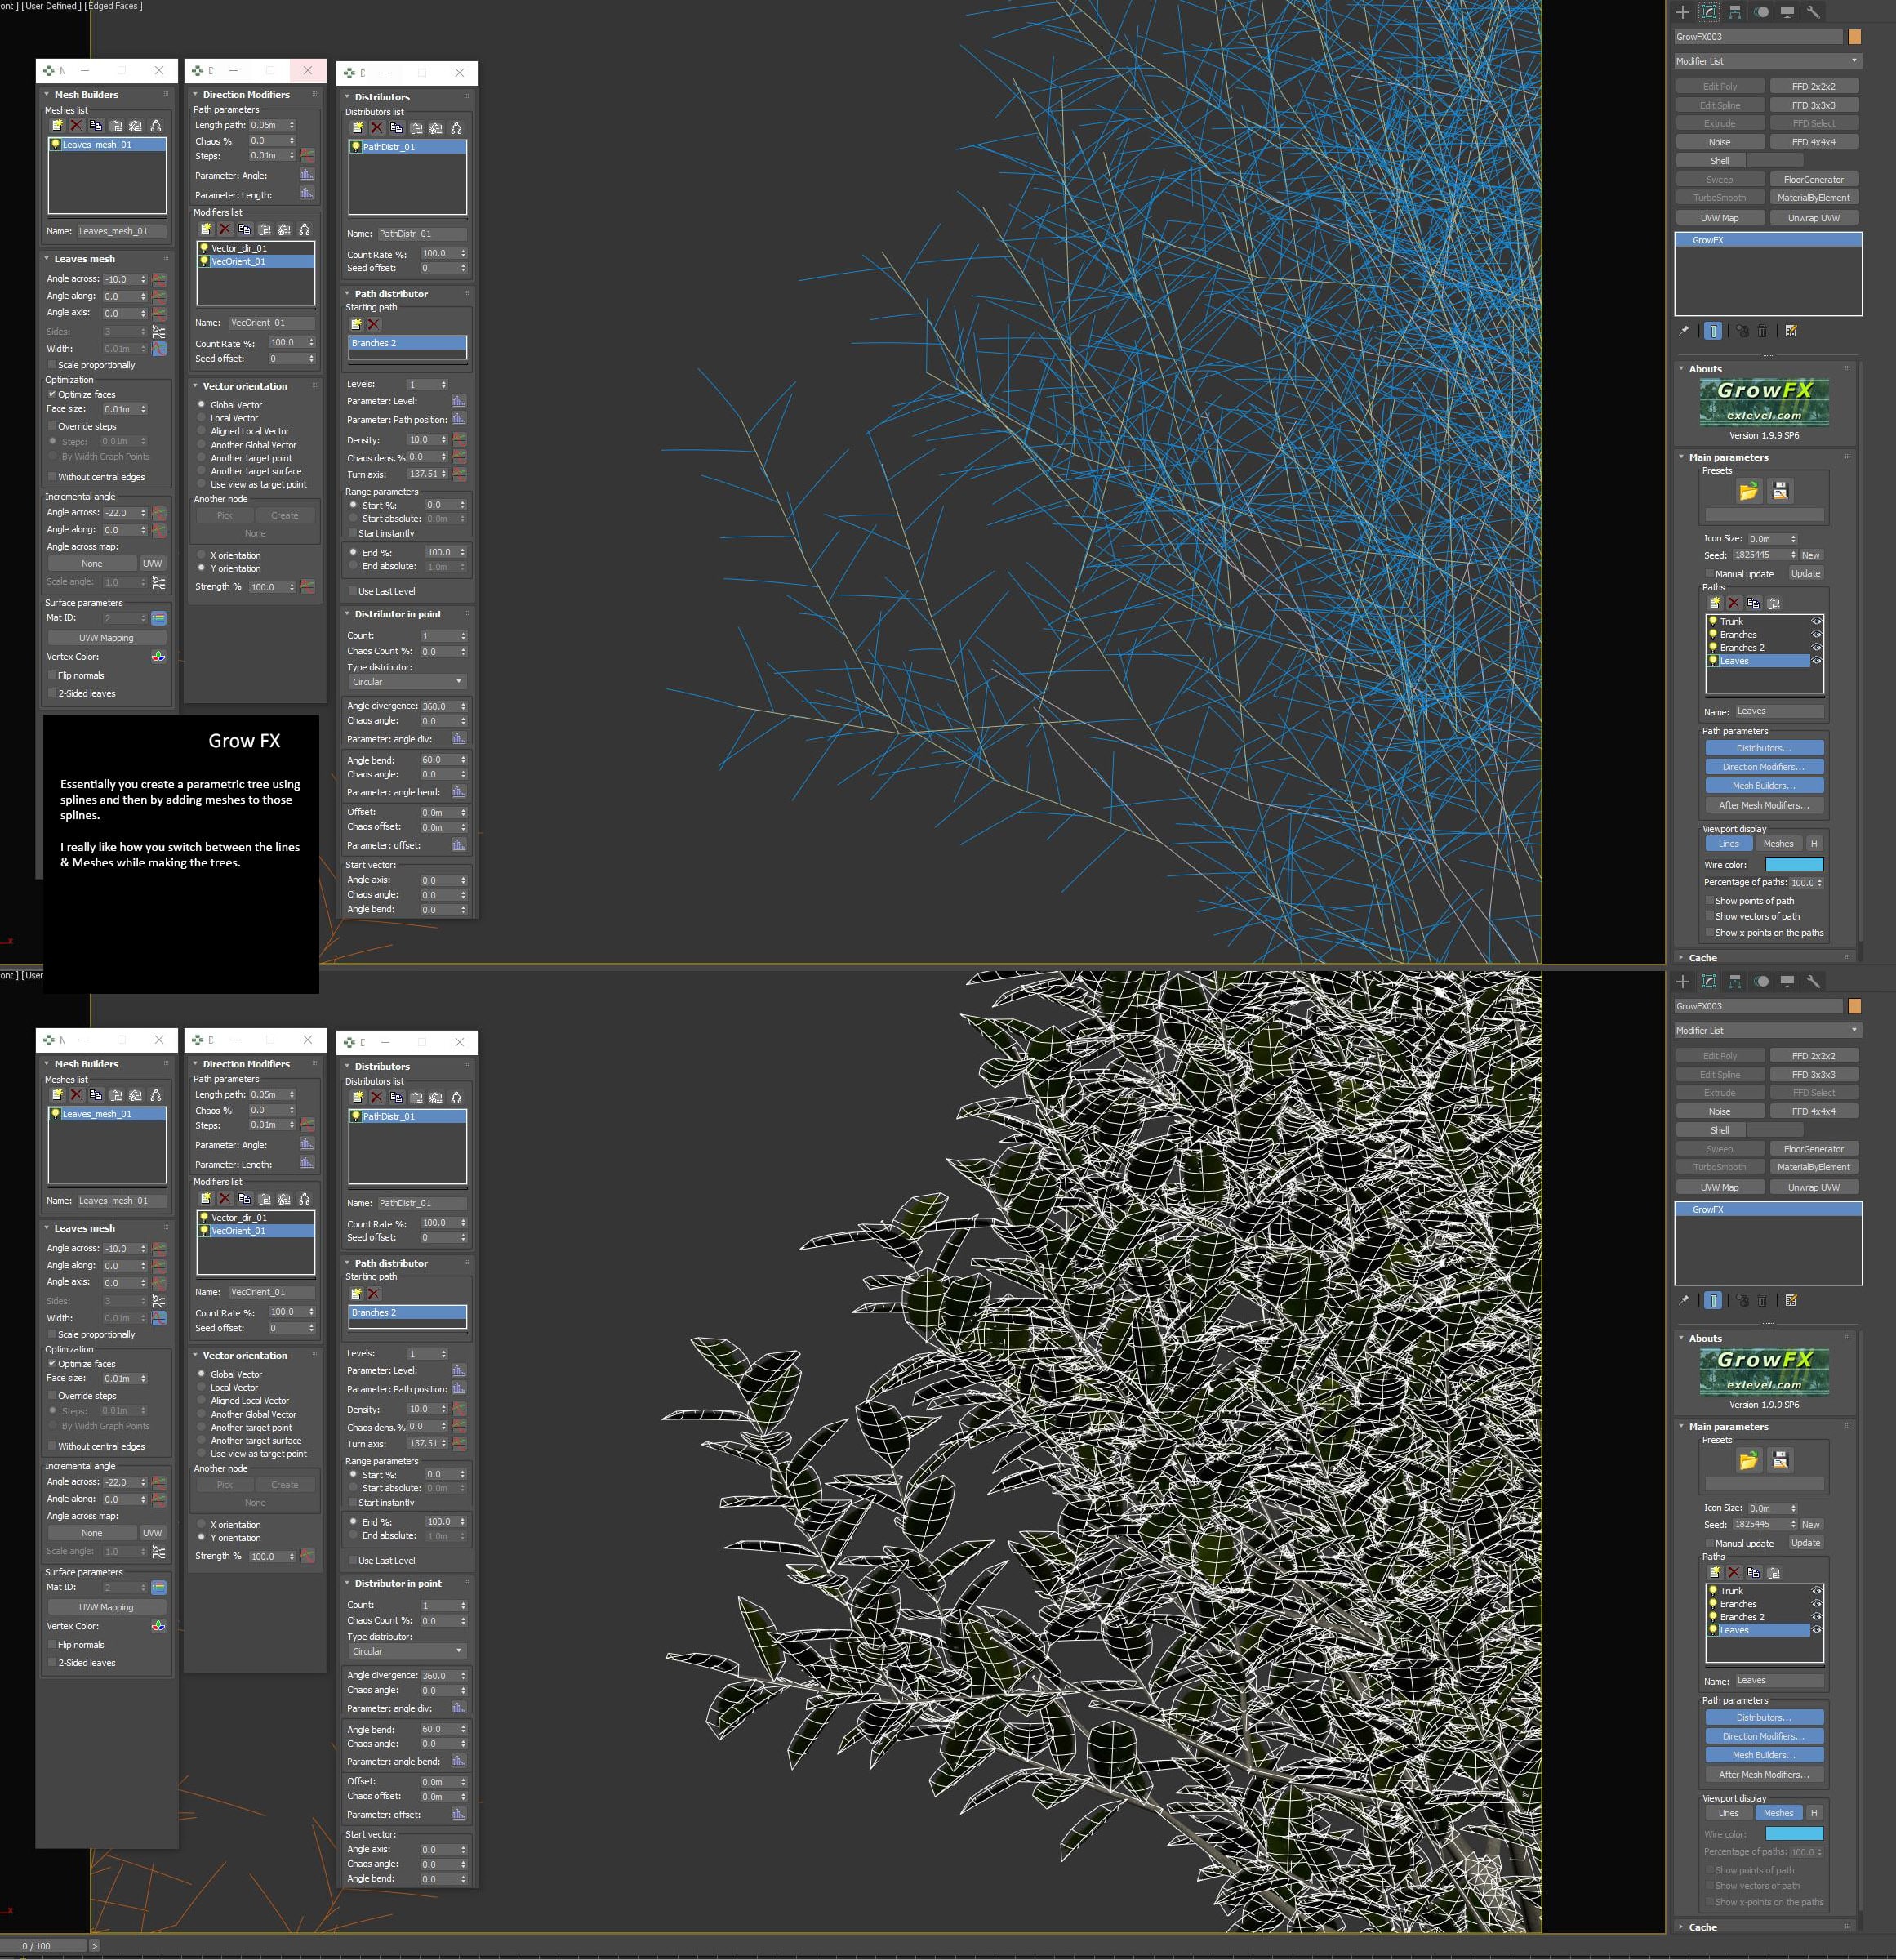
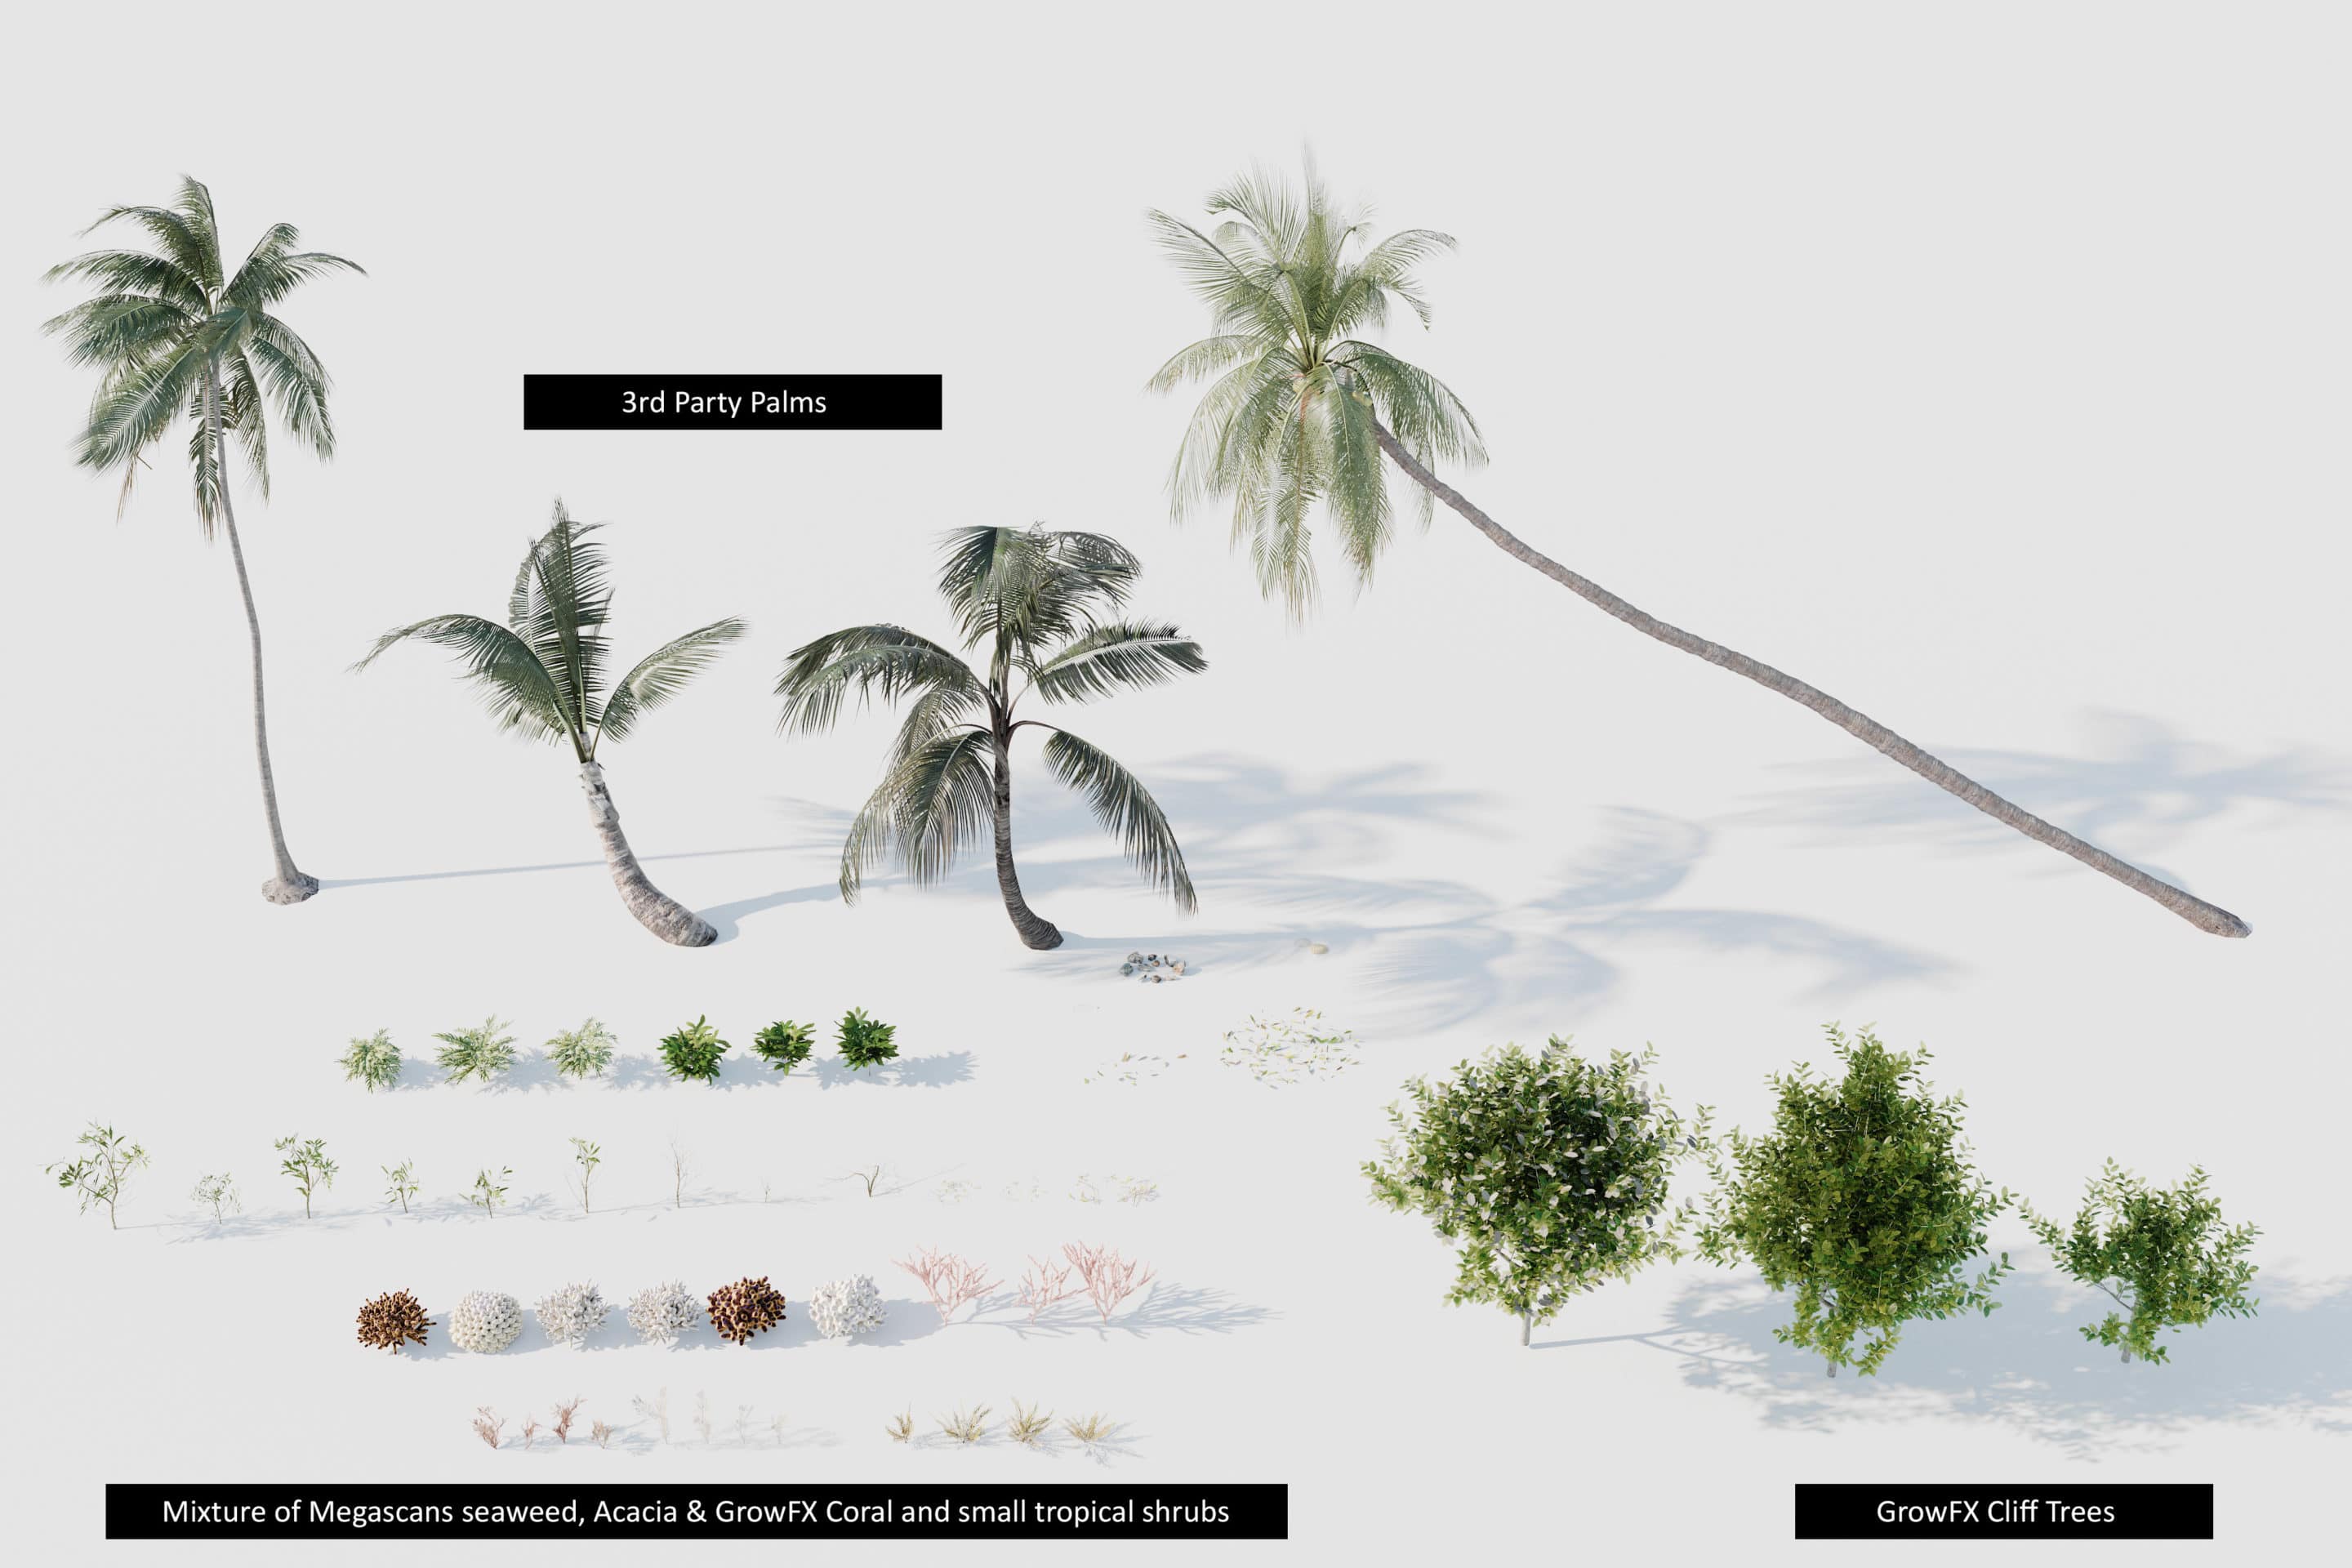
The trees and plants in my entry are modeled in Exlevel GrowFX apart from a few smaller models from Megascans and the Palm Trees from another, 3rd Party, asset maker. I like GrowFX – once you have made a tree you are happy with, you can create many different variations at the click of a button. I have been using it for years, but I am still to master a perfect tree model.
Its simple to use but challenging to get the tree you want but the resources are great from their website & forum.
This here is a prime example of amazing artists in our industry sharing invaluable knowledge.
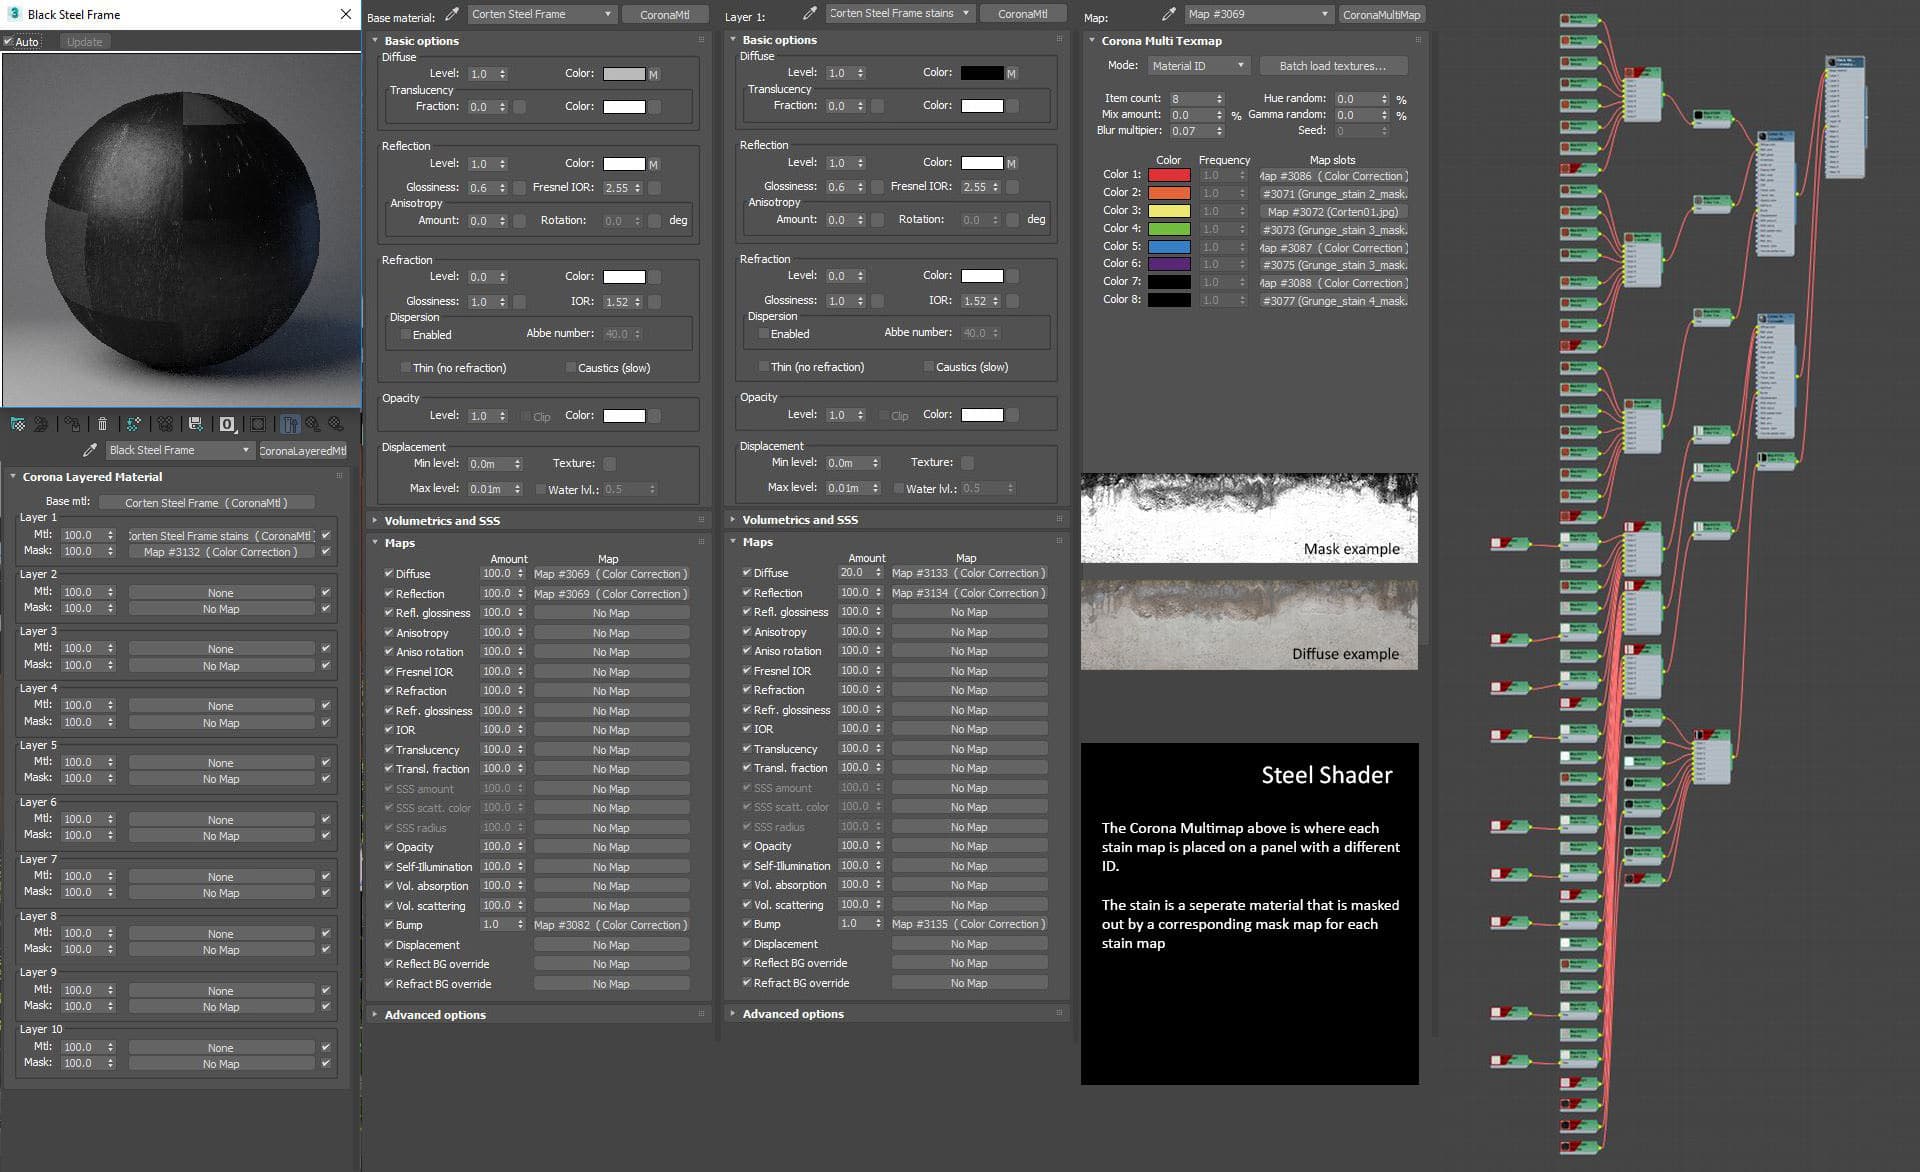
Here is the shader I created for the trees. I find that these sometimes need to be tweaked based on the light direction and viewing angle. Usually the translucency and reflection. Not Overly complicated – just slotting in the Megascan maps in their corresponding slots.
The Forest
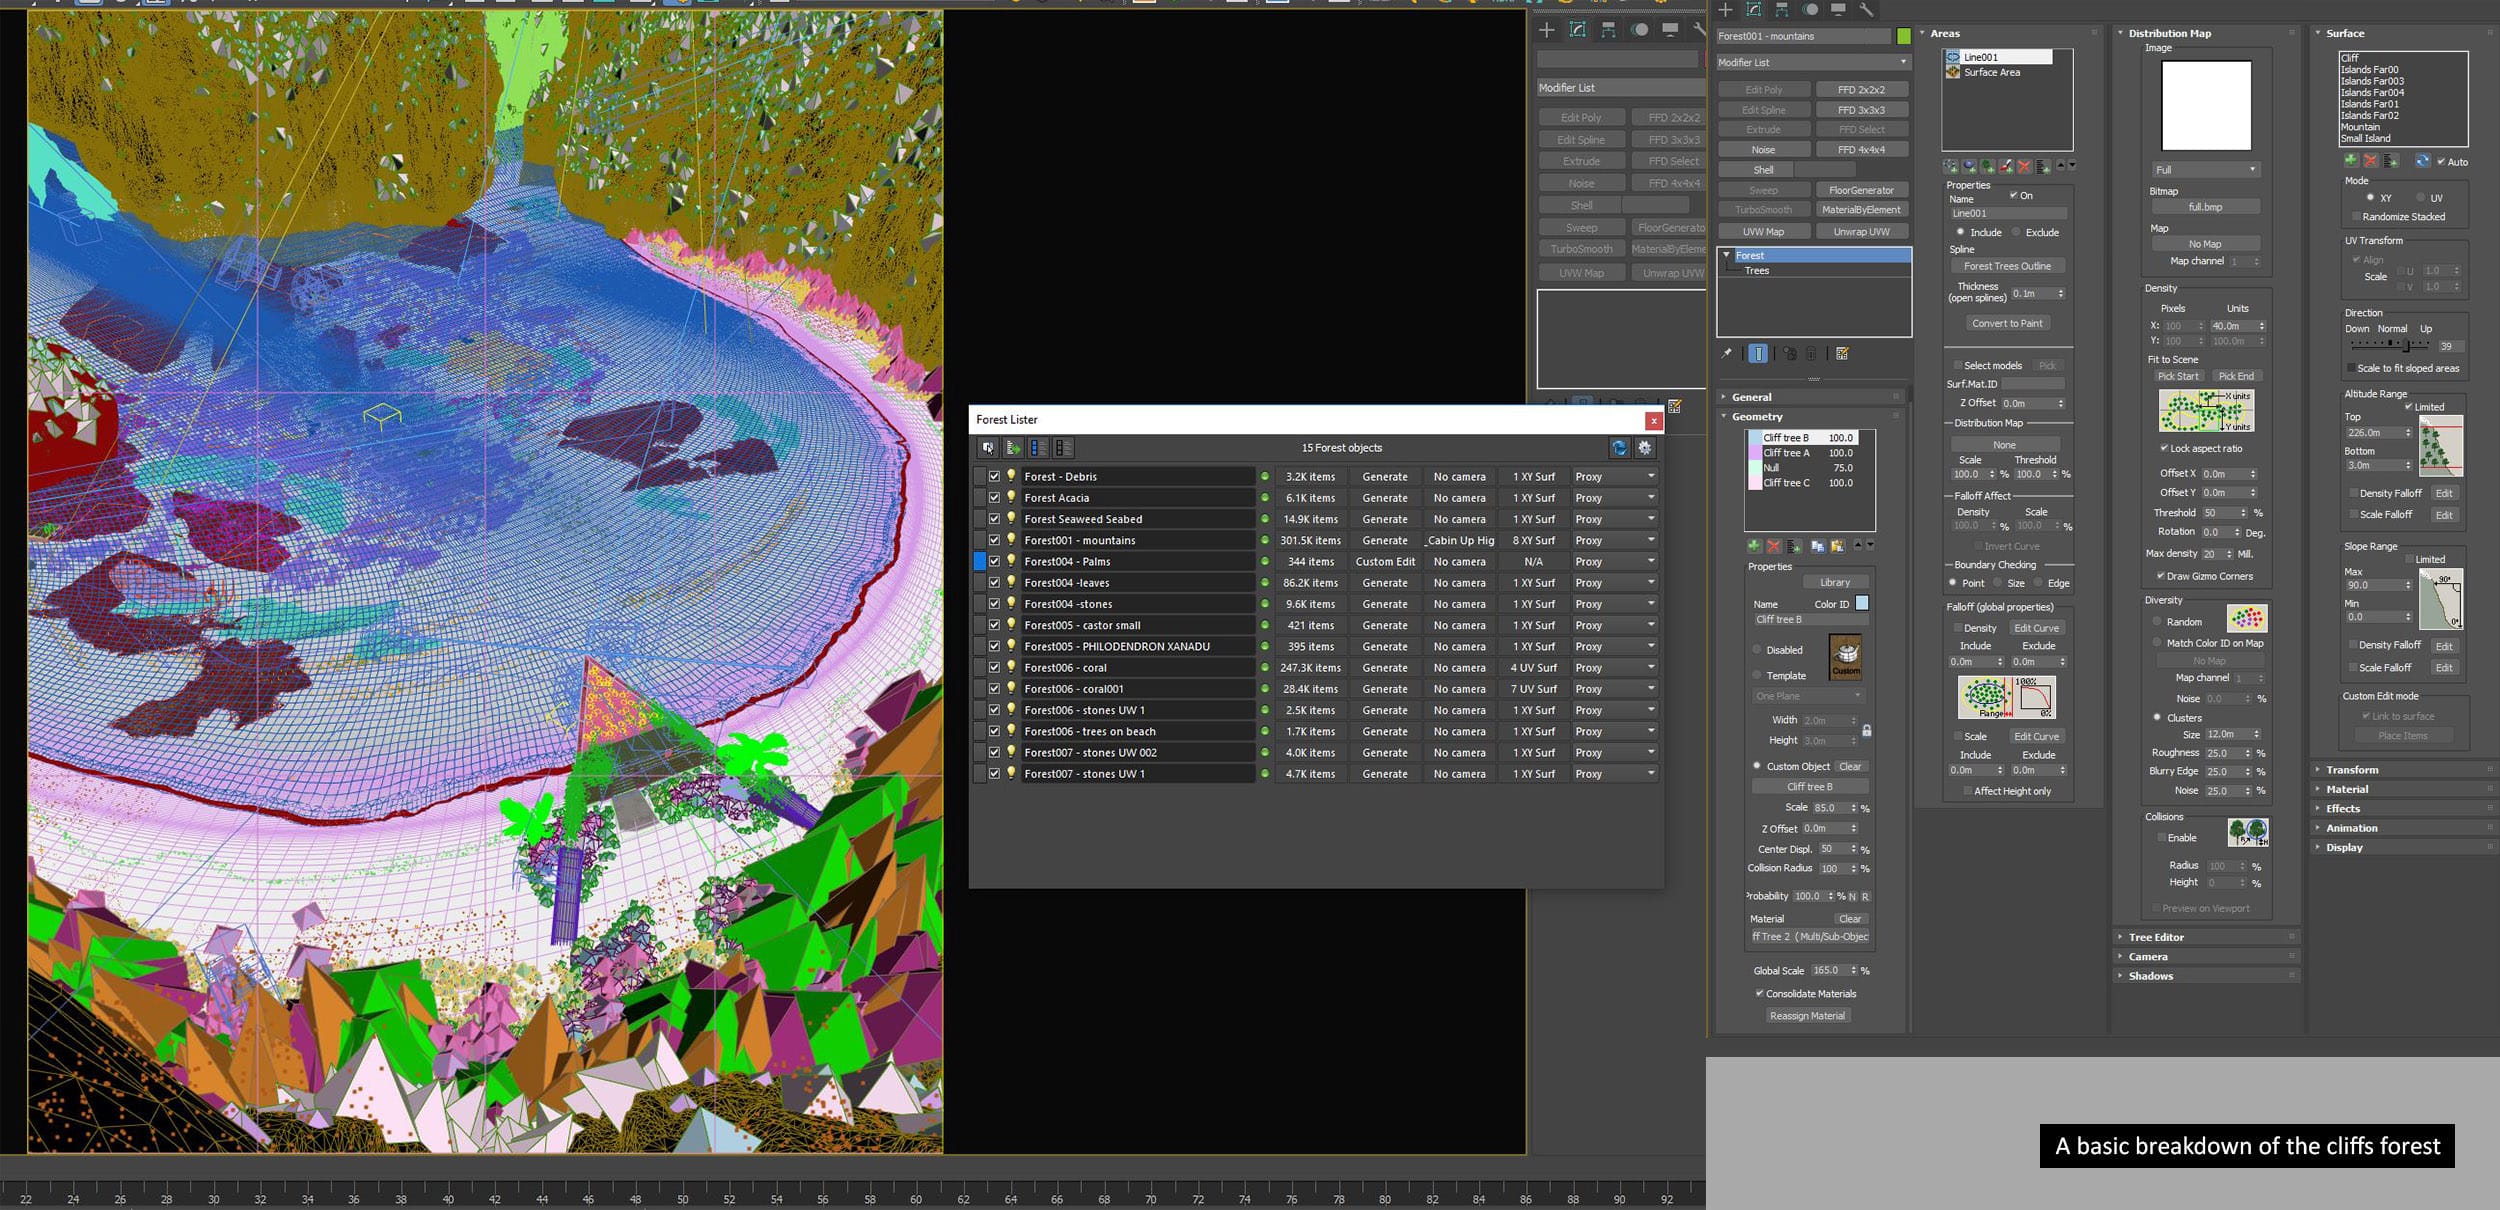
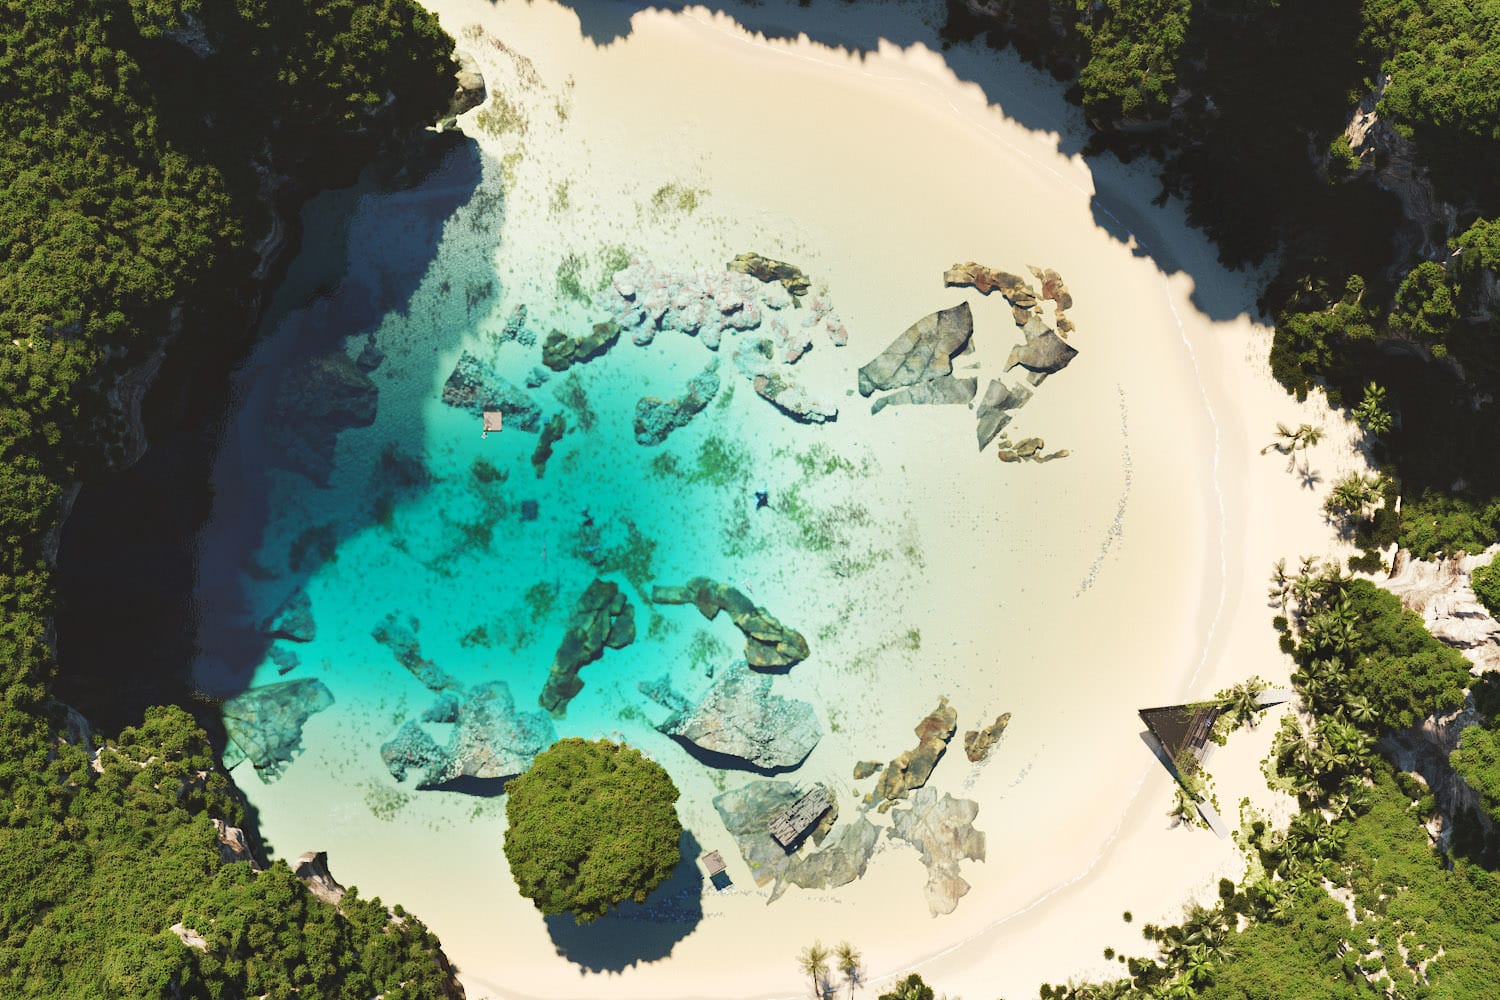
I can’t mention the trees without mentioning the forests component. All my trees are placed using iToo Software’s Forest Pack except a couple here and there. In fact, all the underwater plants, small stones, and debris on the beach and underwater are all placed using Forest Pack.
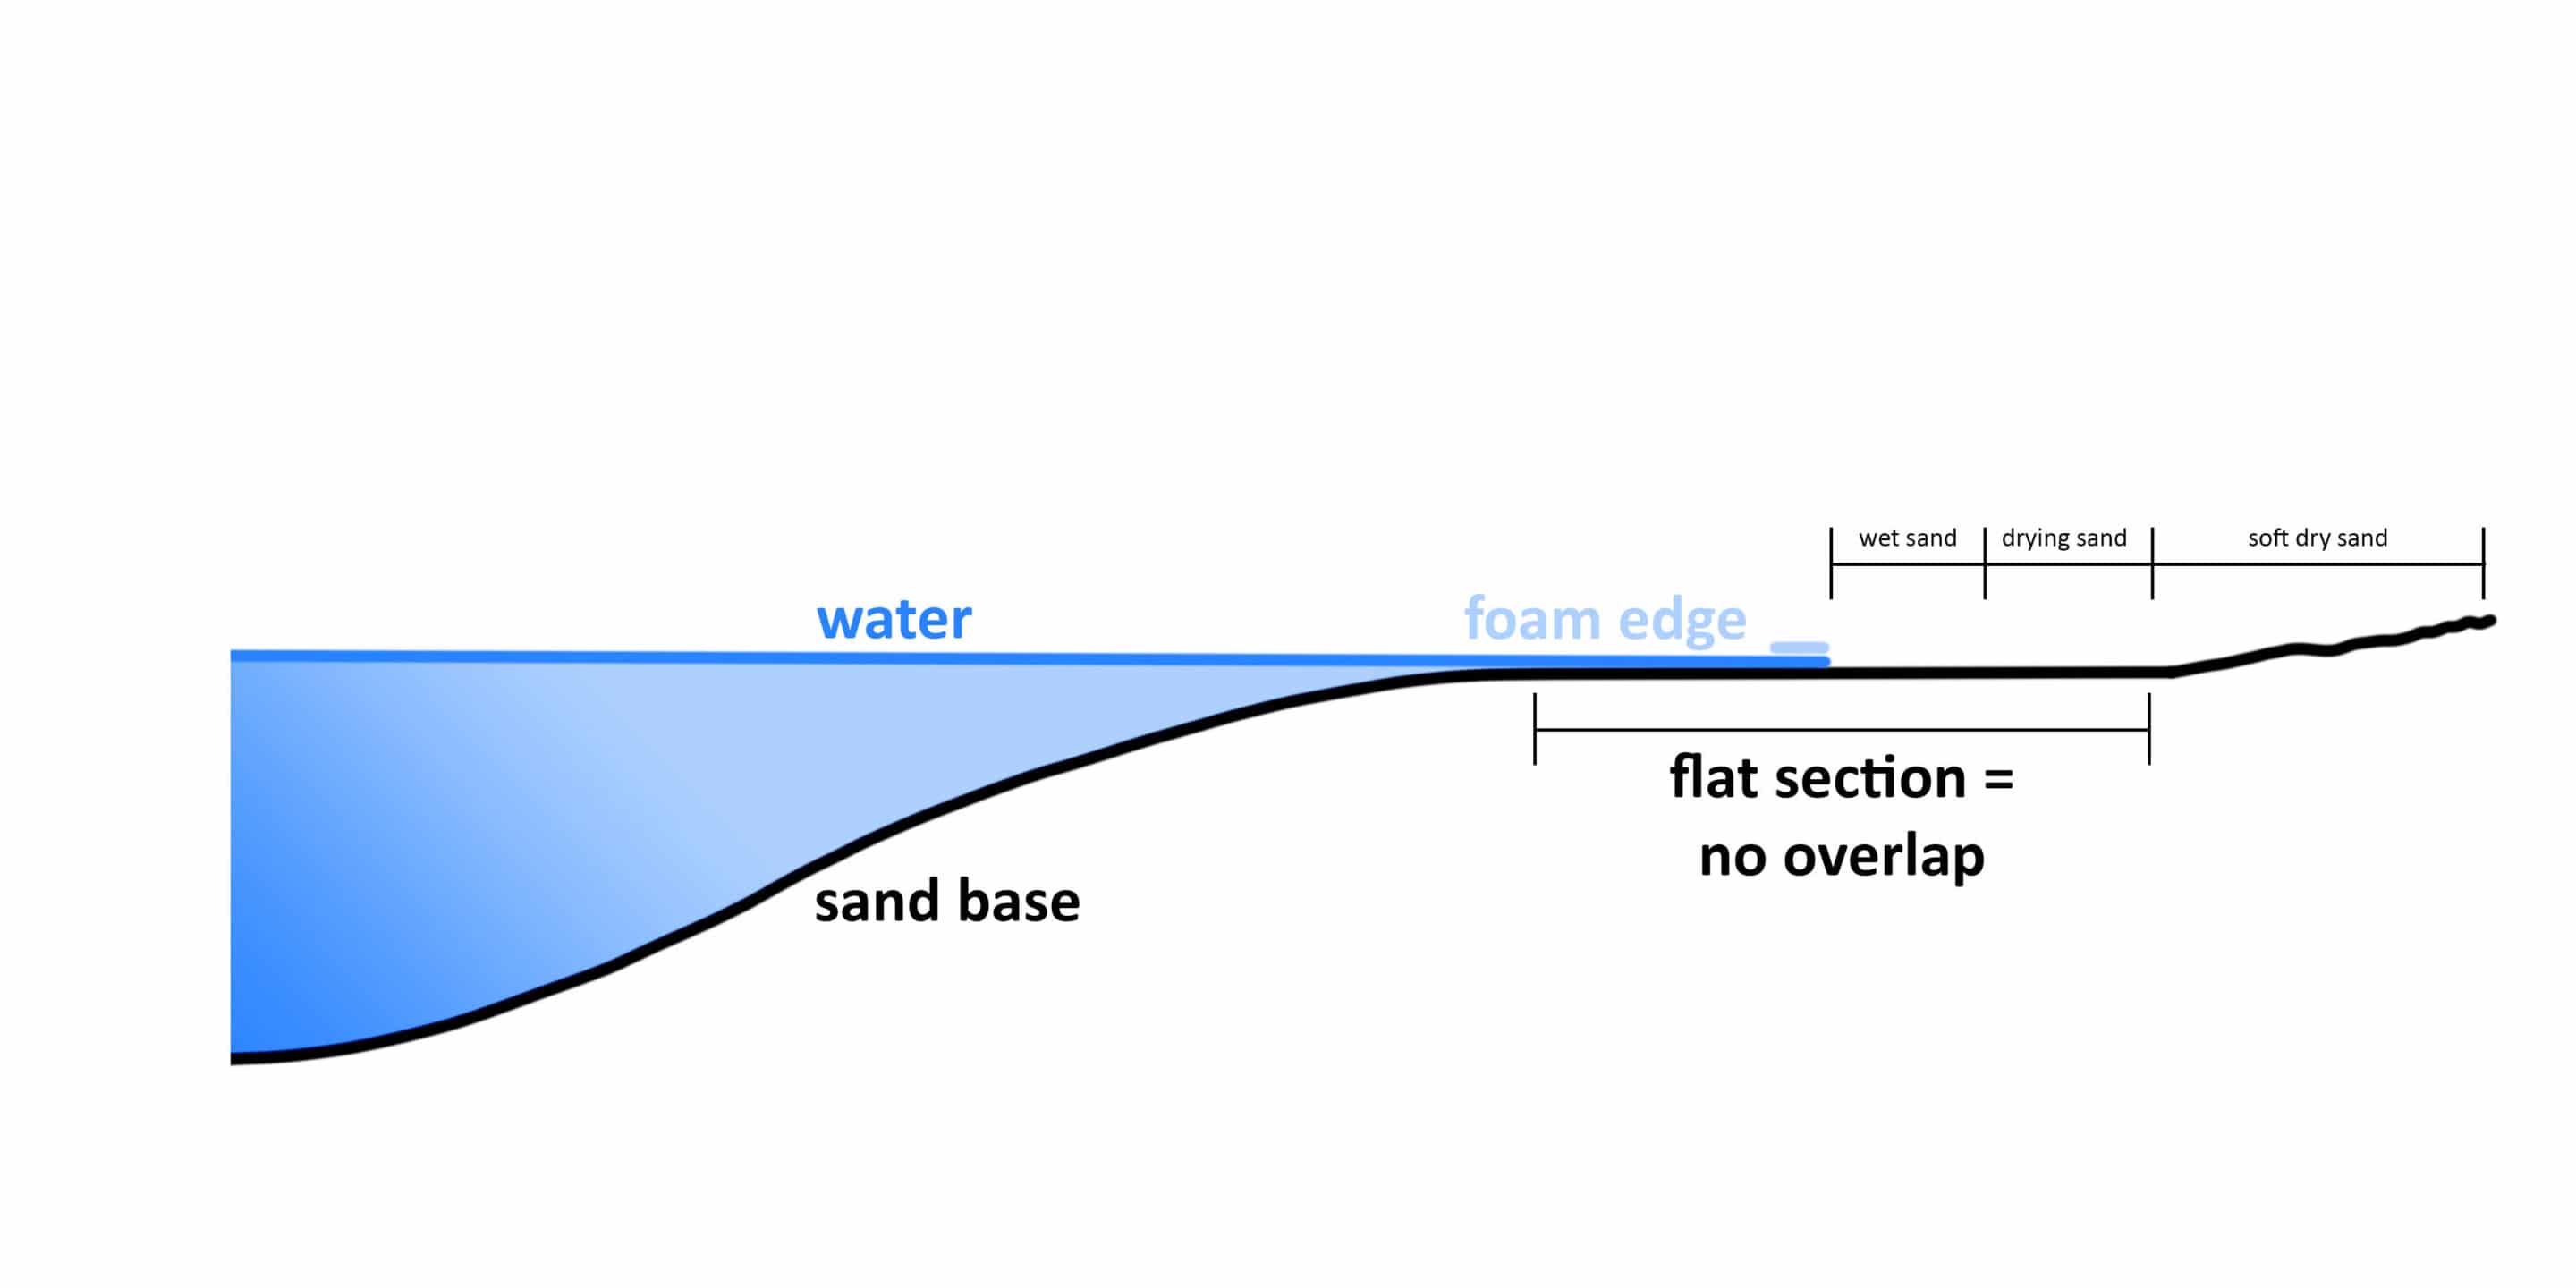
The נeach or sand is another element I spent a bit of time on mostly trying to get the colors right and painting the various masks for the transitions of wet to drying to dry.
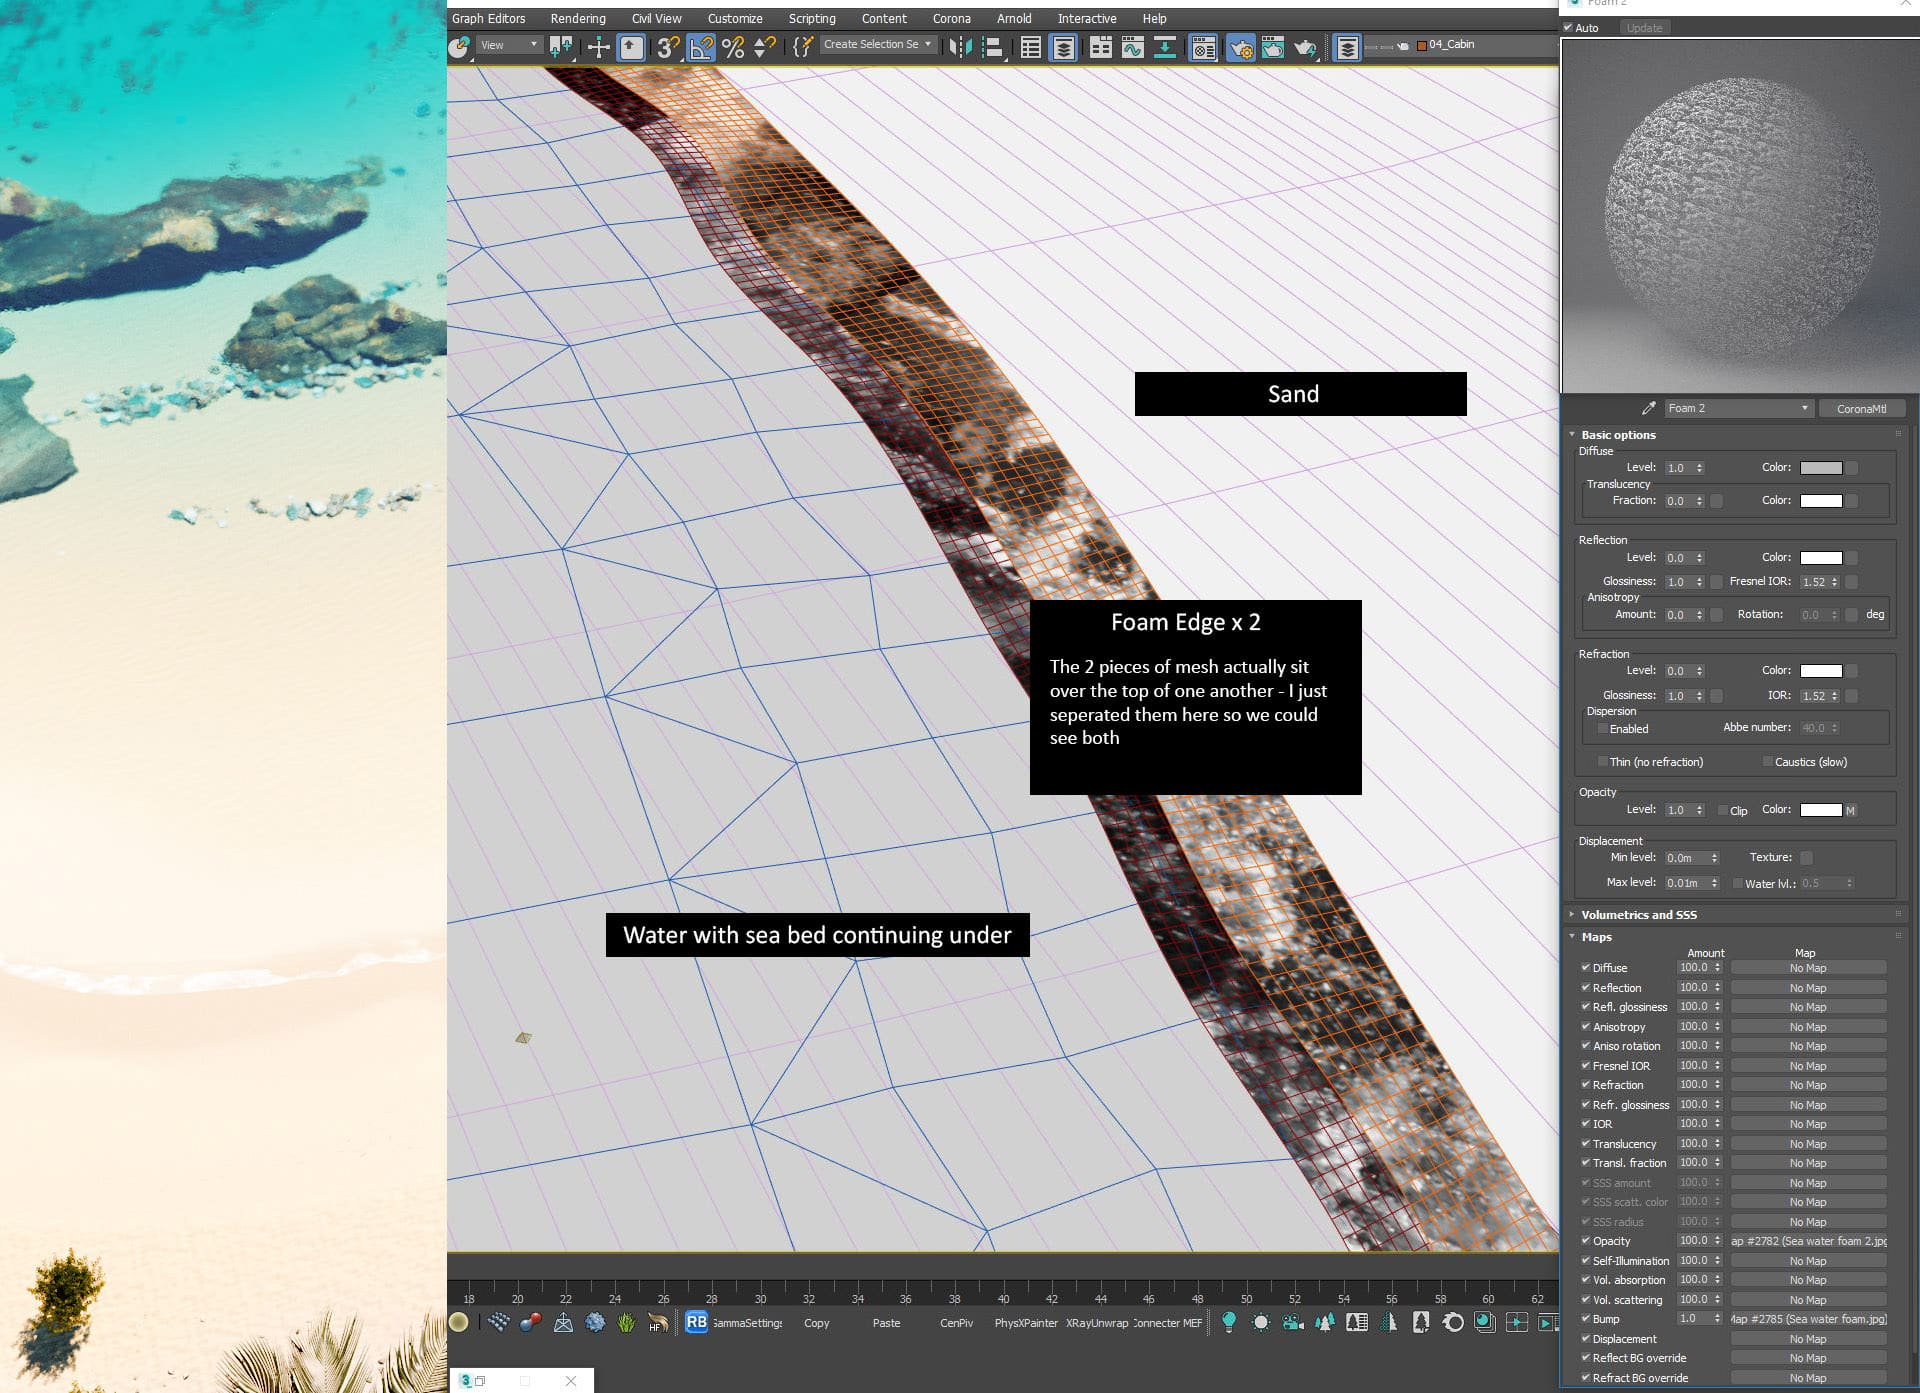
I started with an underlying mesh and then turbo-smoothed it, so I could add some subtle noise displacement but quickly realized that wouldn’t work with the water’s edge. The waters edge required the sand mesh to be completely flat all the way around, so I didn’t have the water mesh crashing through the sand mesh. I made sure I had a suitable plane to sit the water on with some subtle variation in the waters edge.
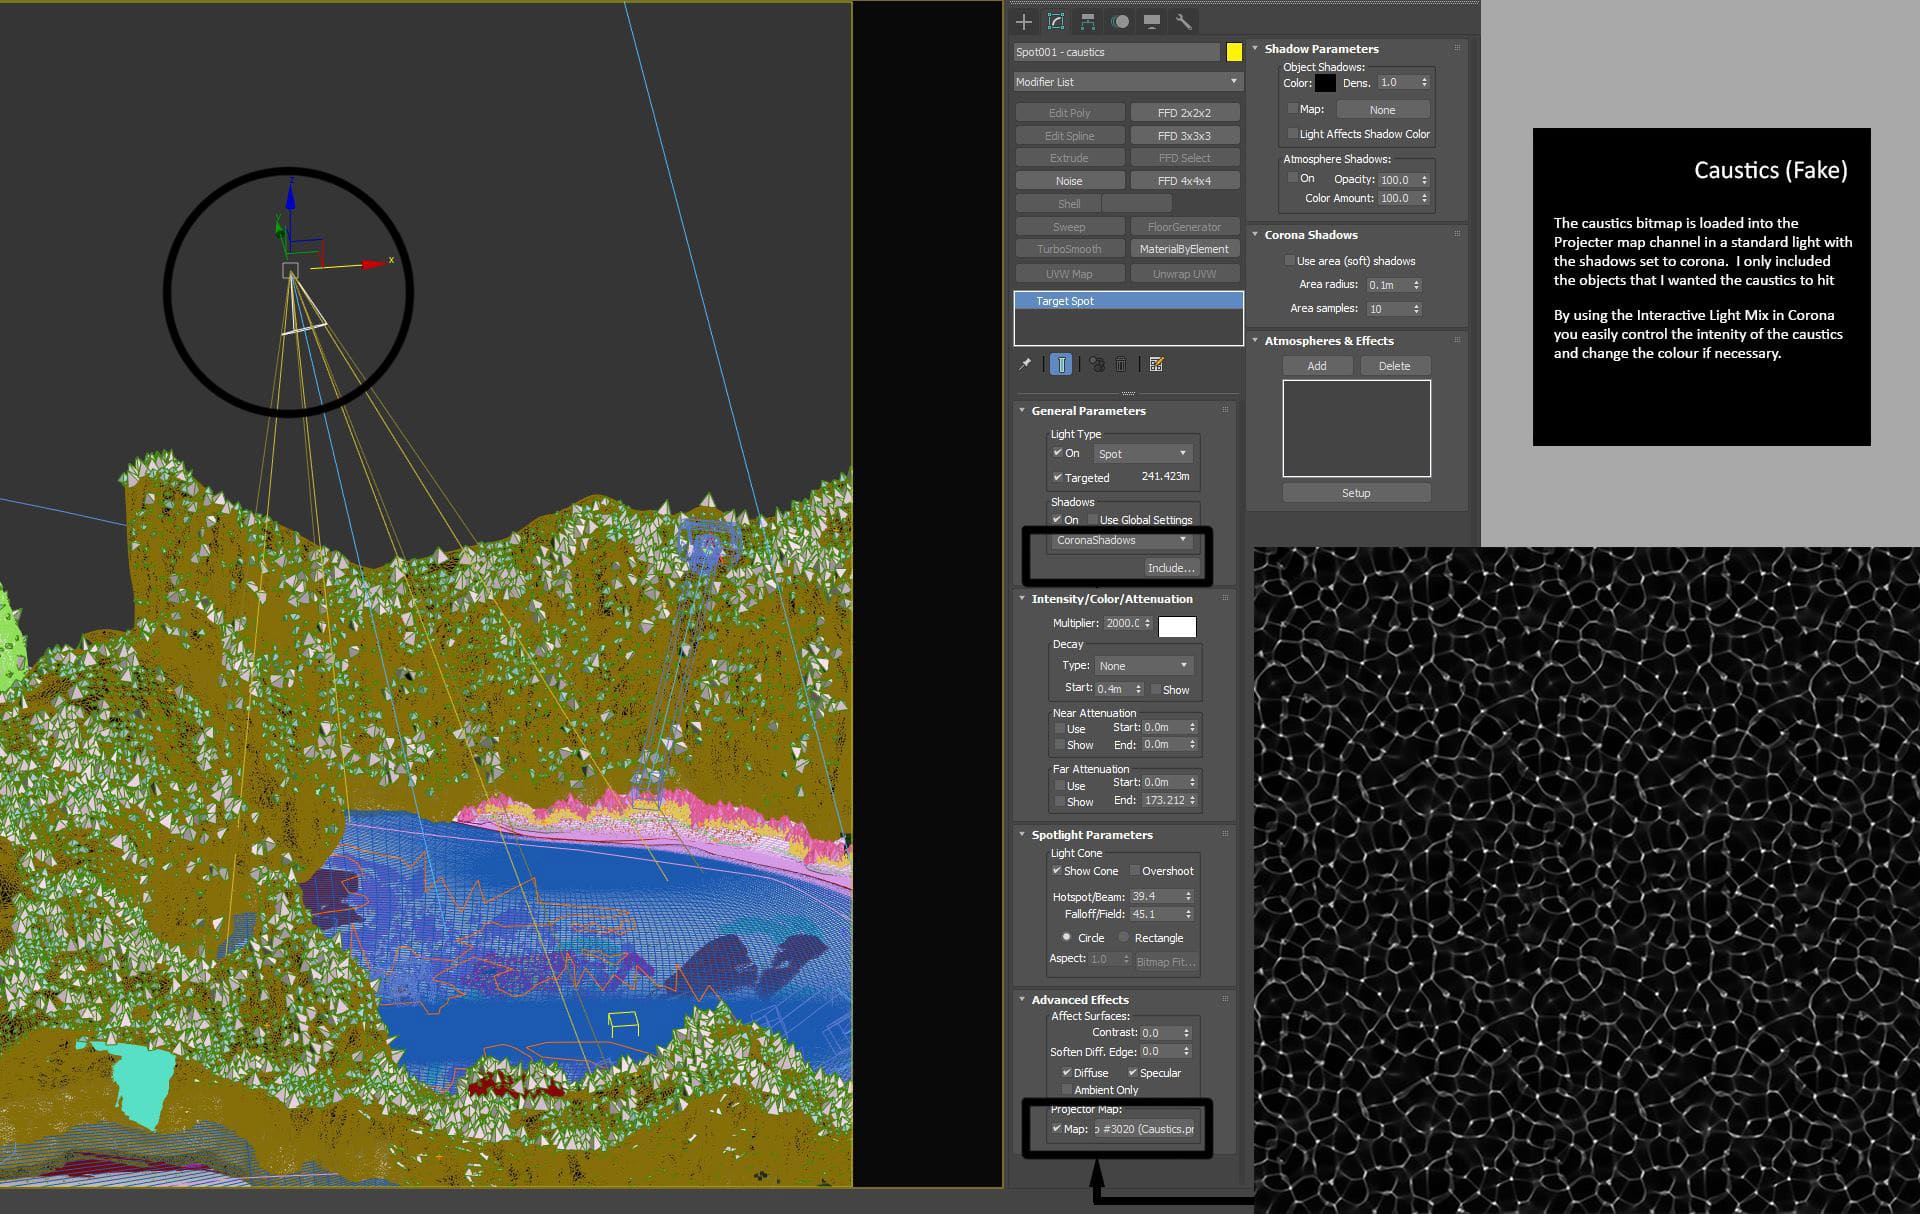
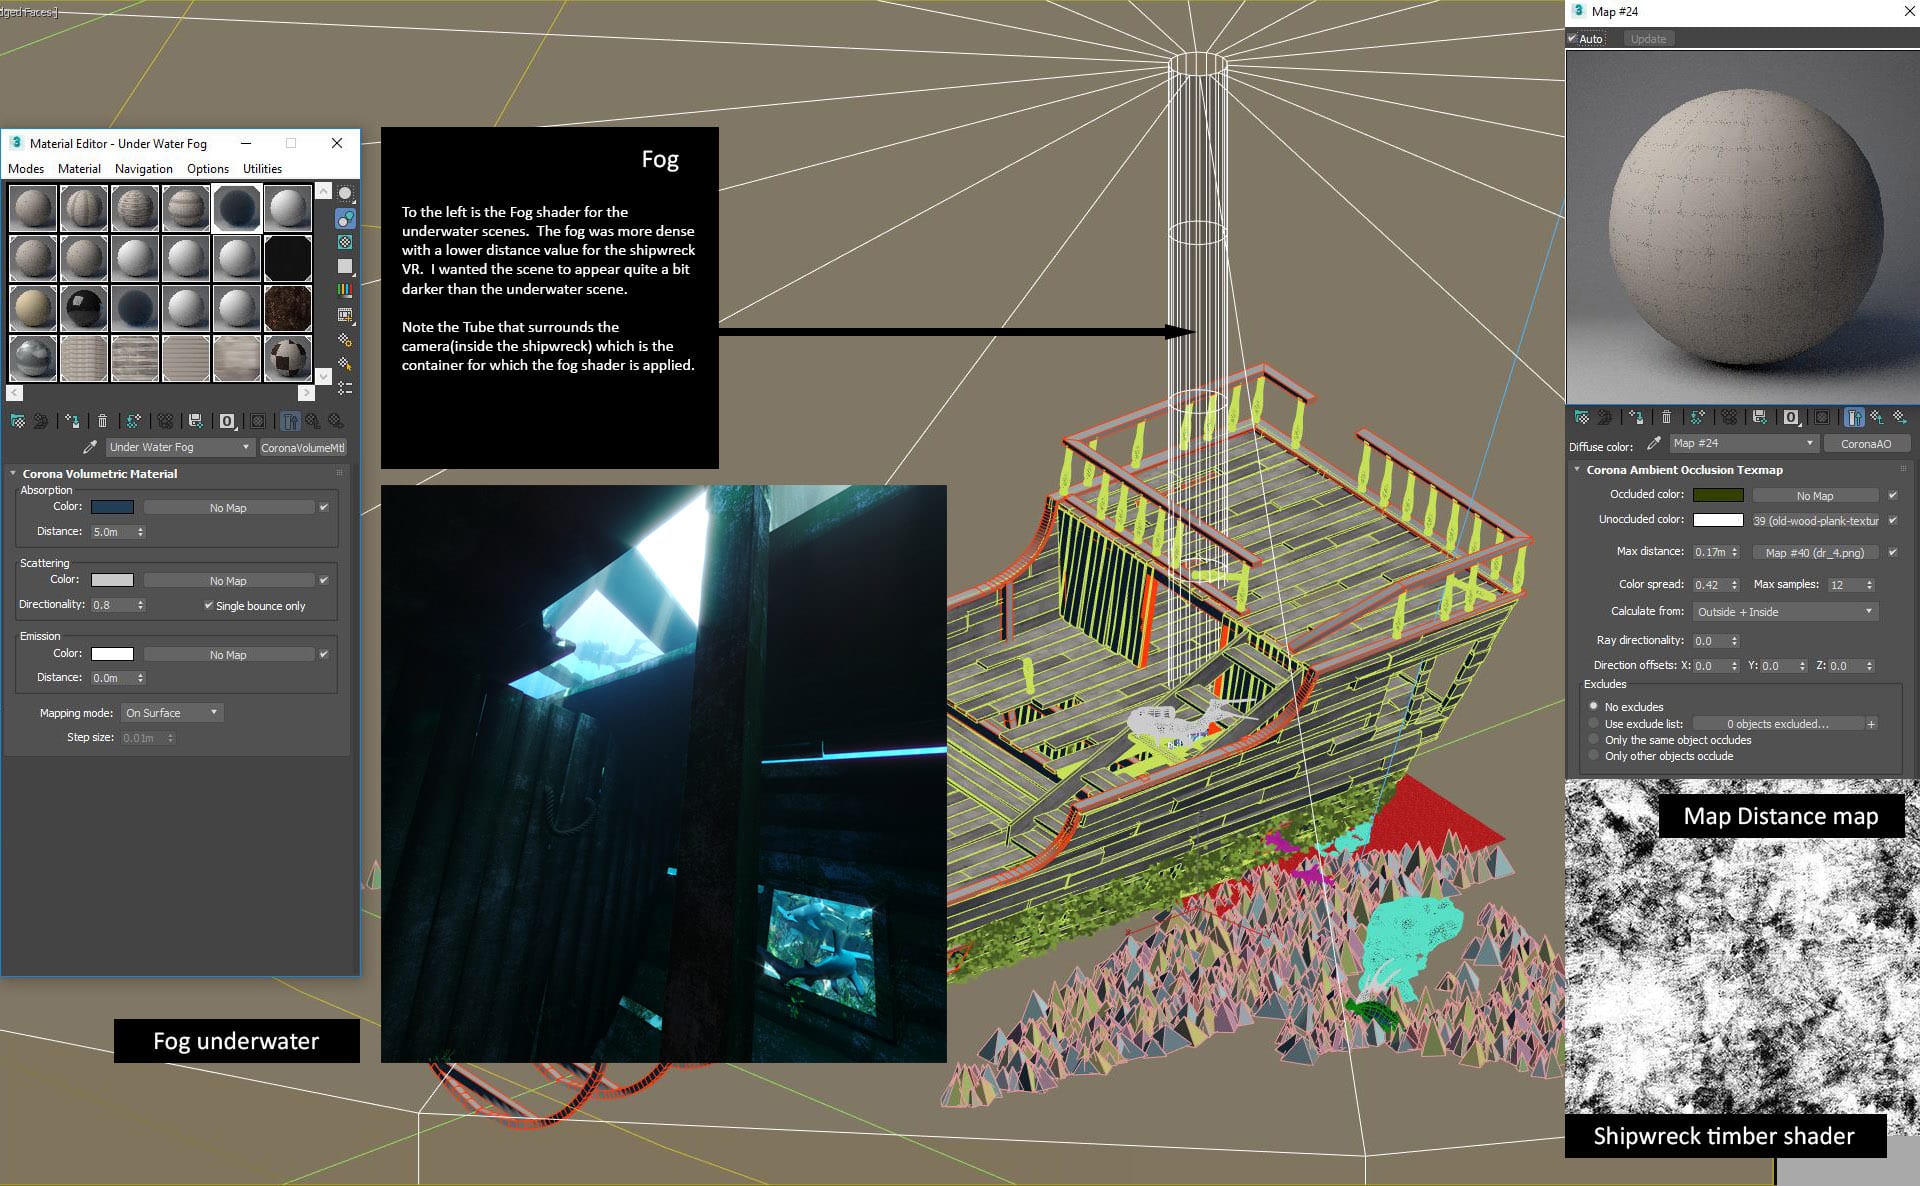
Because I only rendered the underwater scenes in VR, I created a tube container that the camera sat in so that when you rotated in any direction, you had the fog effect. A Corona Renderer Volume material was applied to this container to create the effect. This is also the reason you get the light rays coming through. The light rays a created by adding a caustics bitmap to a standard light like a projection. Corona Renderer doesn’t support caustics yet, so these had to be faked.
It would have been awesome to have a great model of an octopus or something in the foreground, but time is always an issue. One thing I realized during the project is that you don’t want objects too close to the camera when outputting VR’s which was the case of the Shipwreck scene.
I found out while wearing VR goggles, and it does weird things with your eyes!
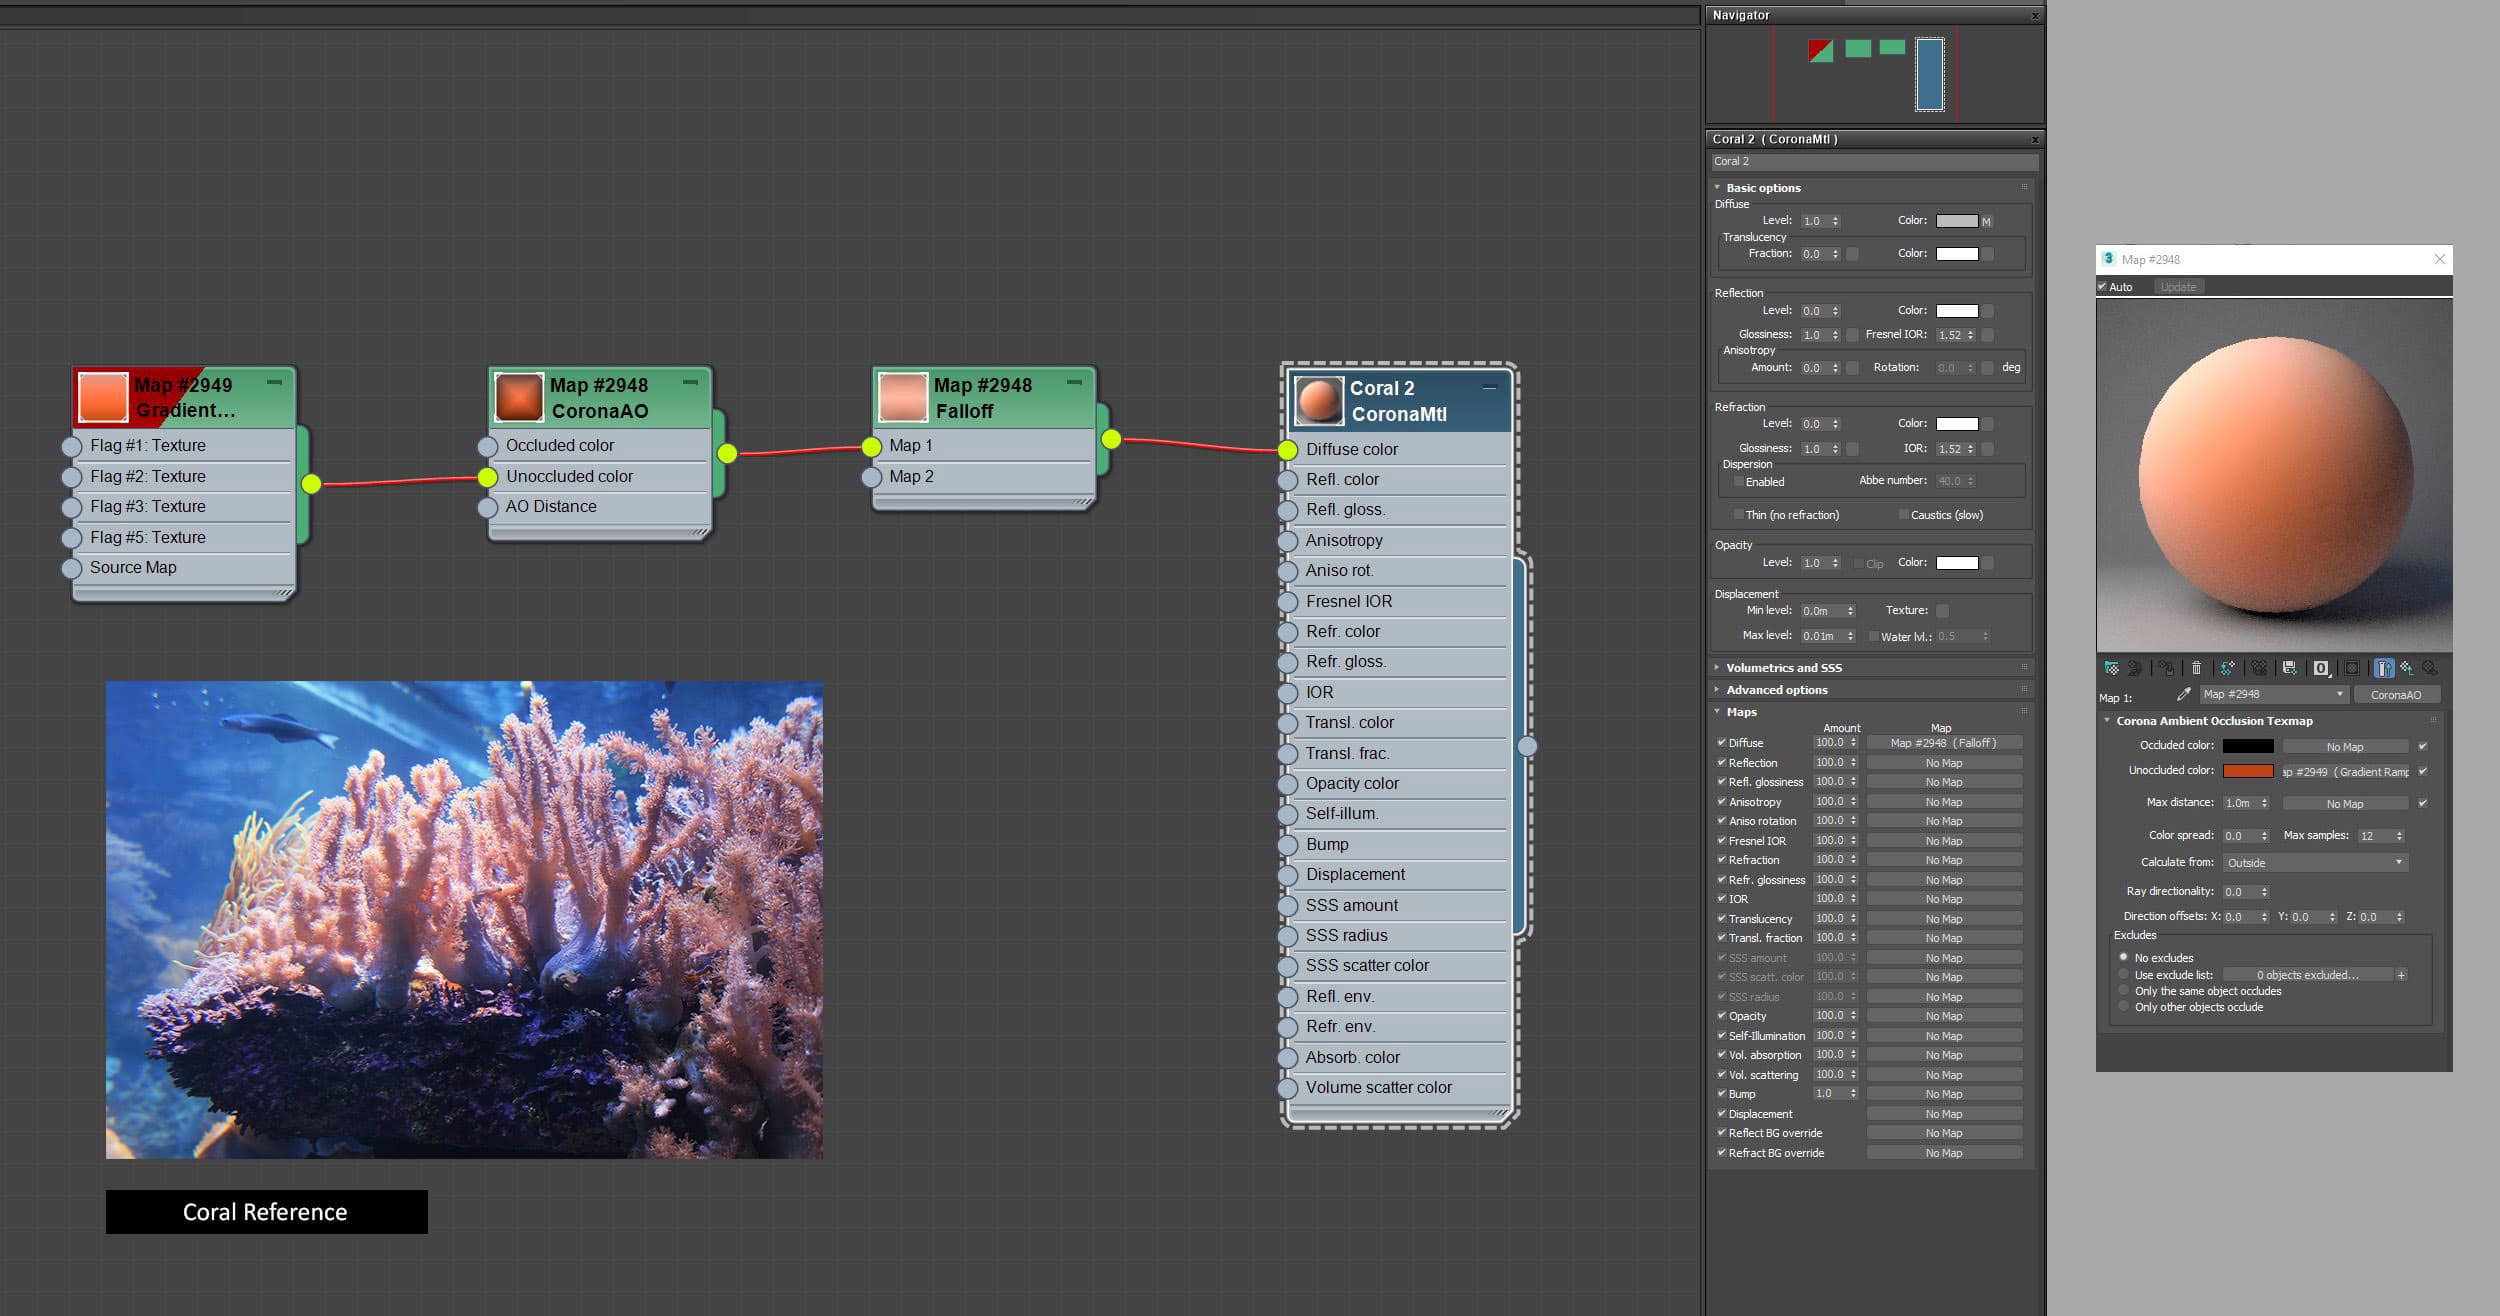
All the coral was made using GrowFX and some basic poly modelling, I initially was going to model many different types of coral, but that also got away from me, I felt the underwater section was a bonus to my scene and a fun part of the VR presentation, so I ended up not going too overboard with it.
The material is fundamental too. It has a strong falloff to create a soft and microscopic look. The coral sits on volcanic rock assets from Megascans and some necessary poly meshes I built for a little more variation.
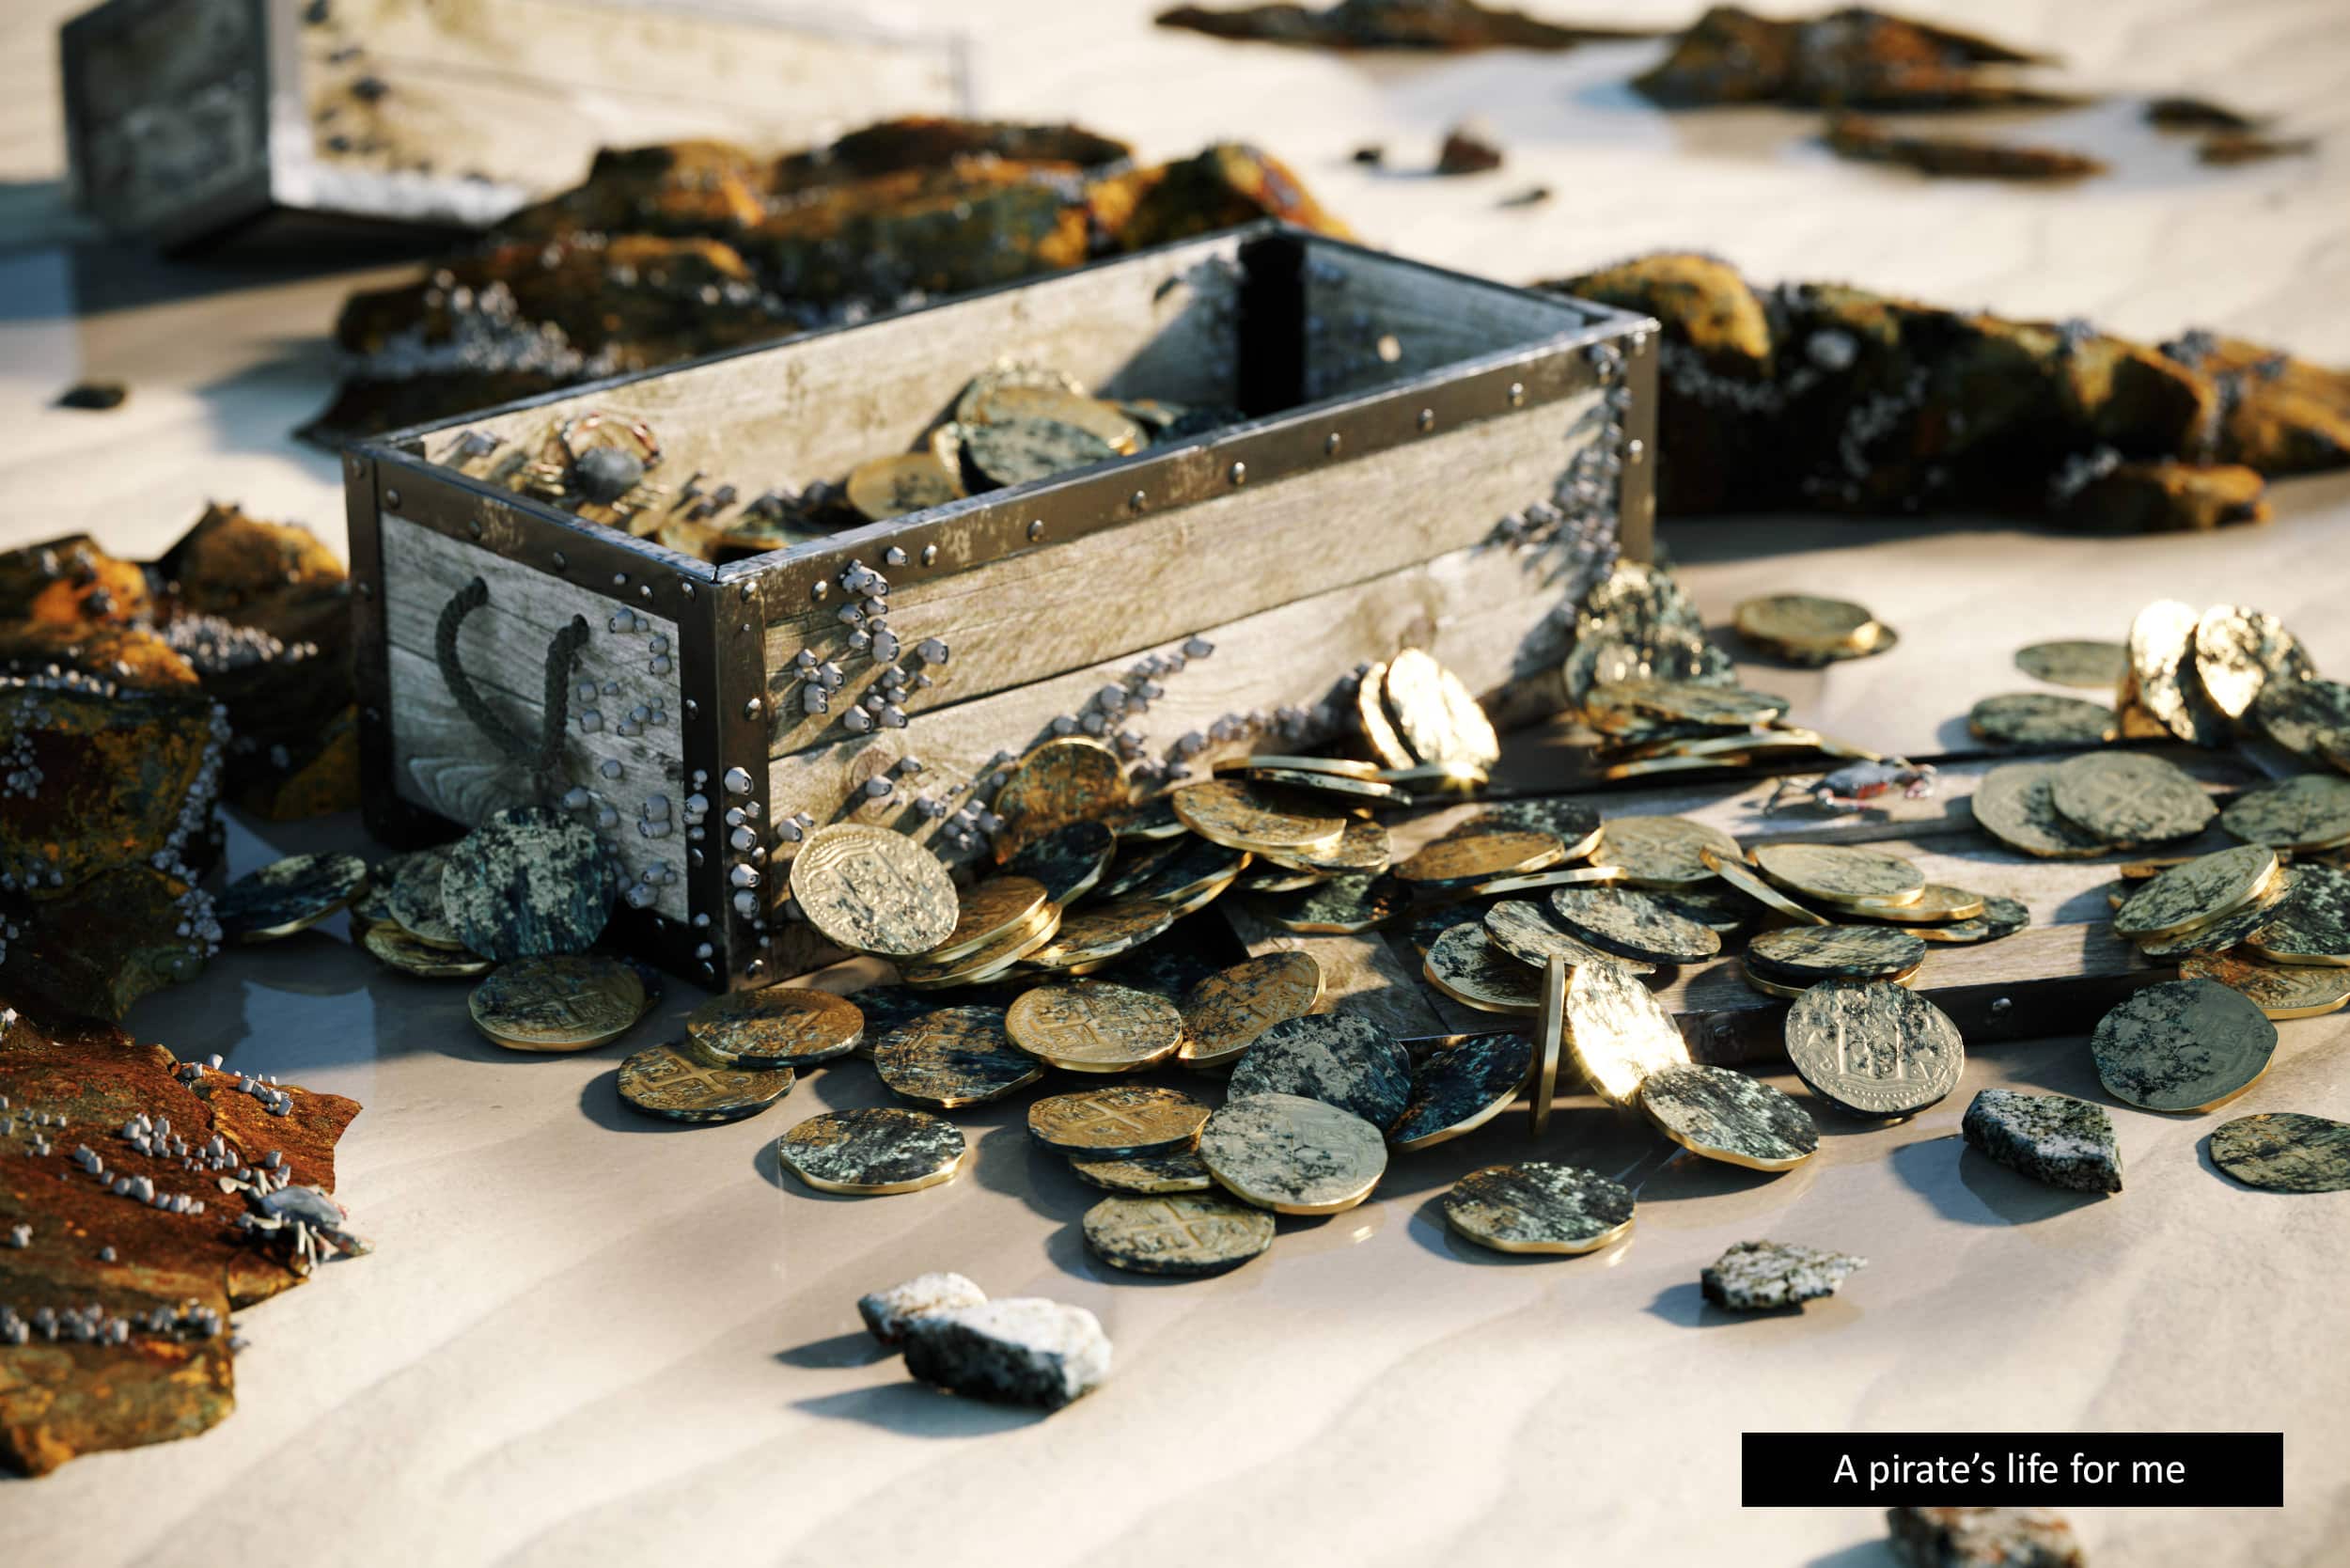
I modeled up some pirate treasure and placed on board – this sort of created a story (a subtle tale) my scene where it may have been an ecological site where one could dive and discovered the treasure or is the treasured cursed and cannot leave the island?
I doubt it 😊
If anyone has any questions, I will be happy to answer them if you would like for me to cover something I missed in this making-of.
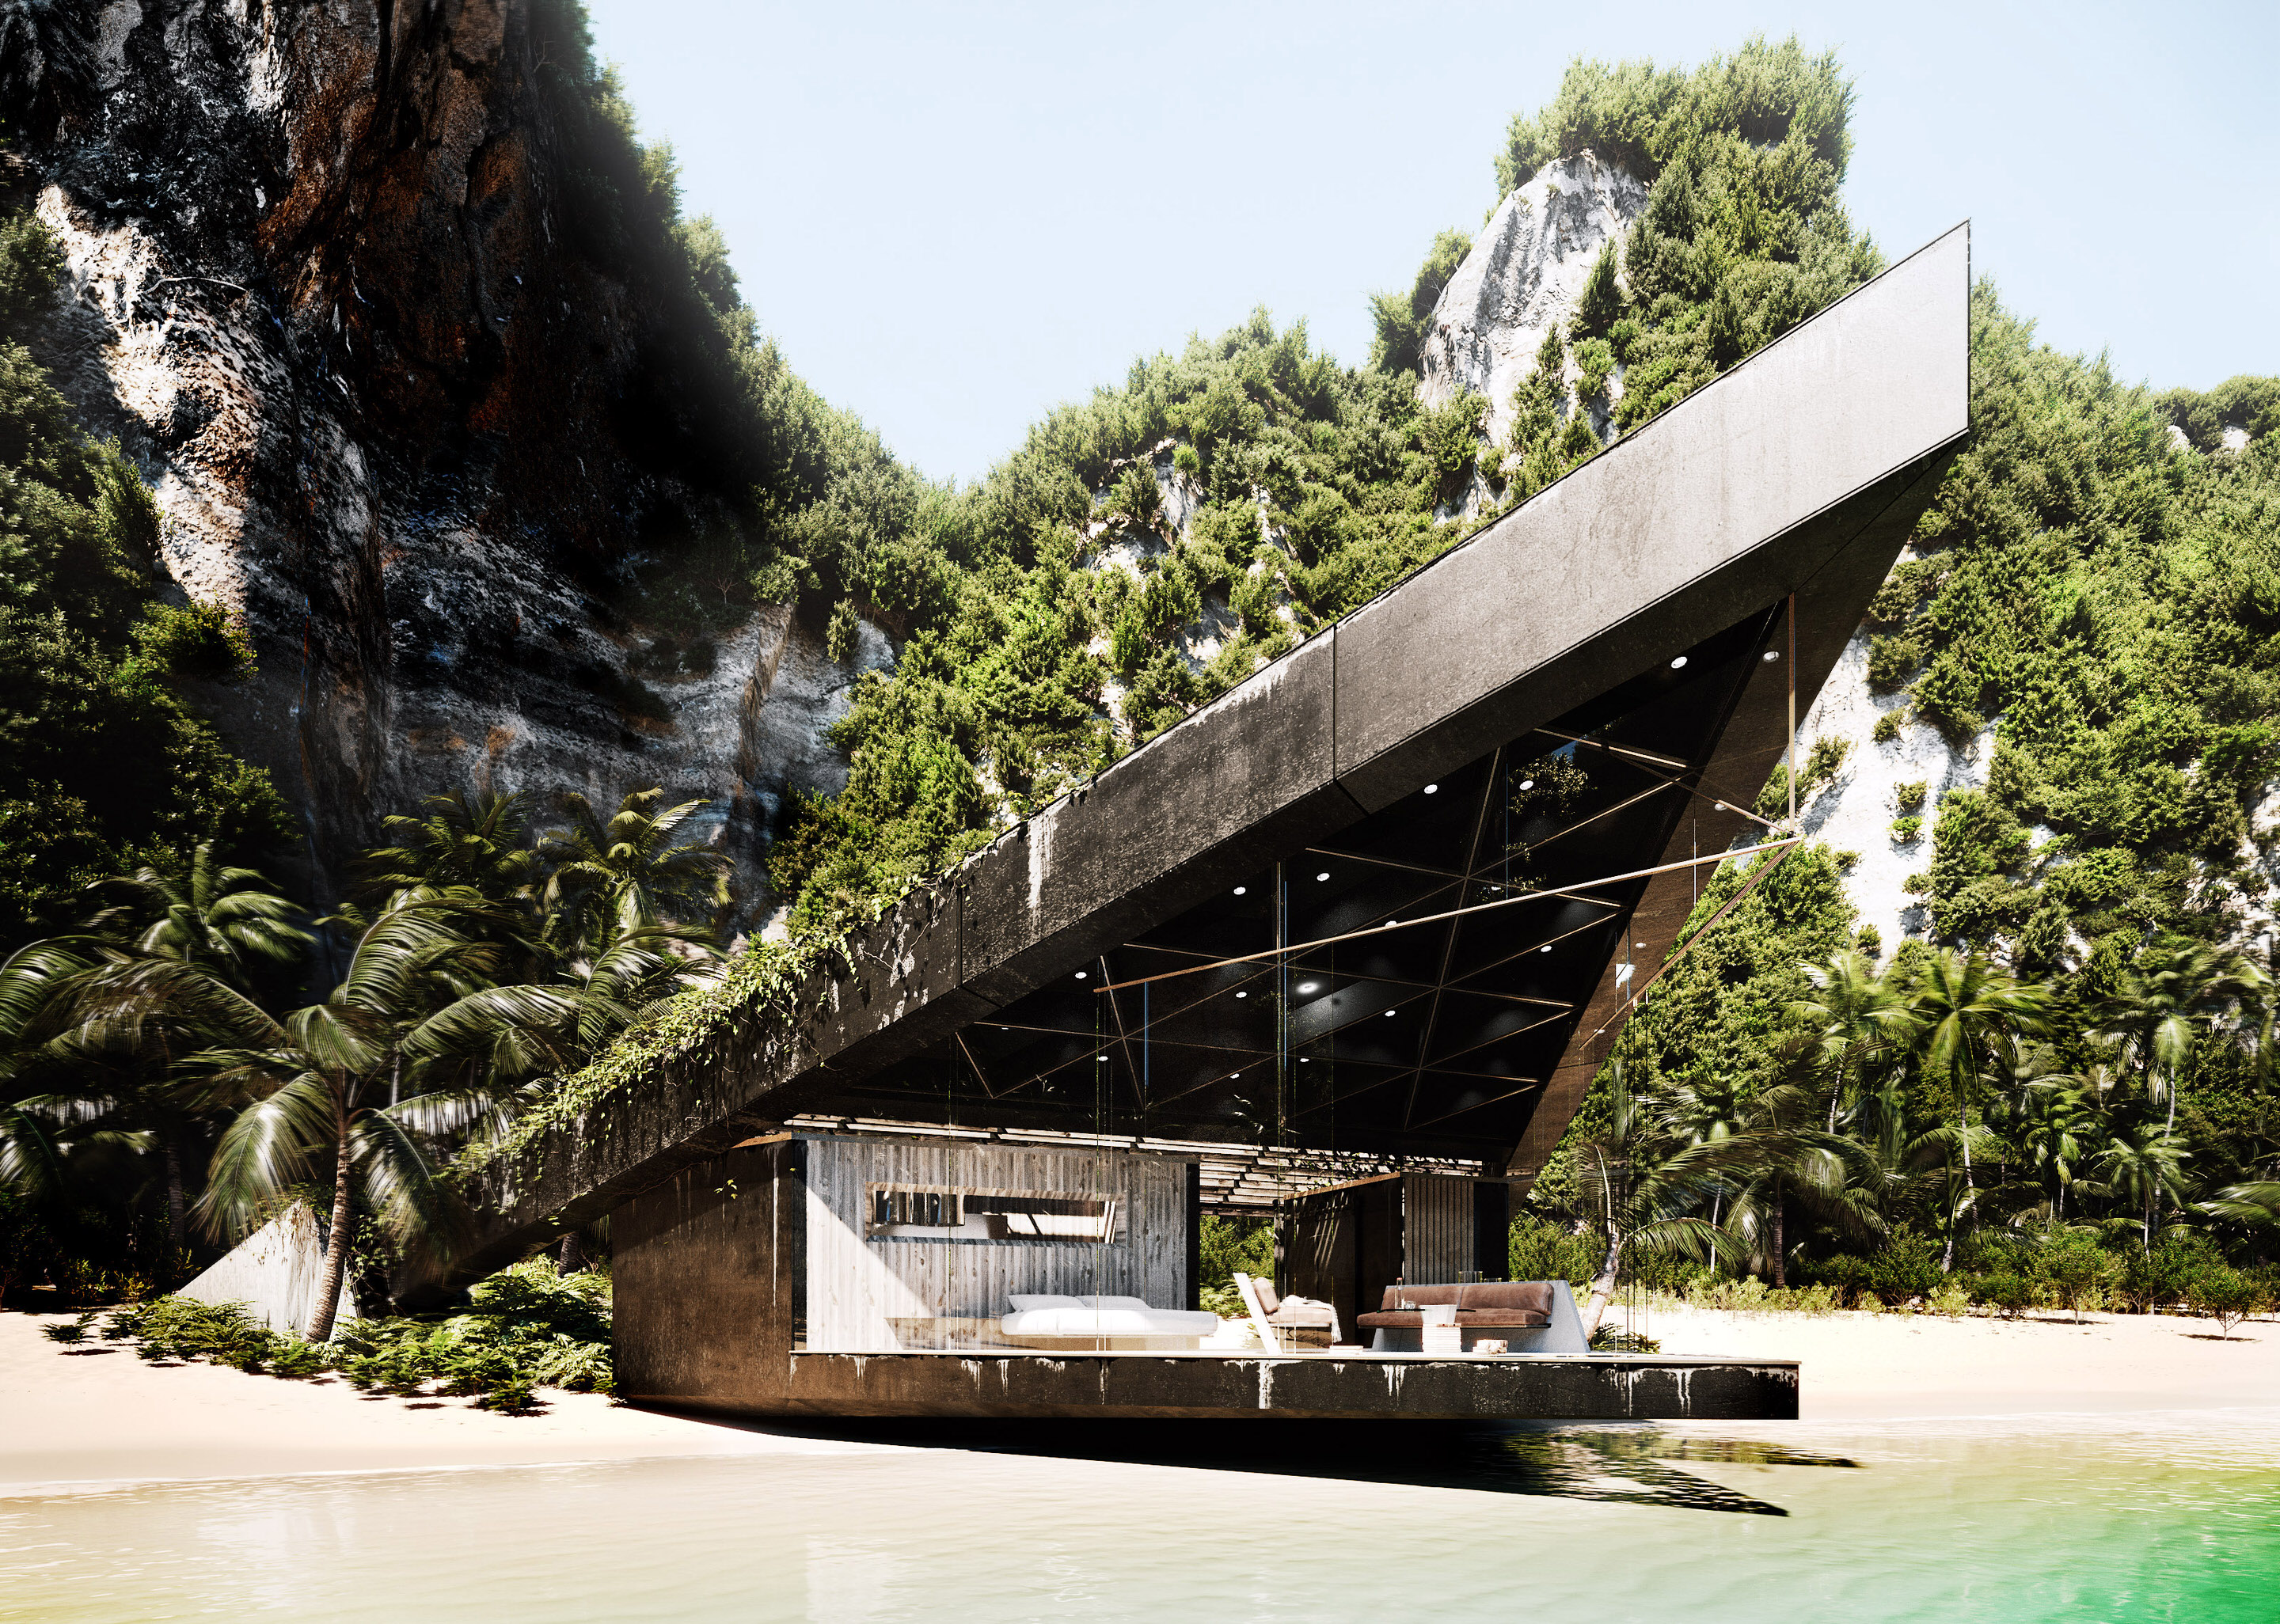
“I like the challenge to mimic nature and create a believable environment in which architecture occupies. So, this was an exciting prospect to me, not only to create an environment for a cabin but to visualize it in VR.”
Notable Replies
Continue the discussion at talk.ronenbekerman.com
1 more reply











Kudos @jamie and welcome to talk!! I personally do think that growfx is an industry standard in order for a studio to push their standards apart from other studios. I like how you modelled your cliff , any difficulties you came across when texturing it so it won’t look repetitive?
Cheers!! For the Cliff I just used all the rock alpha brushes at varying sizes and overlapping each time I brushed. Also I focused heavily on the parts I thought may not be covered in trees which were the 90 degree plus surfaces. I think if you look closely without a texture on you may see a little repetition but once the texture is applied the repetition pretty much disappears then you have the problem of the texture map repeating.
It really came down to making sure wherever the cameras were placed, trees had to be appropriately placed to hide the bad repetition. Its a juggling act!!
Cool Thanks! Here is a how the light was set up for the daylight shots with the corona post and lightmix. Nothing too crazy - just some colour tweaks and I have the sun at a lower value. I have a HDRI for the environment light but I have override the GI (with the same HDRI) to make it a bit brighter using the output settings.
It sure is a juggling act! Anyway thanks for sharing. Looking forward for your next project !